…. for glassing the nose that is.
I started out today by checking the layup from last night attaching the F4.1 mini-bulkhead to the NG30 uprights. Sure enough, there were about 5 distinct areas that looked like delams on the face of F4.1. However, there were no distinct bubbles, or mushy soft spots, or any of that. I did the quarter test and the change in tone was nearly imperceptable. Nonetheless, I still popped a couple of holes into each delam’d area, mixed up some epoxy with fast hardener, then injected the delaminated spots. I clamped it with a piece of wood covered in packing tape (no pics) and then took off to do some errands.
When I got back home I started in on the fun, but left my phone upstairs so it was a bit of time before I went back upstairs and grabbed it to take some pics of the goings on. I would say that I got at least 80% of the delams, and was happy with the outcome of the epoxy injections. Not perfect, but I have no doubt that this sucker isn’t going anywhere and that it’s a strong layup.
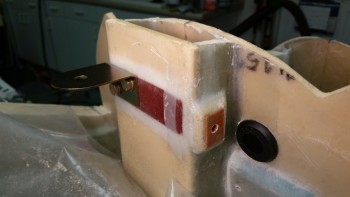
Below you can see that I drilled the holes for the left brake reservoir mounting bracket. I couldn’t drill the holes for the right reservoir bracket yet since I had to wait for the BID to cure on the nutplate assembly that I glassed in for the panel power & ground cables that traverse Napster through the grommet just to the right of the nutplate assembly.
BTW, I had an epiphany tonight! I finally made a decision to buy a right angle drill! Normally I’m fairly handy with a drill, but tonight the need to drill into a very tough piece of phenolic at a slight angle ended up in 3 of my 4 reservoir bracket mounting holes being distinctly off. I had to grab a round rasp and work on the holes for nearly 30 minutes total throughout the evening. Of course, since the holes are now oversized I’ll have to backfill them with flox when I do the final install of the brake reservoirs.
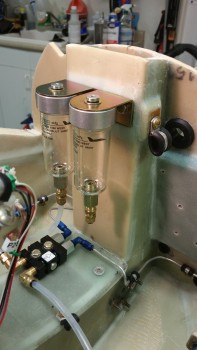
Below is simply a shot of the brake reservoirs from the left side.
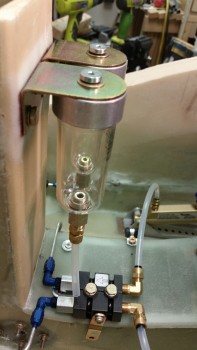
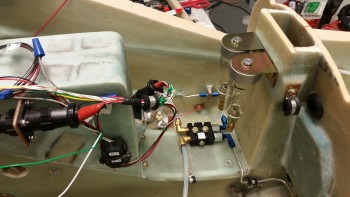
And a shot from the right side showing the brake reservoirs in relation to the NG30 covers & general inner nose area.
One thing I didn’t get any pics of was the R&D I’m doing on the taxi light extension cable attachment bracket that mounts on the NG6B. I’ve got a bit more to do before I’ll know if I’m going to use it or not, so I decided to wait to do any descriptions or write-ups on it until I’m further along in the process.
Tomorrow I plan on working on the taxi light NG6B bracket, then reinstalling the strut for testing both the taxi light bracket and also checking that my tweaking of the nose gear up-travel limit microswitch was successful. After ensuring the up-travel of the gear is good, I plan on first modifying the nose gear wheel well cover (NB) to increase its height (if required), then glassing it in place to let it cure overnight. That’s the goal at least.


