
Today was quite the beautiful day here in Northern Virginia, so after messing around with my school work for a couple of hours, getting my motorcycle battery charged up enough to get it started and out for a quick scoot, and then spending just over an hour on the phone with my building nemesis Marco (ha!)…. I finally got into the shop!
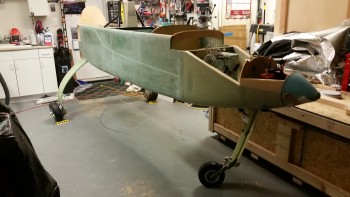
My main goal for this afternoon was to get the fuselage off the dolly and into its grazing stance, which I did as you can see below. Before I actually offloaded the fuselage from the fuselage dolly, I did a bit of Spring cleaning in the shop and attached the rollbar and headrest to the fuselage.
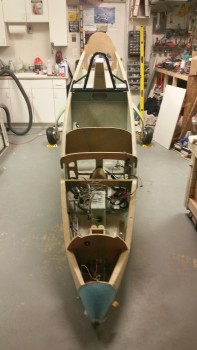
My next task was to install the battery in the nose and connect up the wiring leads to get the nose gear to extend and finally get this bird on all 3 wheels!
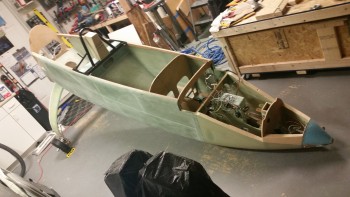
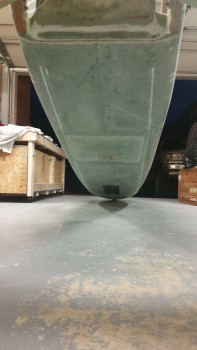
First, I wanted to get a couple of shots of my grazing fuselage from the aft end.
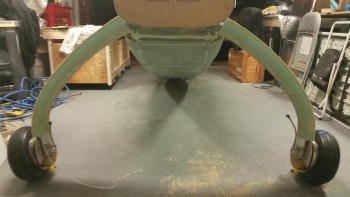
Especially this shot, where the nose is fully resting on the nose bumper, which of course is the aerodynamically clean shaped nose bumper that my buddy Marco CNC’d out of a hockey puck. He did a fantastic job on it!
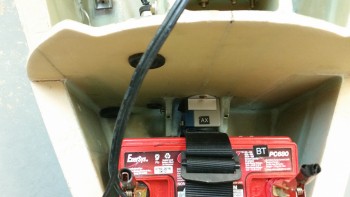
I then got the battery installed into the nose battery compartment and the power cables clamped into place. Note in the pic below you can see the nose gear backup battery immediately aft of the main battery.
I shot a video that covers the majority of work I’ve completed over the last few months. Then, at the end of the video, I raise the nose by extending the nose gear for the first time during this build. Note that I merely strapped in the battery, attached the leads, and then shot the video. There was no previous testing to ensure it worked and the initial nose raising in the video is just that, the initial nose raising in real time. I’m just glad it worked! Whew!
I took one final pic of the fuselage on all 3 wheels before closing up shop for the evening. This of course is another huge milestone for this build!
Over the next few days I’ll be doing a final check on the wheels to ensure the toe-in is correct and set for one final time! In addition, I’ll also be prepping for installing the wheel pants.