Funny, if you look at all the pics in this post you’d swear today was all about brakes, which I definitely hit some significant milestones with today. In actuality, today was almost entirely spent on, you guessed it, the electrical system, but I’ll get into that in a minute.
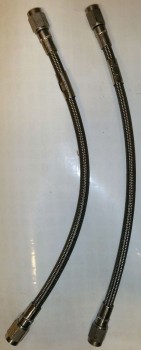
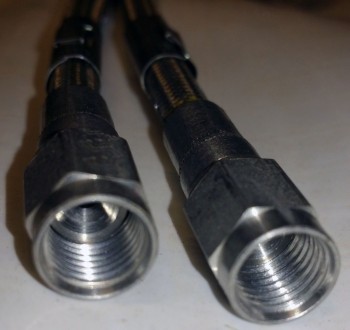
I received my 3/16″ Statoflex 124 brake line hose assemblies today and they’re exactly what I wanted!
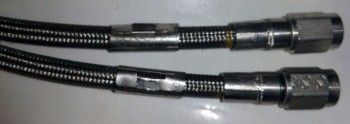
Here are a couple more shots.
If Bob Nuckolls is the King of Electrons, then I’d say Tony Bingelis was the King of Engines, and almost all things mechanically related to aircraft. Now, just as I have on occasion angered the gods, mainly Burt, (as if he actually knows what I’m doing… ha!) by violating his edicts with a few mods here & there, so too did I violate one of Tony’s. Tony states to always go with new hoses and not NOS (New Old Stock), but given the history of these hoses, the care in which they were stored (detailed), the price compared to new, and the fact that they were EXACTLY what I was looking for dimensions & fittings wise, I just couldn’t pass them up.
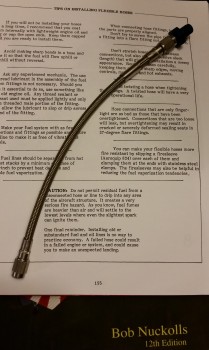
Below is a shot confirming that the new hoses work with the AN3 fittings I have on hand. Sweet!
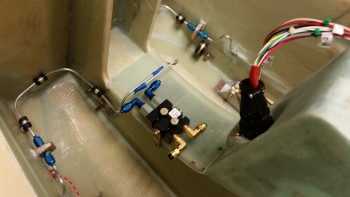
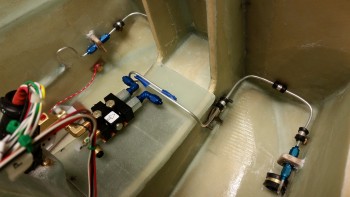
Continuing on with the brake theme, I spent the latter part of the evening working on my brake lines in the forward NG30 nose area. I cleaned up the inevitable flox globs that formed on the edge of my threads just over the blue tape to offer me a really good challenge of removing 1/2″ pieces of blue painting tape. (Maybe this is how the angered airplane guru gods get me back, by making even the smallest tasks a total PITA . . . haha!)
I know that my brake line system may seem a bit robust, or entailed, for what it’s actually accomplishing, but I didn’t want to just go the EZ way out and throw in a couple of runs of Nylaflow and call it a day (I’ll do that for the rest of the nose brake lines!). Remember, the components making up these lines are literally the smallest you can get in every category: 1/8″ aluminum tubing, -2 fittings and -2 Adel clamps. We’re talking mere ounces, including the diminutive mini-bulkheads, in weight penalty… I’d seriously guesstimate maybe 2 ounces over using Nylaflow/Nylon brake tubings from the main brake line to the Parking Brake Valve (PBV).
Plus it was fun, I learned a lot, and the tubing reminds me of a German brewery . . . Ah, beer!
Here’s a shot from the other side. The half loops in the line are simply that, a service “loop” in case I need to rework the brake line. Since the majority of it is embedded, I wanted to leave enough exposed that I could whittle down in making new flares, etc, if need be. The aluminum tubing is softer, and bends quite readily, so there was no torquing or strain on the line in making those seemingly tight bends.
As I’m sure you’ve noted, I placed the Parking Brake Valve near it’s final mounting location to check how it fit into the schema. So far so good.
Now, onto how I really spent my time.
When I was brushing up on brake line fittings, tubing, flaring and the like in Tony Bengelis’ books, Firewall Forward, and Tony Bengelis on Engines, I noted that he noted that there seems to be a number of “insignificant” things (my paraphrasing) that we overlook in the build until we get to them. Probably natural, and perhaps less costly in the long run since far less money is wasted on buying things based on future prognostications.
Tony was speaking mainly about hoses, and how builders tend not to give them care until they’re at the point in the build where they need them, and then they most likely have to get them constructed. Time not building, and perhaps added costs in getting them shipped faster. IMO, there are quite a few areas in a Long-EZ build where this occurs, ESPECIALLY considering that Long-EZs are both plans built and continue to evolve in major sub-systems design due to the open source type metamorphosis that continues with this aircraft. A few cases in point from the original plans: Jack Wilhelmson EZNoseLift, Ken Miller’s forward rudder/brake pedals, Vance Atkinson fuel site gauges and pitch trim actuator system, Waiter’s roll trim system, Davenport’s extended nose, Stephen James “Wortmann” main gear fairing, Sam James’ construction of Gary Hertzler’s wheel pants, Todd Silver’s improved canopy design, the Cozy Girl’s torque tube offsets, Feather Light and Aerocad’s improved strake kits, to name a few, And that doesn’t even take into account the RAF approved mods, all requiring another set of plans: Ronzc canard and HIgh speed rudders with hidden bullhorns.
My point in all this is that the Long-EZ is unique in that they’re an amazing number of variables that must be dealt within each build, and each variable requires time in research & decision-making to figure out. I haven’t built an RV, or a Kitfox, or any other kit plane, but conventional wisdom dictates that following the instructions of “Bolt A to B, C to D, and step 15 is complete” is an entirely different construct than what Long-EZ builders contend with. After reviewing my fellow builders’ websites, I can tell you that each plane is so amazingly unique, that they are all truly one-of-a-kind works of art!
I digress.
This all affected me today in a real way. As I was trying to “simply” figure out what electrical components would reside in the nose battery compartment, and the configuration, placement, fitting of such components, I was of course referring back to my electrical diagrams. I pulled out my lighting systems diagram. It was old, outdated and not representative of the components I have on hand. I updated it with my chicken scratchings. Then I referred to my primary electrical system diagram, adding a ton more chicken scratchings and notes to the pre-existing myriad of handwritten notes. And when I say myriad, I really mean A LOT!
If you’ll note the trend, I had had enough. I was fed up with working off of old wiring diagrams. How old? My primary electrical system diagram was dated Jan 2014… almost 2 years old! I had to remedy this. I fired up my CAD program and spent a good 3-4 hours updating four electrical diagrams in my wire book.
In my mind, I think many could claim that clearly the wiring diagram is not an overly tangible thing right now in the build considering I haven’t even finished construction on many major parts of the aircraft. What updating those diagrams did was give me better clarity for figuring out what was going where, and why. Again, IMO, with so little space available for the amount of stuff I’m cramming into this bird, combined with the issues that plastic birds are prone to have with those nasty little electrons, not to mention RF monsters just waiting to get nasty in our headsets, I’m really trying to optimize my electrical system as best possible.
The last thought I had on this was when I had finally decided to mount the battery buss on the aft side of Napster vs. in the battery compartment. After I checked the fit and mocked up the buss and the relay to see where they should go, I spent at least a half an hour figuring out the hardware to use to mount the damn things! To me, this is the stuff Tony is talking about. A half hour sorting through screws and bolts and washers just to figure out WHAT I NEED TO ORDER! . . . amazing! Again, this is not stuff that comes in that giant crate sitting in your driveway, pre-configured, pre-designed and just waiting for you to mount item A to pre-drilled panel B, with screw C, washers D & E, with nut F.
But I wouldn’t trade it for the world. Good times!
Oh, btw, in case you were wondering what’s going on with the actual nose build, I measured out my foam panel requirements for the battery compartment floors & sidewall pieces. I should be starting on those within the next day or so.
(I also spent a good hour consolidating and organizing my electrical parts containers… also something LONG overdue!)
And hey, thanks for “listening” . . . sometimes ya just gotta ramble!
Rock on Brothers!

