
Besides getting a late start today, I had a bunch of minor tasks, phone calls & visiting friends that derailed me some what in getting to the main gear bolt hole drilling & bolt install.
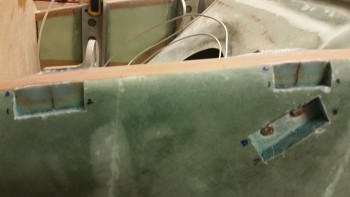
I started by pulling the peel ply and sanding the edges of the 1-ply BID layups over the floxed lower bolt holes. I then used the Dremel tool with a fresh cutting disk to shape the last set of washers for the right lower aft gear mount (no pic).
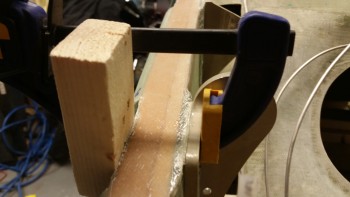
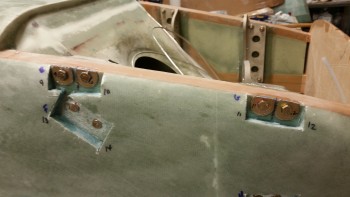
I then clamped a block over each hole & re-drilled all the lower bolt mounting holes.
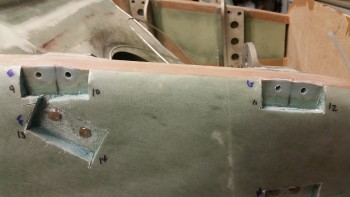
Here are the re-drilled holes in the lower gear mounts on the right side.
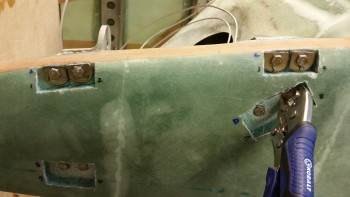
I then remounted the lower main landing gear extrusion mounting bolts with the new AN970-4 washers, after applying some wet flox on the inner face of the washers.
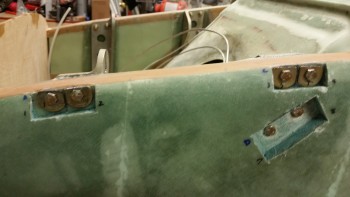
I tightened all the bolts snuggly, but allowed some room for torquing them to approximately 66 in/lbs after the flox cures, which will allow the flox to fill any minor irregularities that weren’t eliminated with the first round of flox & ply of BID.
By the time I finished re-mounting the lower bolts with new washers, it was too late to make some real noise, which the air ratchet excels at producing…. lots of noise. I managed to get the left aft upper set of nuts off the bolts, and then loosen the left forward set as well, but I then figured I would wait until tomorrow to use the air ratchet and use my time more efficiently.
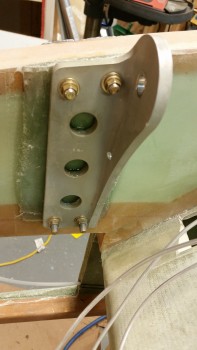
Here’s a pic of the lower bolts & new washers installed (upper in the pic below) to show how with the embedded flox & new washers that only a couple of threads are showing after the install. I’m expecting that after I torque the bolts to specs, that only another thread or two more will show. Conversely, the old installed bolts at the bottom of the pic have quite a bit of thread showing, although I’m sure that replacing the inner thin washers with standard washers also helped cover another thread or two.
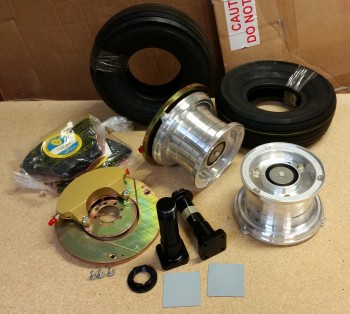
Since it wasn’t too late I still wanted to be productive, so I pulled out the Matco W50LT wheel & brake assemblies and Lamb tires to inventory all the parts and check them to ensure they were in good working order. Some of the water soluble packing peanuts had adhered themselves to some of the wheel & brake assembly surfaces, so I spent about 15 minutes cleaning the residue off.
I then spent a good 15 minutes assessing the spacing of the engine mount on the firewall to see how it aligned with the longerons (not shown).
Tomorrow I plan (again) to finish up the main gear washer swap. Also, as the flox & BID cures on the upper gear bolt holes tomorrow, I’ll be working on a piece of 4130 metal extrusion to create the inboard wheel pant mounting brackets. These brackets will be mounted on the backside of the axles when they’re mounted.