
I started out today by making some noise! I was able to quickly get the 1/4″ mounting bolts out of the left side of the aft fuselage, leaving some rather securely embedded washers in the process. I tried to quickly remove the washers but they weren’t budging, so I left them for a bit while I removed the right-side bolts.
All was going well until I got to literally the last bolt to remove. I have to say I’ve always been impressed with the size & strength of the aircraft grade MS21042-4 nuts, but one huge disadvantage is that if you make one good slip up with the wrench on a very tightly installed bolt, and POW! . . . It’s stripped! And that’s exactly what happened with this last nut/bolt that is one of two –including the other side– that are pretty difficult to reach.
Well, I messed around with this *!&$#@ nut for almost half an hour to no avail. I pulled out the whole armada of tools that I have in the shop … again, with no avail. Thus, in my overwhelming need & desire to win out over an inanimate object (and believe you me, this sucker was INANIMATE!) I figured since I had loosened it up even by the slightest degree, that it had to come out. But, just about as far down on the inboard side in a “V” channel as you can get, there was just no way to forcibly remove the nut & pound the bolt out. I was going to have to attack it from the accessible outboard side.
I taped up the inside of the upper bolt trough with aluminum foil tape (I took a pic but it turned out really blurry) to protect the foam from the sparks. As you can see below, I missed a spot. Nothing like the smell of burnt foam in the morning to wake you up! I spent a good 5 minutes with the Dremel grinding off the bolt head, and then another 15 minutes getting the remainder of the bolt, with nut attached, removed.
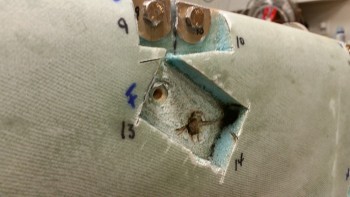
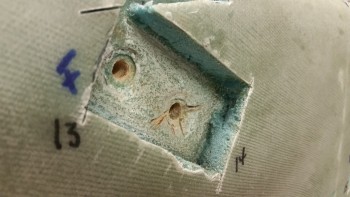
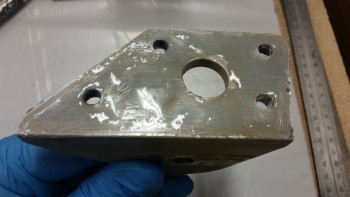
As I was using a center punch from the outboard side to dislodge the jacked-up bolt, I quickly realized that it wasn’t going without a fight. If it was departing the airframe, then it was going to bring the lower forward landing gear mount extrusion with it. I don’t know why, but this bolt was seemingly fused to the gear mount extrusion bracket. I eventually let it have its way by unbolting the 2 top bolts to get the whole extrusion bracket out of there. Now, this was after creating about a 1″ gap between the interior side wall (15-ply BID pad mounting base) and the outboard mounting surface side of the extrusion. With this gap, I snuck in my small German hack saw and cut the bolt in half… another solid 5 minutes down the drain! Once the bolt was cut in two, I drove the whole assembly back towards the side wall to get enough clearance to free up the bolt that at this point was gouged & stuck into the aft side of the GIB setback (you can see the divot in the pic below).
I then removed the gear mounting bracket with the remainder of the Bastard Bolt from Hell! still stuck in the bolt hole. Even after all this, it still took some really sharp blows with the center punch to get this damned bolt removed from the bracket!
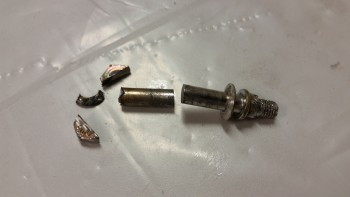
Here’s the skeletal remains of the Bastard Bolt from Hell! after I dismembered it!
Thankfully, it took only about a minute to remove all the scorched foam & clean up the bolt trough.
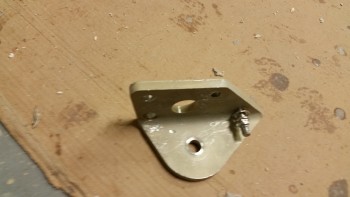
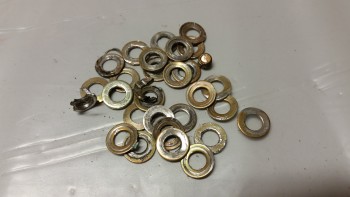
And here are some more casualties of war. I’m still not sure why I mixed up the AN960-416L washers for the standard ones, but again, that completely solidifies my decision to spend a few days swapping out these main landing gear mount attachment washers.
Back to the “peaceful” side of the fuselage, I spent a few minutes (I should add the words “longer than needed” here!) removing the embedded washers. To keep with the slog of a day that I was apparently mired in (ha!) I bent the tip of scribe trying to get these damn embedded washers out! I finally resorted to using a 1/4″ diameter cylindrical punch pin to insert into each washer just enough where I could then push the pin to one side and pry out the washers.
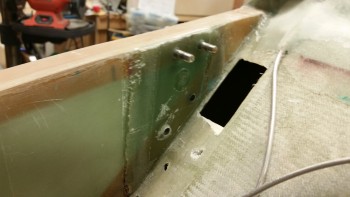
I employed my new found trick on the right fuselage side and removed the washers handily. I then embedded Saran wrap in the aft holes in prep for flox, but in the forward holes I wrapped the Saran wrap with electrical tape to have a dark identifying marker for the bolt hole since I would have to drill the forward bolt holes from the outboard side with no mounting bracket holes as a guide.
This wasn’t just on the right side where I had the issue with the stuck bolt, it was simply a matter of access to drill the holes on the inboard side of the fuselage. The upper mounting bolt holes on the forward main gear mount extrusion simply are located higher than the aft lines of the GIB seat back. Unless I was using a flexible drill bit attachment, it was physically impossible to get access to the inboard side bolt holes to drill them. Thus the dark protective plastic in the forward upper bolt holes.

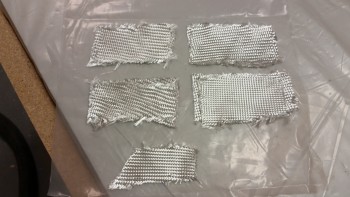
I then grabbed a couple of strips of the scrap BID that were left over from the nose layup I did a couple of weeks ago. From the BID I made up 2-ply BID pads to prepreg & layup in the upper bolt access troughs cut into the side of the fuselage. I also added a 1-ply piece of BID to repair the punctured seat back from when I removed the Bastard Bolt from Hell!
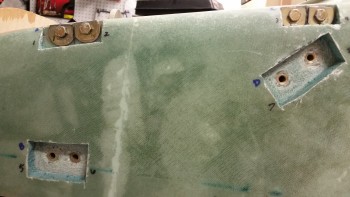
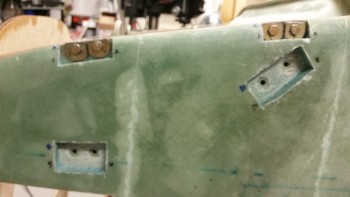
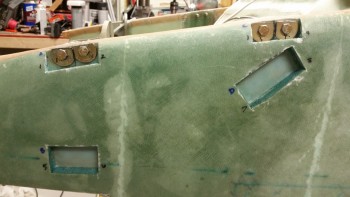
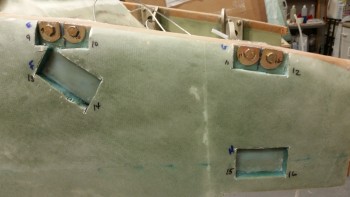
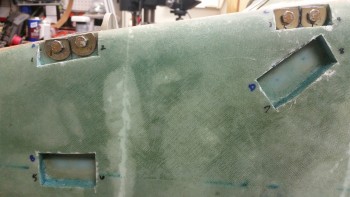
Below are the left & right shots of the laid up 2-ply BID pads over flox to reset the “floor” of each bolt trough back to level after the damage of the original bolt heads & washers getting embedded too deep in the surface. As I’ve stated before, this damage was part & parcel to having the bolts installed with enough clamping pressure to keep the landing gear mount extrusions mounted securely. Yet another reason I’m really pleased to be performing this washer swap.
While the flox & glass was curing I went to work to knock out some ancillary tasks.
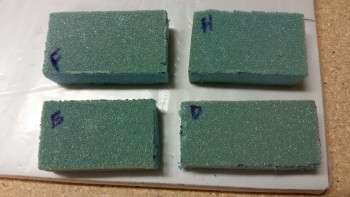
First, I grabbed some spare 3/4″ thick Divinycell PVC foam & cut them into blocks to match the dimensions I had measured earlier for each of the upper mounting bolt troughs cut into the side of the fuselage. As you can see, they’re identified with the letter designator that I labeled each bolt trough with.
I’m not exactly sure how I’ll deal with the lower gear mounting bolt troughs that I opened to expose the bolt heads along the very bottom longeron edge of the fuselage. I’m not really that concerned about the aesthetics of these lower bolt-access troughs because they will reside directly under the newly mounted fuselage sidewall lower extension foam that I will be adding to fill in the aft fuselage to account for a 4″ lower firewall. Again, this is to match my Carbon Fiber engine cowlings that were designed by Mike Melvill & fabricated by Feather Light.
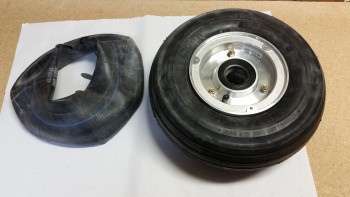
With the upper bolt hole foam inserts cut to size, I then started on installing the tires & tubes to the Matco main gear wheels.

And here’s the end result. One wheel with the tire & tube installed, and yet another casualty! On try #1 I followed Matco’s directions by adding about 10 PSI of air into the tube when it was installed in the wheel before bolting both halves of the wheel assembly back together. This made the process nearly impossible, even with clamping both halves together.
So, round #2 I followed the sage advice of Frank Sinatra and, “Did it my way!” by not adding any air, clamping the tire down to ensure that none of the tube would get pinched, then bolted it together and filled ‘er up to about 50 PSI (70 PSI is max on this tire/tube combo). Voila! It worked!
Note that each time I did use talcum/baby powder to reduce the friction of tube going into tire.
Also, I will order a couple more tubes from ACS later this evening.
After messing around with tube & tires, I spent a couple of hours making a few phone calls before returning back down to the shop. The flox & BID in the bolt troughs were nearly completely cured, so I pulled the peel ply . . .
. . . and then re-drilled the bolt mounting holes. I have to say that I’m glad I used the dark plastic material for the inserts since I could see where to drill the holes on the forward bolt holes.
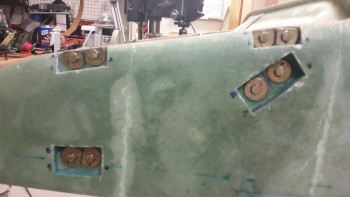
After trimming the upper aft AN970-4 washers to fit, I then vacuumed out the troughs & then mixed up some wet flox using fast hardener. I spread a good bead of wet flox on the forward gear mount extrusion and installed it.
I then started on the forward extrusion after mounting the bracket back into place, and mounted all the remaining bolts & washers after applying wet flox to inside face of the AN970-4 washers.
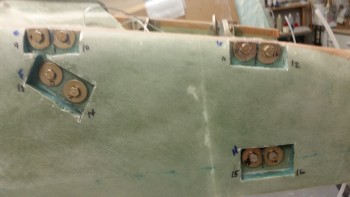
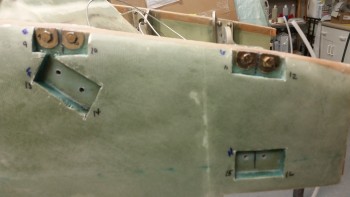
Here’s a shot of the bolts & new large washers installed with wet flox on the left side of the fuselage.
After I ensured ALL the main landing gear mount extrusion bolts were torqued to 70 in./lbs I notched the inside of the trough foam inserts to fit over the bolt heads, whipped up some thick micro, and micro’d them into place in the troughs. After determining the fit was good, I clamped the foam inserts into place on each side of the fuselage.
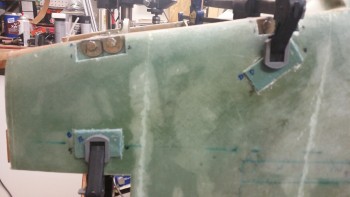
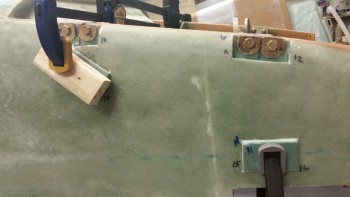
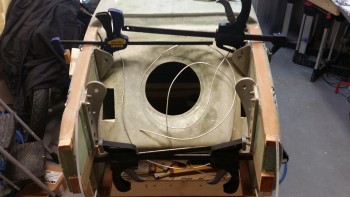
Here’s a shot of the aft end of the fuselage (Hell hole area) showing the foam insert clamps in place.
I have to say that after mounting the bolts I was even more convinced that I had made the right decision to swap out the washers simply by the fact that the remaining threads on each installed bolt went from about 8-10 remaining previously, to around 2-4 threads visible after the washer swap.
Tomorrow I’ll be looking to finalize the installation of the large washers by embedding new foam inserts into the lower bolt troughs, sanding down all the foam inserts and then laying up the final glass to cover over the foam replacement inserts. I’ll also be marking up another piece of Finnish Birch plywood for the 4″ extension to the bottom side of the firewall. I’ll also most likely pull out the main landing gear bow to clean it up & prep it for install onto the fuselage.