
I started off today by removing the clamps from the upper gear mount bolt foam covers that I micro’d & clamped into place last night.
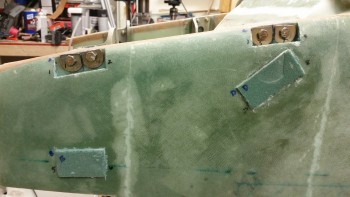
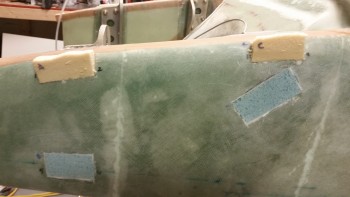
Here’s a shot of the right side upper gear bolt foam inserts micro’d in place.
I then used the Stanley Surform “cheese grater” to knock down the excess foam.
Again, right side after “cheese grating.”
I then did something that I rarely do on this build: I grabbed some of the ton of excess urethane foam I have on hand and cut blocks to fill in the lower bolt holes. Honestly, with as little foam as there is at the lower edge of the bottom longerons, I could have probably just as easily floxed the existing corners & called it a day. But since this edge will have more foam added to it to fill in the space for the aft fuselage fill-in/lowering to match the 4″ lower firewall & cowling, I went ahead & filled these bolt troughs with foam.
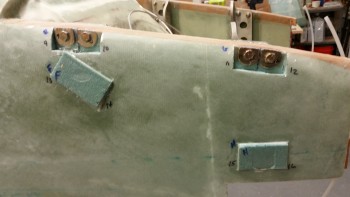
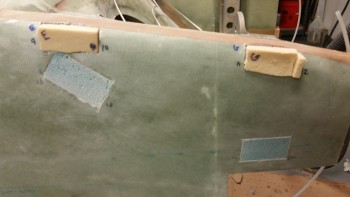
Right side lower bolt troughs filled with urethane foam.
I then micro’d the urethane foam filler pieces into place in the lower gear bolt troughs along the lower aft fuselage edge.
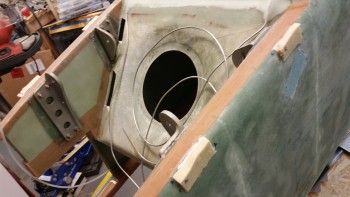
I then used 2 tape-covered pieces of wood to cover the freshly micro’d in place urethane foam inserts and clamped those across the aft fuselage (hellhole). Here’s the left side fuselage.
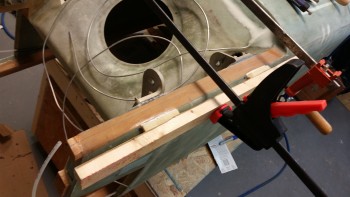
Since I had one extra small piece of foam all by itself on the lower right side I needed to give it a little extra attention, so it got its own clamp (bottom of pic).
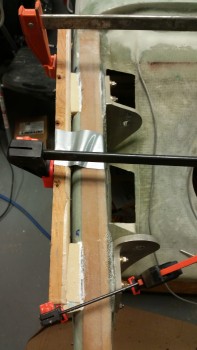
And a wide angle shot of the clamped urethane foam inserts.

While the micro cured I went to work on cutting the firewall extension piece.
I pulled out the box containing my 6mm (1/4″) Finnish Birtch plywood. The plywood box being easily spotted… recognize it? It’s the box that I primed all the 2024 aluminum extrusions for the wings & CS spar. Ah, memories!
Anyway, I pulled out the second uncut 24″ x 48″ sheet that I still have left over from my original order of 2 sheets, but then found the remaining piece left over from when I cut the original firewall. This piece was plenty big enough from which to cut the 4″ firewall extension.

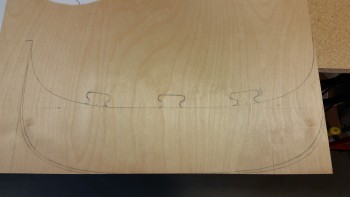
I marked 4″ up from the bottom edge of the scrap Birch plywood sheet, and then placed my existing firewall in place with the vertical edge aligned flush with new plywood edge & the firewall bottom edge aligned with the 4″ line on the plywood.
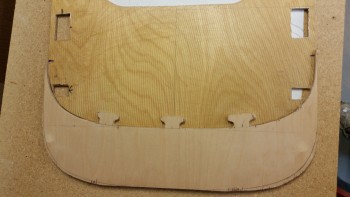
I then traced the bottom of the firewall in relation to the marked 4″ line across the plywood piece, and then again along the very bottom edge of the plywood piece. The latter will be the new bottom edge of the firewall. I then made 3 puzzle piece styled locking tabs to help lock the new 4″ firewall extension in place when it is attached to the bottom of the existing firewall.
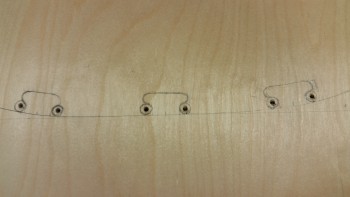
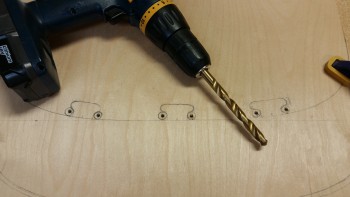
Here’s a closeup of the “puzzle piece” tabs. I grabbed a 27/64″ (.421″) drill bit and traced the bottom edge of it to the side of each puzzle piece tab to mark the drill points that will make up the compound curve of each locking tab side.

I then drilled a smaller pilot hole for each circle I just marked.
Loaded up the mojamma 27/64″ bit . . .
. . . and drilled the holes to make up the compound curved edges of the puzzle piece locking tabs.
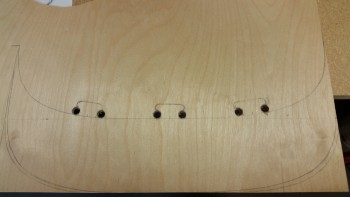
I then used my jig saw to cut out the rest of the 4″ lower firewall extension piece. I would have preferred to have a finer jig saw bit, but since it will all get covered with glass anyway, I wasn’t too concerned about a slightly rougher edge.
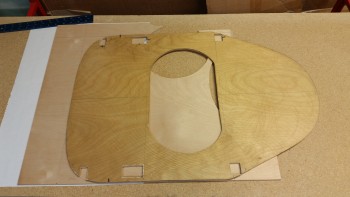
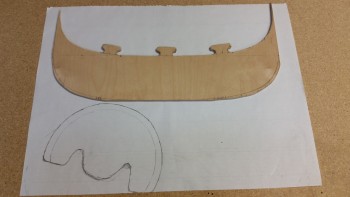
Here’s the new firewall extension piece mocked up along the lower edge of the existing firewall.
In the pic below you can see the paper template that I will finish tweaking in order to cut out the 0.09″ thick 6061 aluminum heat shields for the lower gear legs (as per CPs). I’m using 6061 vs 2024 since it is more corrosion resistant, and that will be a definite benefit in the lower gear & wheel well environment.
Here’s the lower gear heat shield test fitted onto the wheel brake assembly.

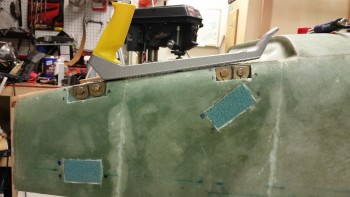
After all my ancillary shenanigans above, the micro on the lower urethane foam inserts was at least 80-90% cured, so I proceeded with the final glassing of all the foam plugs covering the main gear mount extrusion bolt heads.
I sanded down the urethane foam inserts to match the contour of the lower fuselage edge. I have to say that I haven’t worked with urethane much, and it is definitely SOFT, so it requires a much more delicate touch than I admittedly used in sanding the inserts to shape.
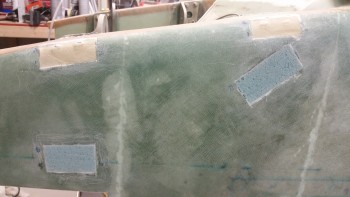
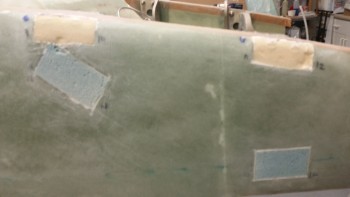
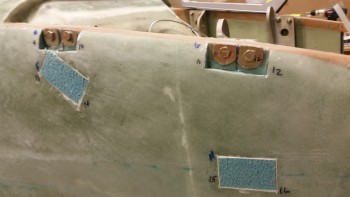
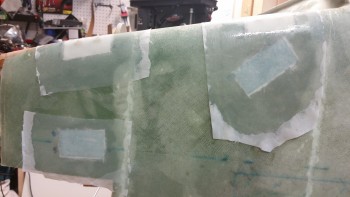
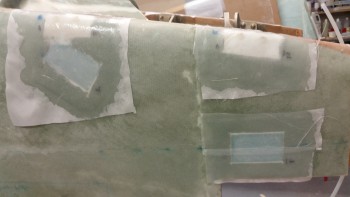
After locating & cutting my scrap BID pieces to cover the foam inserts, I then micro’d all the foam pieces.
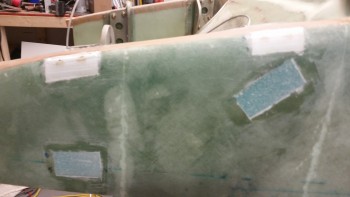
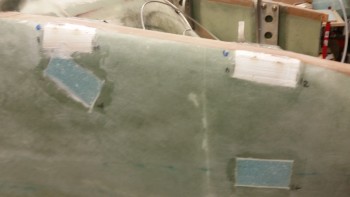
I prepregged 6 pieces of 1-ply BID, laid them up over the foam inserts & then peel plied all the freshly laid up glass.
This completes the main landing gear mount extrusion bolt washer swap! Although it essentially added 3 days to the build, the piece of mind it provides is well worth it. I’m very happy that I did the swap and also very pleased with how it turned out.
Tomorrow I’ll be working a lot various components in prep for the gear install: cutting the bottom of the existing firewall & floxing/glassing the 4″ extension to it; cutting out the heat shields from the 0.09″ aluminum sheet; leveling & truing the fuselage; cleaning up the gear bow in prep for mounting; shaping the inboard wheel pant support bracket, etc.