
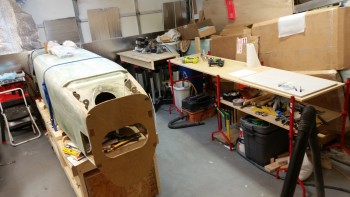
I started off today by spending about an hour finishing up cleaning & organizing the shop to enable the main gear installation.
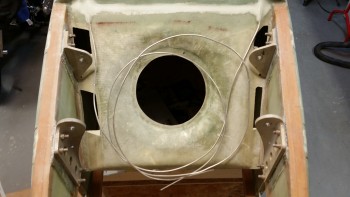
Before discussing the main gear washers swap-out I wanted to show the hell hole area with the long runs of aluminum brake lines, which will get cut much shorter to be connected to stainless steel brake lines that will run down the gear legs.
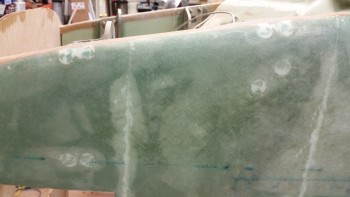
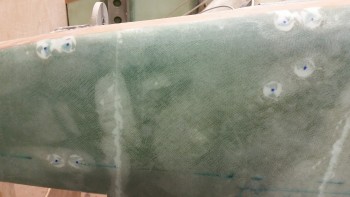
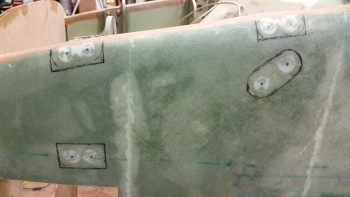
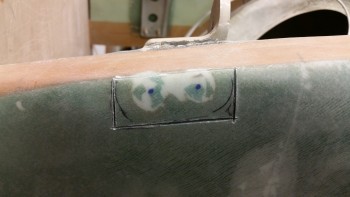
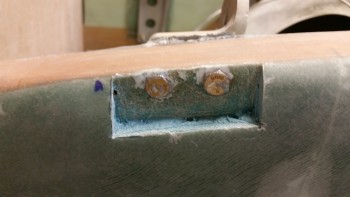
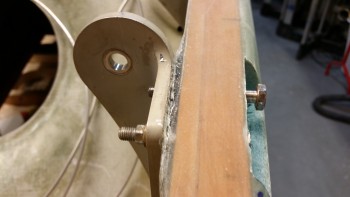
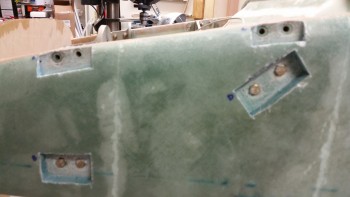
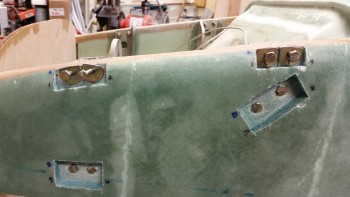
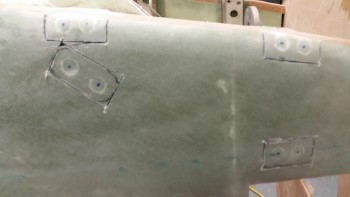
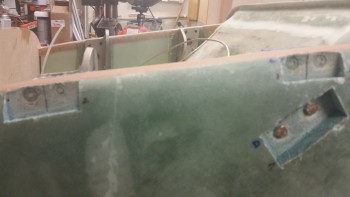
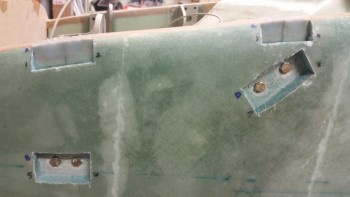
Here’s a shot of the left side of the aft fuselage showing the main gear mounts from the outboard side. You can see the filled foam & micro bolt head channels. In the second pic you can see where I marked the middle of each bolt head. In the third pic I marked the areas where the skin, foam & micro will be removed to gain access to each bolt head.
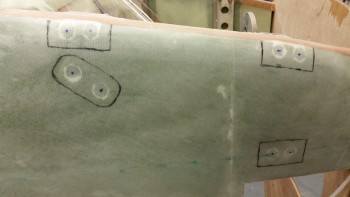
Here are the same 3 pics for the right side.
I then started cutting with the Fein tool on the lower aft left-side bolts.
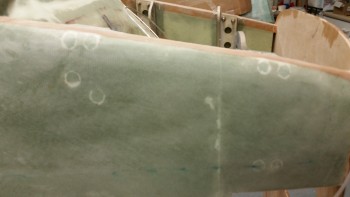
I popped the skin glass off.

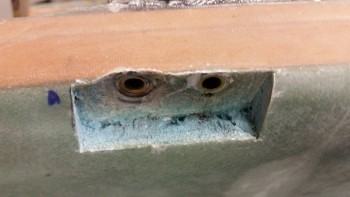
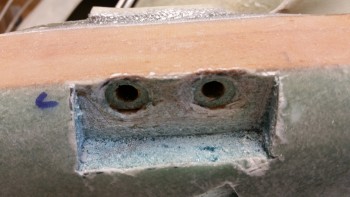
I then dug out the foam & micro from the channel. Also, to ensure I knew what piece of glass was covering what set of bolts, I labeled the removed glass piece and the bolt set that it was associated with, as you can see with the “A” below.
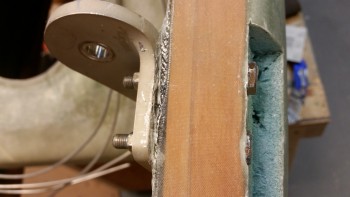
Below you can see the difference between the bottom bolt, tightened to what would normally be used for a 1/4″ bolt & thus crushing the base glass & wood, and the upper bolt, tightened so that visually no glass or wood is crushed, but not tightened to standard torque specs.
[Note: Below is also a good shot of my widening the top & bottom longerons since I widened the fuselage. My goal was to bring the interior edge of the longeron back to plans’ dimensions by widening the longerons. However, to utilize the carbon fiber engine cowlings that I ordered very early on in the build from Feather Light, I had to revert the firewall back to stock dimensions and thus just ended up with 0.4″ wider longerons top & bottom.]
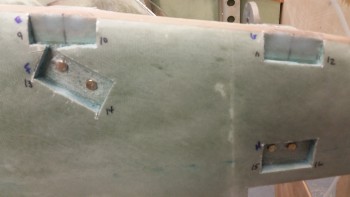
Here’s a shot of the forward bolts on the left side.

To get the bolts out I started with the basic method using wrenches. That worked, but it was tough & time consuming.
After getting about a third of the way of getting the nut off of the first bolt, I decided to ratchet it up a bit (pun intended!) by using an air ratchet.
WARNING!: This is not a standard scenario where a pneumatic tool would normally be used. There are many variables to account for and any misstep could result in serious injury! I’m conveying how I achieved my results, so use this method only if YOU know what you’re doing & YOU accept the risks involved!

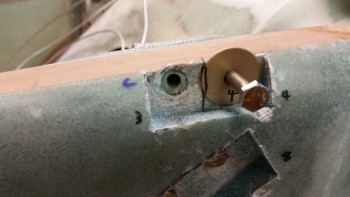
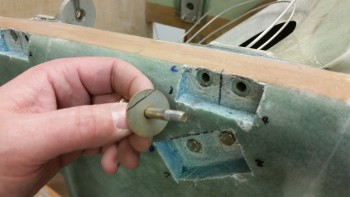
One problem area that is conveyed in just about every builder’s account of swapping out these washers is getting the bolts removed from the mount & the Spruce longerons. Well, using the air ratchet I serendipitously stumbled upon the fact that these bolts are mounted so tightly, that when an air ratchet is used they simply thread themselves out of the hole. About a third of them came out with no help, while the others I simple pushed the bolt from the inboard side with a drift pin & it would easily extricate itself as it was being turned by the air ratchet. Thus, I’d say it took a full 10 seconds on average to remove these bolts!
In prepping for the task of swapping out these washers, I of course looked at my buddy Marco’s blog to get some tips & ensure I wasn’t missing something or about to make a big mistake. Marco noted that he had used AN960-416L washers vs the AN960-416 washers called out for in the plans. The “L” stands for “Light” resulting in the AN960-416L washers being about half the thickness of the AN960-416 washers. Perhaps it’s something with new builders, but I’ll be damned if I didn’t do the same exact thing! Both on the inboard and outboard side of the fuselage wall. This of course makes this washer swap even more pertinent than ever.
A few pics up I included a shot of the bolts installed in these holes below to show the difference in depth that a “properly torqued” bolt looked compared to non-crushing torqued bolt. Below you can see the depressions made by the bolt head & washer into the glass & wood.
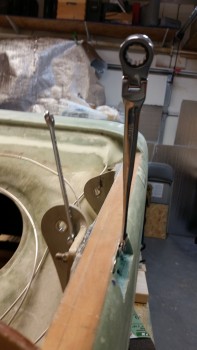
Here’s a wide angle shot below of the bolt removal shown above.
I then started work on clearing around the bolts on the left forward gear mount extrusion.
Getting there…. left side.
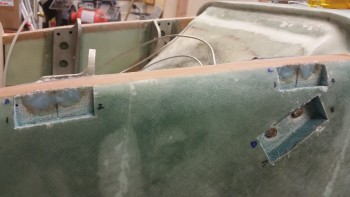
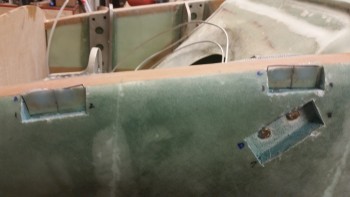
My goal for the evening was to get all the bolt heads exposed and the surrounding foam & micro cleared, and the glass around each bolt head clean as well within each newly made pocket. In addition, I wanted to get the lower bolts remounted and then get to work on the upper bolts. In this fashion, I’m following my buddy Dave Berenholtz’s method of swapping out one set on an extrusion at a time, thus not having to remove the floxed-in gear mount extrusions unless absolutely necessary.
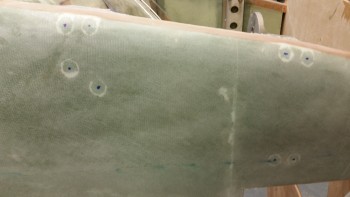
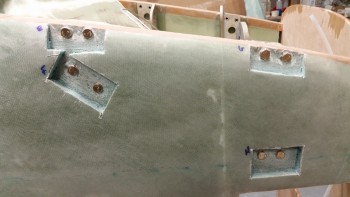
Here is the left forward gear mount extrusion with the bolts removed.
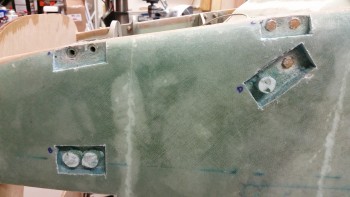
I then drew a reference line between the two bolt mounting holes to use to grind the larger AN970-4 washers to fit adjacent to each other within the foam pockets that I had just cut to expose the bolt heads.
I also used the lower longeron as a guide to mark the backside of the washers.
I then ground down the bottom and interior edge of each washer, as well labeled all the washers numerically and their associated hole.
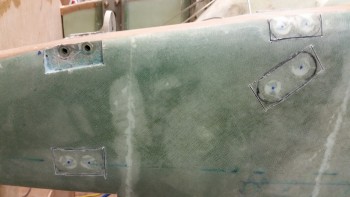
I then grabbed my Fein saw and started work on the right side. I cut the outline into the fuselage skin around each set of bolts.
I then removed the cut skin patch covering each set of gear mount bolts.
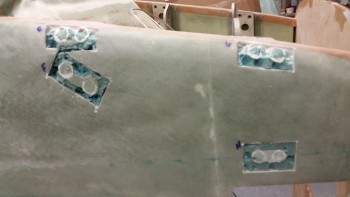
And then cleaned them all up.
I removed the lower set of bolts (pic not shown) which went fine with the exception of the aft bolt in the lower forward extrusion. I didn’t have a good grip on the nut on the inboard side when I fired up the air ratchet. Almost instantaneously it stripped the nut (see air ratchet warning above!) so that turned that bolt removal task into about a half hour long endeavor, resulting in me using the Dremel tool to simply cut the nut off, after a number of rounds of unsuccessful attempts to get the nut removed with vice grips, etc. I eventually got it out & all was fine.
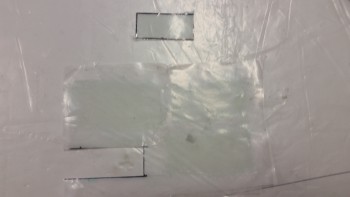
Since I needed to re-level the bolt hole divots at the start of each hole resulting from previously torquing down the bolts, flox would be added to backfill the holes & then get covered with 1-ply of BID. Thus, I filled each bolt hole with Saran wrap to keep as much flox out of each hole as possible.
I then whipped up some flox using epoxy mixed with fast hardener. I back-filled each depressed entrance to each bolt hole on the lower sets of bolt holes both left & right side.
I had already pre-measured each lower bolt hole pocket & annotated the dimensions on my white board. I then used those measurements to prepreg 1-ply of BID for each bolt hole set.
I then laid up the prepregged BID into the lower bolt hole sets. Below is a shot of the bolt hole BID laid up with the top prepreg plastic still in place, left side (I did the same on the right side).
After laying up the BID in all the lower bolt holes, I then peel plied the layups. First on the left…
… and then on the right.
Tomorrow I’ll work to finish up the washer swap. The time spent on that stripped nut, and my going to dinner & catching a movie, didn’t allow me to get to mounting the lower bolts. I’ll also set the fuselage straight, level & true in prep for mounting the main gear. Finally, I plan to get all the prep work & some prerequisite tasks for the gear mounting completed as well.