
As productive as I was yesterday in completing the nose glass layup, today I started off somewhat disjointed. With all the pics I took last night & as tired as I was I didn’t plug my phone in to charge, so when I went to the shop to get started I had no camera on hand, so the pics below were all taken after the work was completed.
I started today by cutting the taped lens cover out of the nose skin to reveal the landing light mounting flange ring that I spent so much time messing around with before I glassed the nose. Since I used slow hardener the glass was still in the final phase of the “Green” stage and still slightly pliable, and thus much easier to cut.
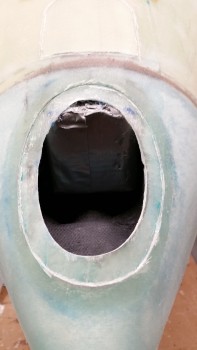
Here’s another shot below. While I may still need to continue to deal with the still somewhat wavy surface of the lens mounting flange, I’m very happy with how the landing light install is going.
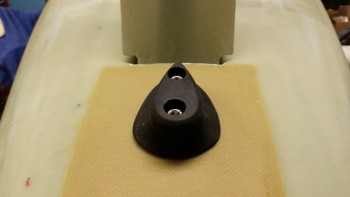
As you can see in the pic below, I also worked the nose bumper installation. Since I had to add the “Exoskeleton” to bottom of the nose to account for the NG6B/gear strut top hanging down below the surface of the nose, it made retrieving the embedded plastic Saran wrap quite a challenge.
After carefully locating the bolt holes under the Kevlar, I spent a good 45 minutes digging out the Saran wrap out of those holes. But it all worked out in the end because it allowed me to mount just a fantastic rubber nose bumper that my very talented buddy Marco CNC’d (to see how he did it, check out his build blog “What have I gotten myself into!”).
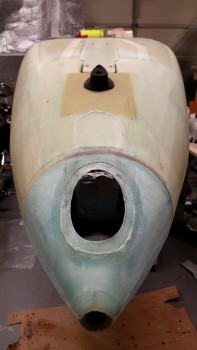
If you look closely between the landing light bay and the Kevlar pad for the nose bumper, you’ll see a gravestone looking piece of the nose cut out & put back in place. This is the Taxi Light cover/door that will swing forward with the taxi light attached to the back side of it. I also wanted to get the taxi light door cut out while the glass was in the green stage, although I missed it and had to pull out the Fein tool to cut it.
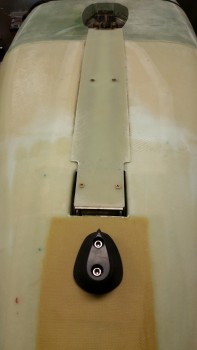
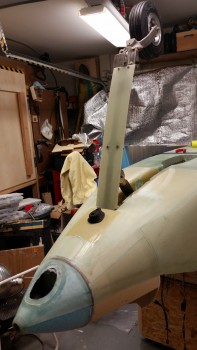
I actually cut the taxi light mount/door after I drilled & tapped the top #8 mounting holes for the gear strut fairing into the NG5 plate. As you can see below with the 2 mounted #8 countersunk screws holding the top of the strut fairing in place.
I also drilled the countersinks for the 4 lower #10 countersunk screws in the gear fairing. I then remounted the gear strut & fairing to test out the fit & clearance. Once I assessed that all was good with the strut fairing, I checked it off the list as complete.
The only real issue that I had with the strut fairing was with the hardware: I had ordered stainless steel hardware from ACS but for the life of me I just couldn’t find them (that was a good amount of my day lost looking for them!).
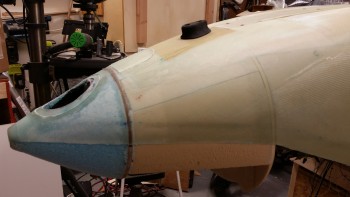
Although I wasn’t overtly joyed to have to mount the “Exoskeleton” to the nose, it has actually proved beneficial in more ways than just filling the gap between the low-hanging NG6B gear pivot. Besides just remedying the height differential, the Exoskeleton provided much better geometry, flow & clearance for the area immediately around the gear strut top, including the strut fairing, as you can see in the pics both above & below. In addition, the Exoskeleton addition made the bottom profile of nose flow better & covered the skid plate to remove any unsightly bumps that I would have had to contend with somehow.
Below is a visual recap of all of today’s completed tasks:
- Strut fairing completion & install
- Nose bumper install
- Landing light bay opened up & lens cover mounting flange exposed
- Taxi light swing door & mount cut out of the nose bottom skin
Tomorrow’s #1 priority will be the nose gear doors. I may play around with the landing light lens if I have time during the cure of the wheel well glass layups.