
I started out today trying to lock down a bunch of hardware for the plane build. It took a while to research some of the items –about 3 hours total– but I found a number of the items I was looking for and started compiling various orders for Aircraft Spruce, Mouser, etc.
I then went to the shop and pulled the peel ply from last night’s layup on inside of the front cover face. I cleaned up peel ply boogers and a few rough glass edges.
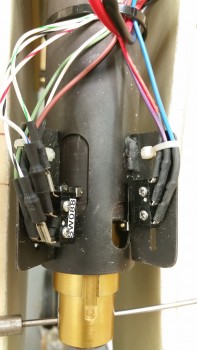
I then set about to add the second microswitch (for the gear up/down alarm) to the gear actuator housing. I pulled one of the screws from the current microswitch and when I went to put in a longer screw it was then that I realized that the set of screws I just ordered where the wrong size!
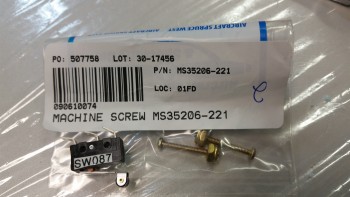
Here are the incorrect screws shown with the CORRECT microswitch. Well, it looks like there’s a bit more research in my future!
Then, as if things weren’t pissy enough, I found that Napster stole the Christmas tie that I was making for my buddy Greg! Ha!
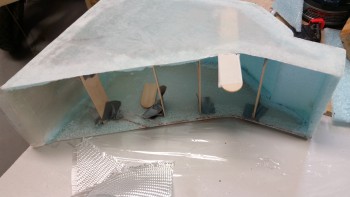
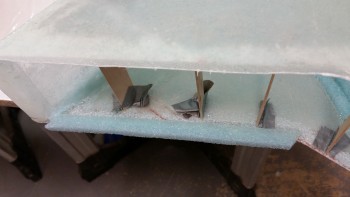
So with the adding of the microswitch to the gear actuator assembly a total bust, I pressed forward with glassing the sides of the NG30 cover. With the initial sides glassed with only one ply of BID, the sides are sunken inwards a bit. So before I glassed the sides I wanted them set out about 0.050″ each side so that they would likely set a little straighter. I cut 4 popsicle sticks to 3.67″ to make the outboard side-to-side measurement just over 3.7″. Even if they cured a little bowed out that would be much better than sunken inwards.
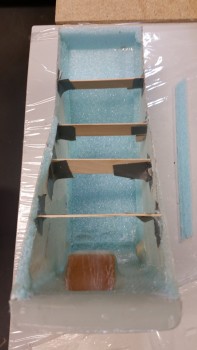
Since there’s a bit of a gap at the cover’s bottom edge dogleg and the NG30’s dogleg on the left side, I wanted the glass to overhang the edge so I could cut it to the correct length after it cured,
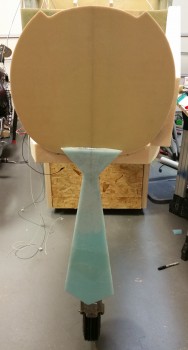
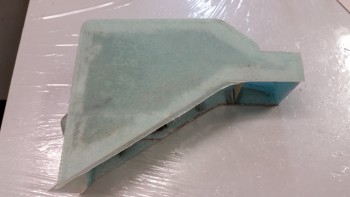
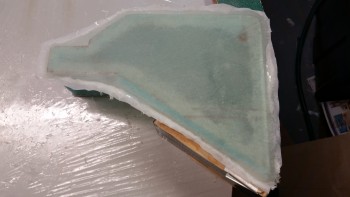
Here’s the left side glassed with 2 plies of BID, and after the peel ply was pulled & it was razor trimmed.
To extend the glass lower on the right hand side I cut a foam extension & glued it in place with 5-min epoxy.
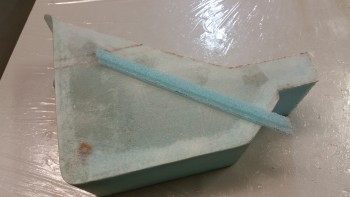
Here’s a shot of the right-side foam extension glued into place. After it cured I sanded it to ensure it was level with the existing outboard side glass surface.
I then laid up 2-plies of BID and peel plied it.
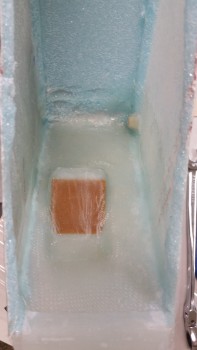
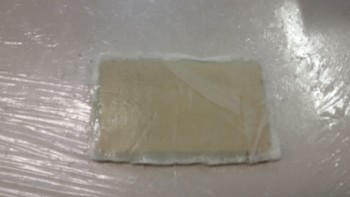
I overestimated the amount of epoxy required for my right side layup, so I had a fair amount left over. I grabbed a piece of 1/4″ thick PVC foam and glassed it with 2 plies of BID and then peel plied it. This piece will serve as the lower of two draft plates to keep the cold air out.
Tomorrow I’ll work to finish up the NG30 aft cover: glass top inner BID tapes, nutplates, mounting tabs, etc.
Hello Wade. I like your cover and really like your recess for your electrical connector. I was planning on building a cover also. After seeing how you are building yours I used my hindsight powers to realize I could have made most of the cover by extending the NG30s up around the actuator and had most of the job done. Gotta hate hindsight.
Keep on inspiring us :-)