
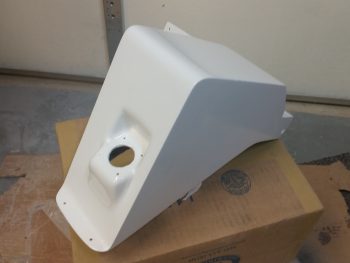
When I noted I didn’t have any pics last night, I failed to mention that I did in fact get something done… albeit not very well! I clear coated the aft NG30 cover with 3 coats of clear coat, but apparently there was some contamination on the surface because I had some issues.
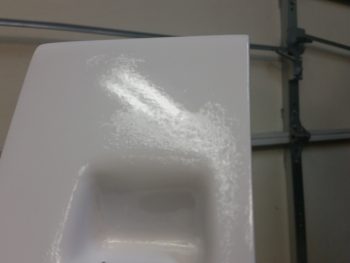
As you can see on the front, I had a bit of an adhesion problem.
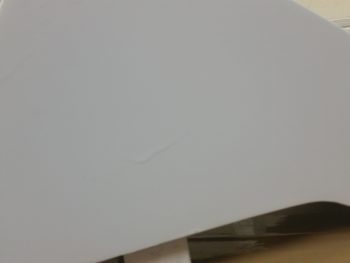
And, to add insult to injury, a nice run on each side. Ugh. So, I’ll try to just wet sand it and see if I can buff it out after I wet sand, or I may have to re-clear it. More to come on this.
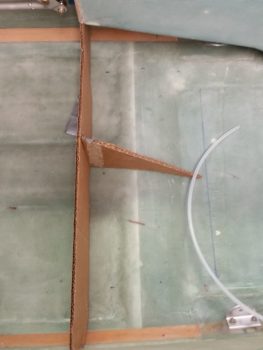
With my investigation on my haggard looking NG30 cover complete, I then got to work mocking up the GIB thigh support sump tank assembly, which will include separate left and right sump tanks.
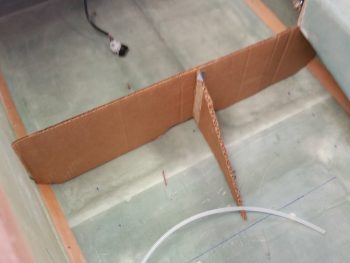
I used cardboard to mock up the forward wall and center rib. Obviously, this isn’t exact, but my main goal here was to get a general idea of size and dimensions . . .
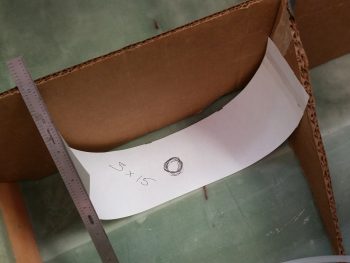
and check out two different sizes for the Holley Hydramat fuel pickup mats that I decided to purchase for the sump tanks (thanks to my buddy down in Oz, Dave Berenholtz…. I think he owns stock in Holley!).
Why the Hydramats? Well, the really cool feature for these mats is that as long as any part of it is touched by fuel, it will get it to the fuel pump. But for me the overriding selling point is the fact that it also pulls double duty as a 15 micron filter. With Nick Ugolini and other builders warning me of installing filters to catch all the bad fiberglass stuff that will inevitably rear its ugly head, I want that assurance that at the last main point that is composite: the sumps (with of course the composite fuel tanks preceding the sumps), that good filtration for the nasty bits before/as the fuel departs the sumps is occurring.
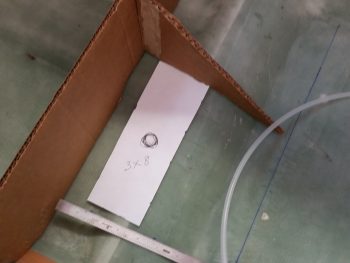
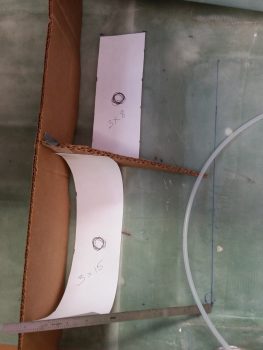
Since I have both a left and right sump tank, I of course require 2 Holley Hydramats. Now, these things will work fine bent at an angle, say 90°, so I test fitted the available 3″ x 8″ and 3″ x 15″ versions by using paper templates. These things aren’t overly cheap, and the latter version is only $10 more, so for almost double the surface I was really trying to make it work. But, with the internal configuration of my sump, it just didn’t fit well and would be wasted surface area. Thus, I went with what fit well and pulled the trigger on a pair of 3×8 mats.
Here’s another shot of the 2 sizes in the separate sump tanks.
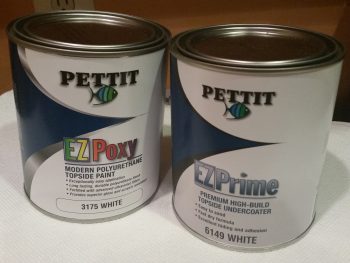
Moving on. As I noted last week, I did a fair amount of investigation on my final paint choice for my Long-EZ. Taking all things into consideration: cost, availability, ease of application, color, workability, and roll on ability, etc., I decided to go with Pettit EZPoxy polyurethane. Now, com’n! Seriously?! How can I pass up a paint named “EZPoxy”??
So today I took back a quart of paint to a local marine supply store and traded it in for a quart of top coat and a quart of primer. A note on the primer: I will only be priming top side areas for a better looking finish and added UV protection. And no, again, I will not be flying in primer starting off.
After getting back from the marine supply store, I dropped a small order with ACS for the remaining required fuel system fittings from the firewall forward. In addition, due to a free shipping special, I also dropped an order with Jamestown Distributors (another marine supply vendor) for the Pettit roll-on thinner, a Pettit topcoat enhancer, and some big Stikit sandpaper for my longboard.
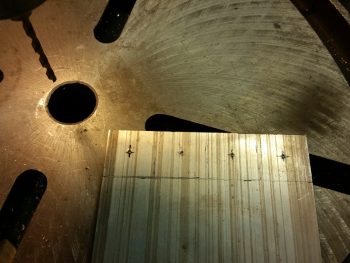
With the acquisition phase of the day complete, I did over an hour’s research on fuel system related topics. I then went down to the shop and decided to knock out all the 1/4″ 2024 aluminum hard points for both the pair of sump tank fuel drain valves and –while I was at it– the pair of main fuel tank fuel drain valves that exit the front of the strakes.
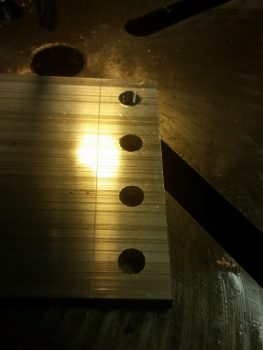
I marked up my 4″ wide (convenient eh?!) piece of 2024 into 1″ squares. Then, knowing my Sharpie lines would be gone in 3 seconds after I started, I scribed the lines. I then center punched the crosshair for each hole for a nice starting point for my drilling.
I then drilled subsequently larger holes . . .

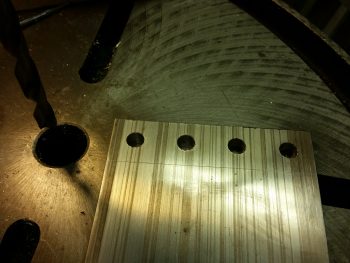
Until I finished drilling the holes out for the final diameter required for a 1/8″ NPT Tap: 11/32″.
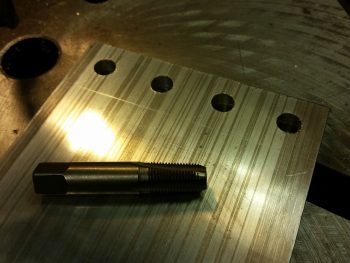
I then started tapping all the holes in old skool fashion with the tap and a crescent wrench — and of course some cutting fluid.
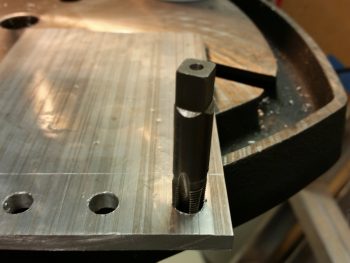
Yes, I really wish I had a nice tap handle for larger taps, like the one I have for smaller taps because each one of these holes took at least 15 minutes. Below is a shot of the first hole finished.
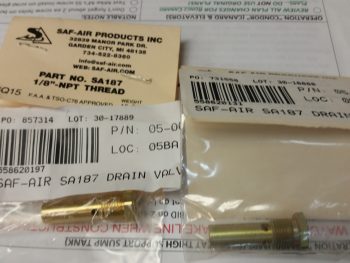
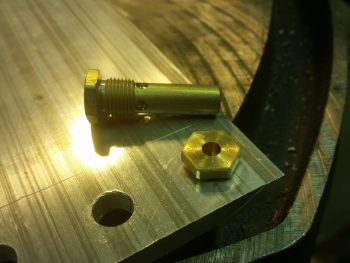
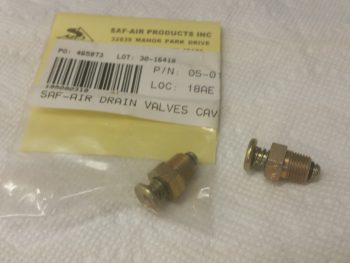
I then rounded up my SAF-AIR SA-187 fuel drain valves that will grace the bottom of the fuselage with their presence…. although, to be clear, they are quite shy so must be hidden away somewhat!
I then mounted the first fuel drain valve. As you can see, I needed the hole just a HAIR deeper since I want these drains to seat very close to the metal hardpoint.
I then mounted my first fuel drain valve to full depth.
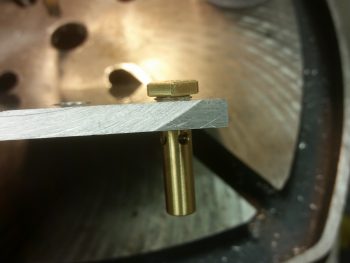
Here’s a profile view of the GIB thigh support fuel sump drain valve.
A bit later I finished hole #2 . . . and mouned sump drain valve #2.
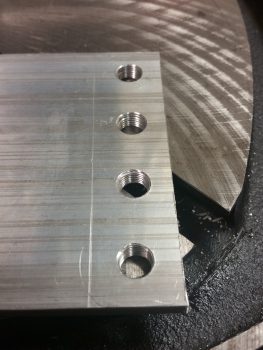
After a good bit I finished tapping all the holes with the 1/8″ NPT tap. I then cleaned up the 2024 aluminum piece in order to test mount all the drain valves.
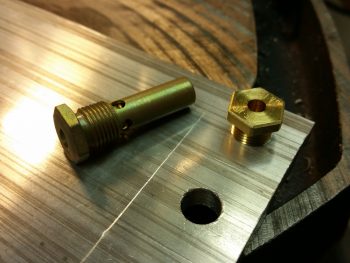
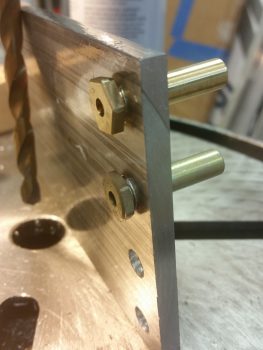
I then rounded up the pair of main fuel tank drain valves that exit the front of the strakes.
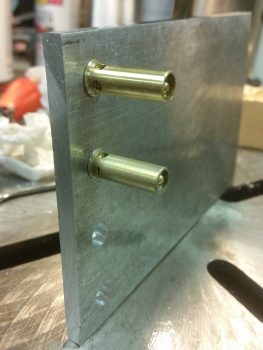
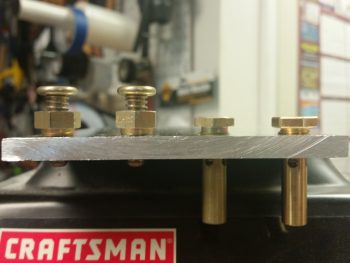
I then mounted all the fuel drain valves that will be on my Long-EZ.
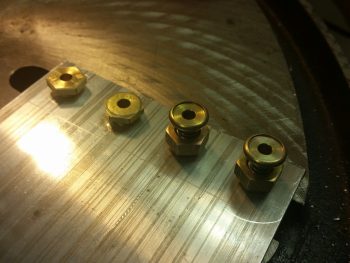
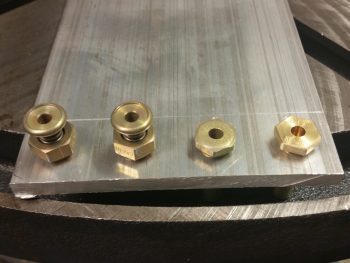
Here’s a profile view of all the fuel drain valves.
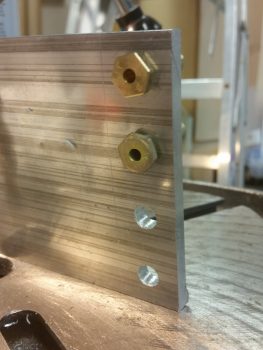
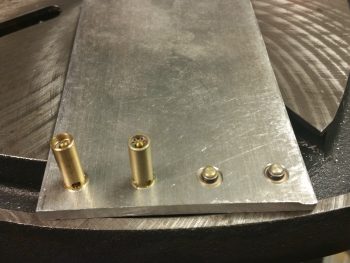
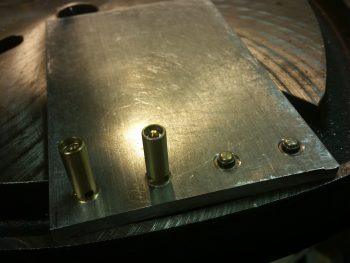
And, lastly, an “inside the tank” view of all the fuel drain valves.
Tomorrow I’ll cut all the fuel drain valve hardpoints from the 1/4″ 2024 aluminum plate. I’ll then continue working on the GIB thigh support sump tanks. I know it seems a rather circuitous route to get the nose completed, but to really finalize the pilot seat area I need to know the true configuration of the fuel lines. Once I get the sump complete and fuel lines in place, then I’ll knock out the pilot seat area. In turn, I can then finitely determine component mounting requirements & locations in the nose to prep the nose for getting its top and getting glassed.