
Within a day of coming back from NC I started feeling a bit sluggish, and felt a cold coming on. Well, today it hit me pretty hard, so I’ve been moving at a bit slower pace. I’m hoping tomorrow I’ll feel well enough to get the lower engine mount extrusions glassed into place. On top of all that, when I woke up this morning it was a virtual winter wonderland outside, with snow continuing to fall and a good few inches already on the ground.
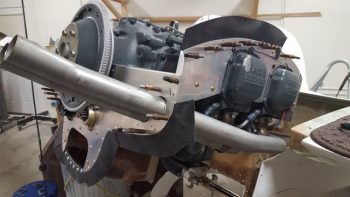
So I grabbed a cuppa and went through Mike Beasley’s baffles and –while looking at his website– taped a number of the pieces together to get a good idea what his were all about.
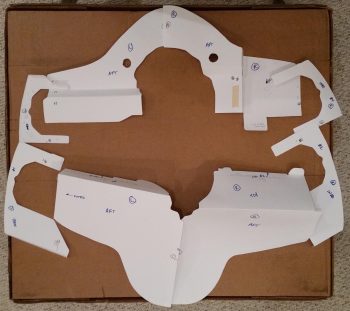
The initial confusing part on his just looking at them is that all the annotated & marked sides are actually the interior side of the baffles, with the blank sides ending up what you see when you piece them together, or the exterior side.
 So once I got that little tidbit down, I was able to get a good handle on what was going on. Here’s the inside (looking aft) of the lower skirt that wraps around the alternator & starter.
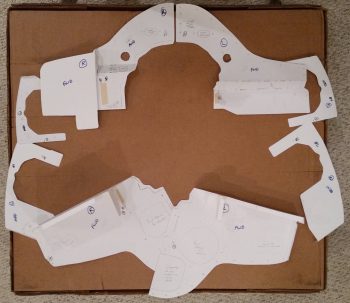
Here’s the top looking aft.
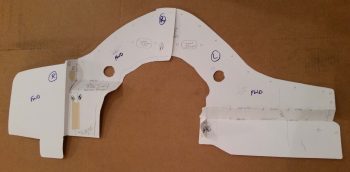
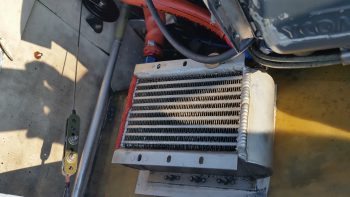
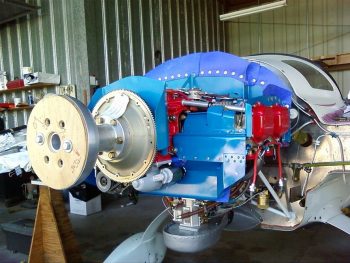
Now, since I’ll have my oil cooler in the plans location on the side of the engine and not nestled in the aft underside region of the motor, I won’t need the aft lower skirt positioned like Mike’s (and countless other EZs) so far aft that it just barely covers the aft end of the alternator and starter. Here’s Marco’s oil cooler in the plan’s location, just forward and to the left of the motor.
Here’s Mike Beasley’s real world baffles, with the lower baffle skirt far aft to account for the oil cooler placement. If I were going to place my oil cooler in this location, I think it might have been a better, cheaper option to just use Mike’s Beasley Baffles. From what I can tell Mike really did a bang-up job on his baffle templates, so they are certainly a viable option for most builders that are installing an O-320.
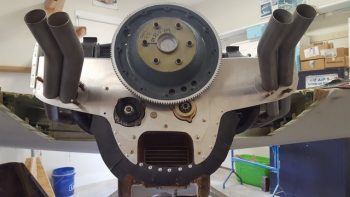
That being said, here’s a lower baffle skirt placed much farther forward that has both the alternator and starter exposed, but still has a centerline mounted oil cooler. My baffles will look more like this, only without the oil cooler mounted in the centerline position. So in my situation I think it will work out better having the VANs baffle kit on hand to modify.
(To be clear, I will be using Mike’s baffle temples extensively –as I have been doing– to modify the VANs baffle kit).
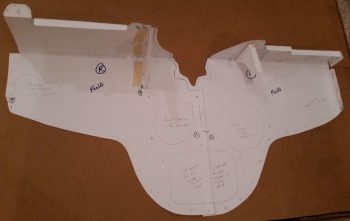
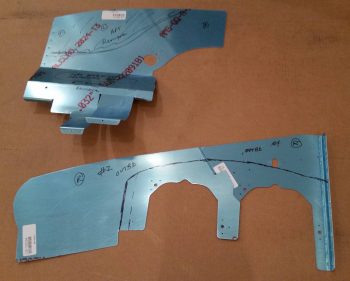
I then compared Mike’s baffles to the VANs, and assessed what I would need to modify on the VAN’s baffles. On the set of side baffles (bottom of pic) you can see my proposed line cuts off that big blank piece of aluminum, which would be on the aft side.
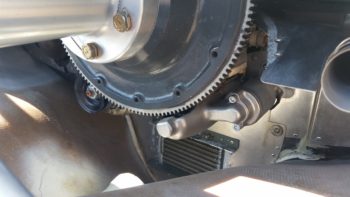
This expanse of baffling would normally match up to the considerably wide shelf going aft of the cylinders (see 3rd pic from top, above) and which then drops down to create the skirt running across the aft faces of the alternator and starter. Here’s another example on Mike Beasley’s bird.
Again, since my lower aft baffle skirt will be located forward of the alternator and starter, I only need a very narrow shelf just aft of the rear cylinders to then drop down to create the lower baffle skirt. Here’s a good depiction of what I’m talking about on Buly Aliev’s Cozy, where he used the VANs baffle kit.
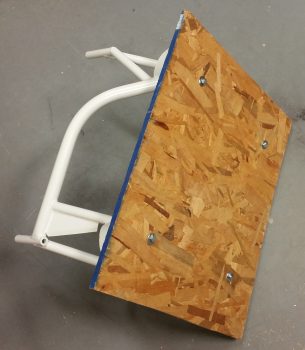
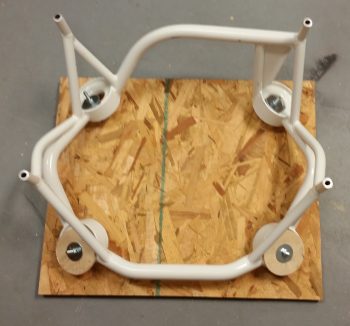
I then made it down to the shop to get a little bit of prep work in for installing the lower engine mount extrusions. I copied Dave Berenholtz in bolting a wood plate to the engine mount to help easily ascertain the mounting angle of engine mount/engine during the installation of the lower extrusions.
Here’s another shot. BTW, the plans would have you install the engine mount so that the prop is 2° higher than the front (firewall side) of the engine. This makes sense since the Long-EZ, like many aircraft, flies about 2° nose high. However, remember that the 2° number is based on a 118-125 HP Lycoming O-235 engine. If you’re pushing a few more ponies, which I and most people are these days in Long-EZs, then it takes less angle to keep the nose up. Also, 2° high on a higher powered engine probably won’t get you level flight, but a slight climb… which then of course would mandate more trim forces in play.
For example, with a planned 220 HP engine, my buddy Dave B. set his angle at 1.1°. So for my 180-190 HP motor, I’ll be setting my engine angle around 1.4°.
In addition to fiddling about with the baffles, I also tweaked the lower engine mount extrusions install plan and will hopefully get these guys glassed in tomorrow, or the next day (depending on how I feel of course).