
Today was all about getting the Trio Pro Pilot Autopilot pitch servo mounting bracket glassed in place on the right fuselage side wall. Since I prepped everything last night, it allowed me to just jump into the fray this morning.
I started by cleaning off the Clickbonds with Acetone & then adding a dab of 5-min glue to the bottom of each one. I had them in place in the mounting bracket to allow me to align the Clickbonds to the actual pitch servo bottom mounting plate when I glue them to the sidewall.
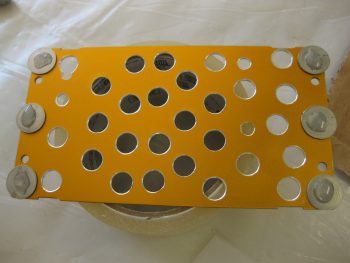
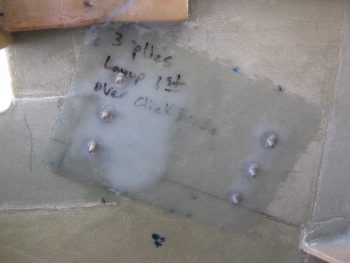
I then lined up the whole assembly and pressed the Clickbonds into place onto the fuselage sidewall. I held it there by hand for about 3 minutes to ensure the 5-minute glue set up. I kept the bottom edge of the mounting bracket aligned with my angled alignment mark that I had made on the side wall, and my left-right alignment was my arrow on the lower left corner of the mounting bracket that aligns with the intersection of the slanted alignment mark and a point 7-3/4″ aft of F22.
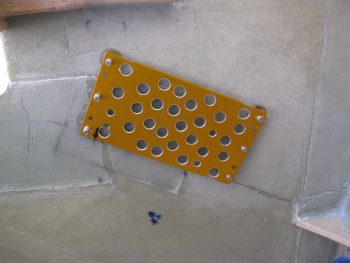
After a few more minutes I pulled off the mounting bracket from the Clickbonds, and after a few double-checks on their alignment, let them cure. The middle dark area just to the right of the left row of Clickbonds is actually a 2-ply BID layup I threw on the side wall to help fill in the elevation gap between the uber 4-ply BID that secures F22, and the sidewall just aft of all that thick BID pad [not a big deal, but perhaps the install could have been better engineered by the Trio gang to avoid this 4-ply BID pad-to-sidewall transition area?….still, no big worries].
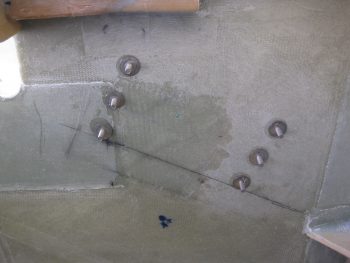
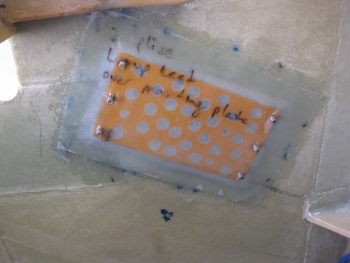
As the Clickbonds cured I whipped up some epoxy and wet out the prepregged 3 plies of BID. I then used the mounting bracket to mark the BID to allow me to cut small holes in it for the 6 Clickbond access holes.

I then whipped up some flox and applied it around each Clickbond base and in the transition area to provide a straight foundation for the mounting bracket.
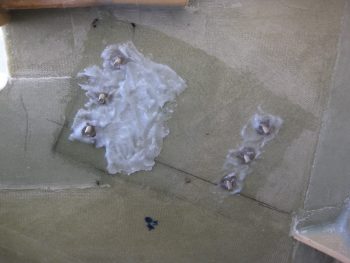
I then laid up the prepregged 3 plies of BID. While the prepreg plastic was still on, I taped up the bottom of the pitch servo for anti-gunk protection and used the actual servo to press in on the flox to attain the exact amount of flox angle required for the servo to sit flat against the sidewall.
I then pulled the peel ply top plastic, applied a bunch more flox and then set the mounting bracket into place. I then laid up the 2-ply BID prepreg over the mounting bracket. Again, with the prepreg plastic still on, I once more set the actual servo on the Clickbonds and applied firm pressure to set the mounting bracket, flox and BID plies into place.
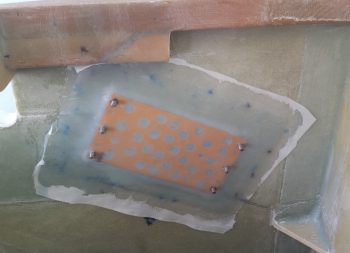
I then pulled the prepreg plastic and peel plied the entire layup.
Today was a short work day since I helped an Air Force buddy that just arrived into the area move some furniture. Tomorrow I’ll pull the peel ply and clean up this layup. Then I’ll mount the pitch servo. I also need to reset the mounting bracket inside the Infinity stick grip because the plastic handle halves are misaligned just a bit, and it’s creating a ridge down the center of the grip stick that will annoy the snot out of me if I have to fly with it! With that, I’ll continue to work the main fuselage/cockpit flight controls as much as possible until I can’t continue (i.e. no firewall aft controls) and I expect to be getting back to the wheel pants next week.