
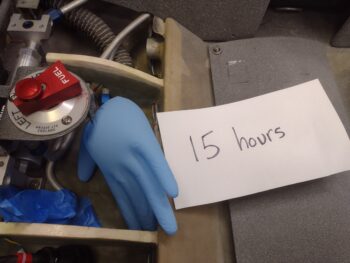
Late last night when I got home from a quick late dinner with Jess, I was annoyed that the previously inflated blue glove for my right fuel tank pressure test was totally flat. On a whim I blew in the tube again and set the right fuel tank pressure to about 100 knots on the air speed indicator, and had a decent inflation in the blue glove. I then closed up shop and went to bed.
Well, this morning, having forgotten about it to some degree, when I went out to the shop 11 hours later I was pleasantly surprised that glove was still inflated nicely. I then snapped this shot at 15 hours later, as you can see. For some reason the glove stayed inflated this time around, and I’ll take it!
Of course the ASI read 0 and I suspect it might be part of the problem as it allows for a slow leak. I will most likely do another round of pressure leak tests before finishing the top strakes, and also after the gas caps are in… only with Freon to ensure there are really no significant leaks.
In more good news, I received the invoice from E-Mag Air and paid them for shipping to send the PMag back. In the next 2-3 weeks I’ll most likely have the engine back off the bird, and then will re-install the PMag back into its spot. While the PMag is off the engine I will make a cooling shroud for it as well.
As for the exhaust pipes: I’m done trimming the pipes for now. I ordered some ER347 filler rod for 321 stainless and plan on tack welding the pipe(s)… first the inboard pipe, and then the outboard pipe to nest as close as possible to the inboard pipe. I may not actually tack weld the outboard pipe, but will clock it and mark it for James to weld it up.
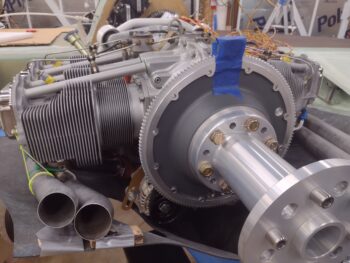
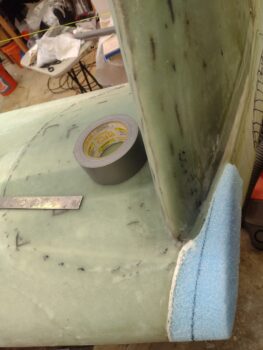
I then taped a 1″ piece of foam on the top of the flywheel as a gap for the top cowling. I want to check the exhaust pipes’ elevation with the top cowling in place since I don’t want to end up with the pipes too high in relation to the top cowling.
The title of this blog, “threading the needle” is in reference to the aft opening of my cowlings and the exhaust pipes’ exit out of them. I may have the narrowest cowling exit on record for a Long-EZ! I will also note that there is a decent probability that I will be modifying the exhaust pipes even more since they will most likely need to be angled more inboard towards the prop hub. About one pipe diameter inboard as to where they are now… the outboard slit (aka cowl opening) will be very tight with only about 1/2″ clearance above and below each pipe.
Since the right exhaust pipes come inboard more anyway, they are not quite as bad as the left pipes.
As I did some research, I noted on my buddy Dave Berenholtz’s site that his lower cowling is about 1″ lower than mine at the very aft end if you measured his fin vs mine. Since I had my bird inverted at the time, I made a decision to mount the cowling to keep the flips minimal. My lower cowling install seemed much easier than Dave’s because he had the aft opening locked in at a good gap and the bottom cowl’s forward firewall vertical interface parallel to the firewall.
Without an engine installed and inverted, my focus was on the perimeter fit, which resulted in just a hair trimmed off each side and a slight gap towards the bottom between the firewall and the cowling front edge, which again was slanted a bit… requiring me to bridge that bottom gap between cowl bottom edge/front face and firewall.
Conversely, Dave seemed to really fight the bottom cowling sides the entire way and that was because if the sides of the bottom cowling were set in their “natural” state (as I did), that would equate to what I have now: the bottom cowling aft end about an inch higher than it should be. This helps explain all the significant clearance issues I’ve had.

I’ll note that ONCE I walk the razor’s edge and get the exhaust pipes positioned, and the upper and lower cowlings are in place, that reduced cross-section exposure on my bottom cowling as its angled up more sharply should prove helpful in more unhindered air flow to the prop… we’ll see!
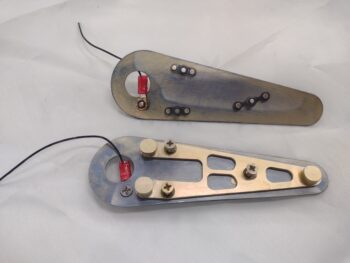
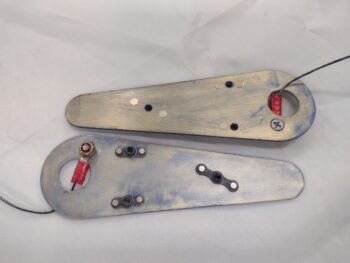
My next task was installing the three #6 nutplates on each nav light mounting backplate. In addition I terminated a black ground wire and attached it to the backplate for each one as well. These nav/strobe light mounting backplates are now ready to be installed into the wingtips and covered with a couple plies of BID.
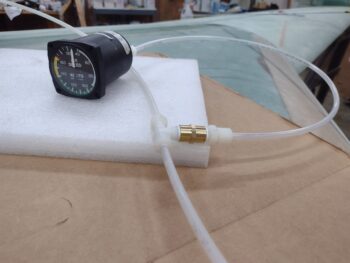
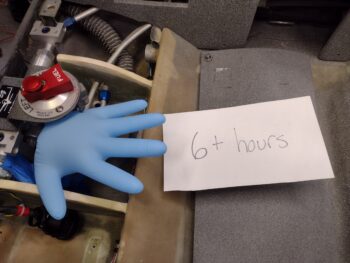
After the “15 hour” pic I took above, I then swapped my test kit over to perform a pressure check on the left fuel tank and thigh support tank. I took extra measures to temporarily seal the thigh support top port cover, and I think it showed as I had far less leakage on the left tank than the right… at least in these tests.
Here’s clearly a pic at 6 hours later. I’m calling the left fuel and sump tanks good with virtually no deflation of the glove. Still, I’ll leave it overnight and see how it looks in the morning.
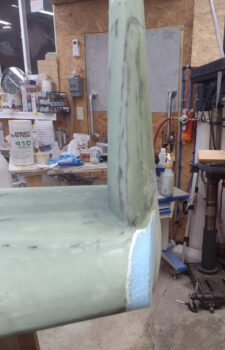
Since I trimmed my lower winglets down to about 2/3rds the size of the stock plans size —off the top of the foam core, not the bottom— they not surprisingly caused a bit more of a headache going on than the stock sized ones would have.
Why? Because by trimming off the top I reduced the overall width of the lower winglet mounting point a good bit… making them more difficult to align properly going on. I attempted to focus on the trailing edge and align it straight with the rudder, but in doing so angled the bottom winglets out by about 1/8″ more than they should have been, all things being perfect (are they ever?!).
This slight “kick-out” didn’t manifest itself really until the wings were mounted and the plane upright. Then you could see the bottom winglet a bit fatter than then top on the outboard side. I used a straight edge to determine where the offending bulge was and marked it up… it had to be reduced to eliminate a need for extra micro to hide the bump and straighten up this slight difference between the two surfaces.

I grabbed my belt sander and went to town… it didn’t matter to me if I broke into foam, I needed to reduce this profile down significantly.
Surprisingly, I went 3 good rounds with the belt sander, rechecked and remarked the the surface protrusion each time, and then hit the areas again hard with 2 sessions of my 36 grit sanding board… and only on about 1 square inch on the right side did I hit foam. I’ll patch that and assess this more when I get to finishing the winglets. This bit of sanding did slim it down noticeably (see pic 2 below).
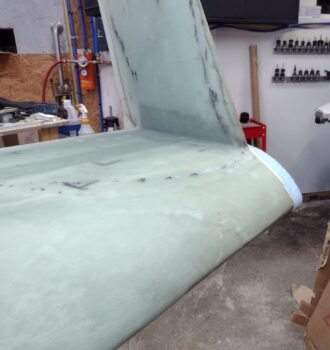
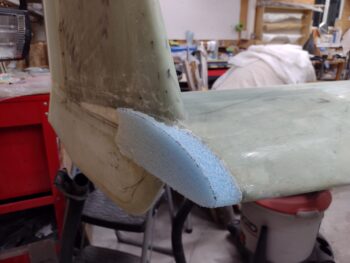
See the yellow string in the pics above and below? I used that for my 90° perpendicular line to A/C centerline to then use a big square to mark the cut lines on the foam wingtip additions. The resulting cut lines are pretty much parallel with the A/C centerline.
I then used a wood saw to cut the blue foam wingtip additions just outside the line.
I grabbed my sanding blocks to then sand the blue foam away just up to the cut line.
I did the same thing on the right wingtip… here are the pair of them shown together.
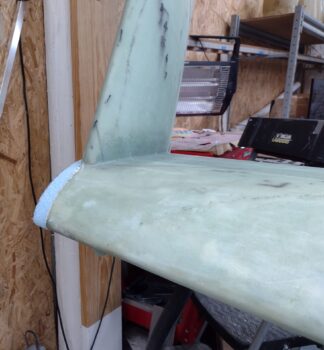
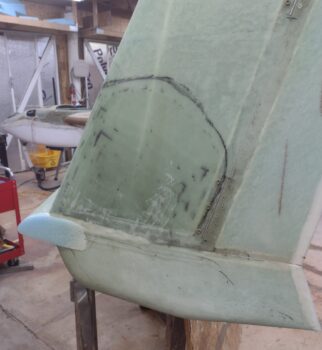
And a solo pic of the trimmed & sanded right wingtip. Not bad.
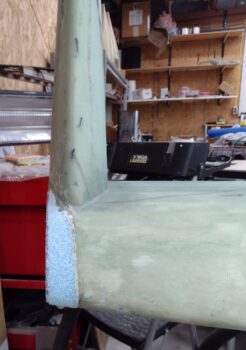
Another shot of the trimmed/sanded right wingtip. I like the way this looks, but I’ll admit that my biggest headscratcher now is how I’ll work the transition on the bottom winglet with this addition.
I’ll sleep on it and see if any ideas come to mind tomorrow.
I previously mentioned “perfection” and once again curiosity got the best of me. I measured from the top aft winglet tip on each side to the front centerline of the nose. Here are the results:
Right ↔ 266-3/4″
Left ↔ 266-5/8″
1/8″ difference for that entire distance?! I’ll take it!!
Ok folks, calling it a night!