
I started out today adding micro & flox to the base of the Vapor Box Clickbond before laying up a ply of BID to secure it. I had originally planned on 2-3 plies of BID, but the air duct will cross over this glass and I didn’t want to add to the gaps or cause any sealing issue.
Furthermore, I peel plied it thinking I would simply add another ply or two as the duct was getting set in place, but that didn’t work out either…. more on that later.
I then pulled the peel ply on the 3 sided (top, bottom, inboard) layup securing the duct to the aft side of the vapor box. I then cleaned up the layups.
I also Dremeled the corners and sanded the edges of the vapor box aft internal duct opening.

I added a small bead of flox and then laid up the last ply of BID on the outboard side (facing up below) to finish the duct-to-vapor box attachment.
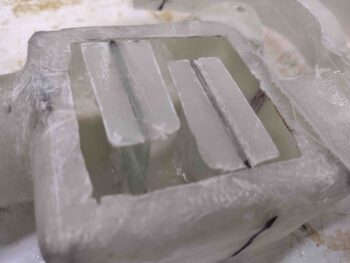
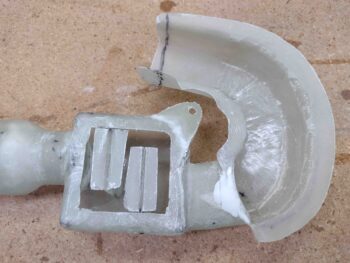
I then got to work installing the vapor box airflow tabs, securing them in place with small beads of flox.

Here we have the aft, lower airflow tab floxed in place inside the vapor box.
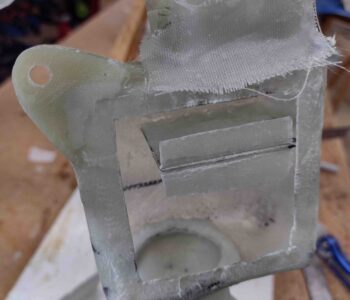
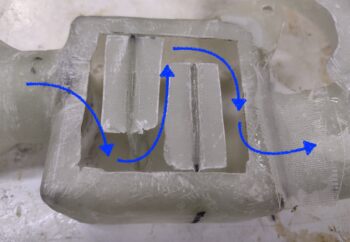
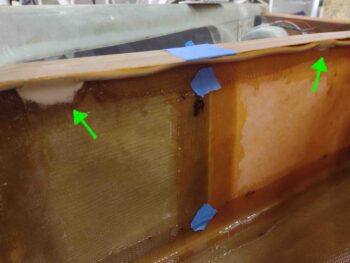
I then installed the forward/upper tab using the same method. I added arrows to the pic below to show how the air will move through the vapor box, with the airflow tabs pulling most of the moisture out of the air.
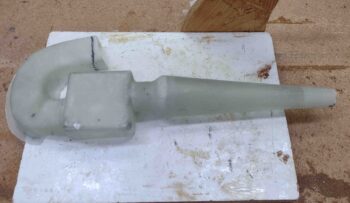
And finally, a couple more final shots with both airflow tabs floxed in place inside the vapor box.
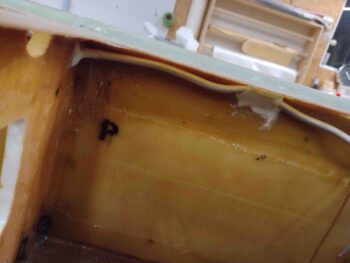
I then laid up 2 plies of BID on the outboard side of the vapor box to close it up and seal it for air movement. Here you can see where those “T-hats” on the airflow tabs really helped in supporting the final layup to seal up the vapor box.
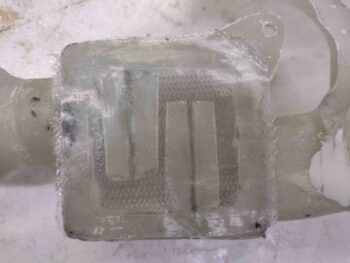
I then peel plied the vapor box’s 2-ply BID closeout layup.
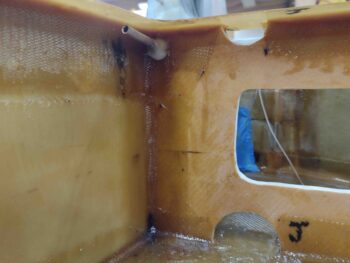
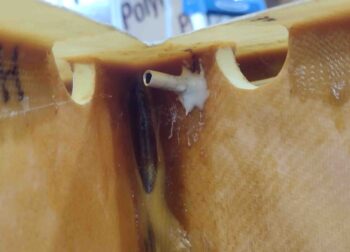
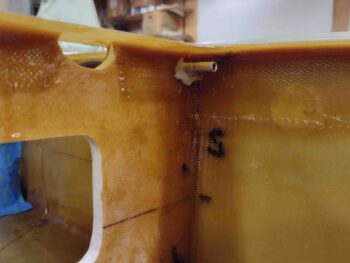
While the vapor box cured, I then got to work on securing my not-so-sexy fuel vent tubes inside the respective fuel tanks. Here we have spots of micro and a ply of BID in 2 separate spots to secure the right tank’s forward fuel vent line.
And the same thing in one spot for the right tank aft fuel vent line. I also added a dollop of flox on each fuel vent tube poking through the BL23 rib, both on the front vent and aft… also with a dollop of flox on each side of the BL23 rib.
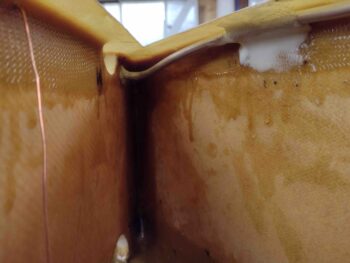
Here we have the left fuel tank with some micro and BID securing the front and aft fuel vent lines.
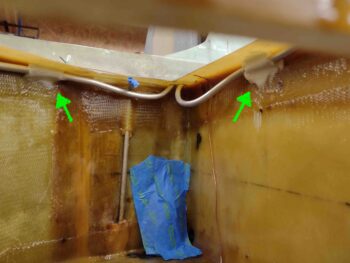
As I did on the right tank, here’s the forward left tank fuel vent line with some flox keeping it nice and secure.
And a shot of the forward fuel vent line splotch of micro and BID ply, with dollops of flox on each side of the BL23 rib to secure the aft fuel vent line. Yeah, working from above trying to get your head down into the tank pockets low enough to see what’s going on leads to some more not so awesome looking glasswork… but they work and the fuel vent lines aren’t going anywhere.
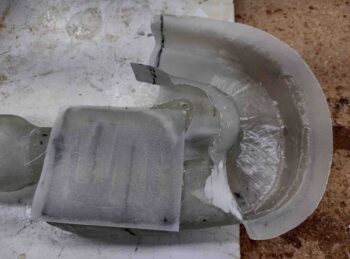
A few hours later I pulled the peel ply and razor trimmed around the perimeter of the 2-ply BID layup on the outboard side of the vapor box.

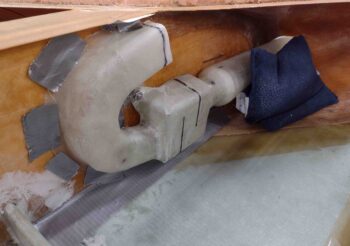
I then whipped up some flox to finally get this whole RAM air scoop, vapor box and duct assembly mounted into the left strake baggage compartment. I applied a bead of flox to the flanges on the duct and then mounted the vapor box mounting (and alignment I should say) tab to the Clickbond.
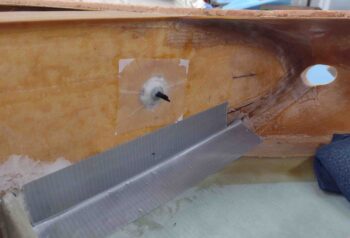
As for the Clickbond, I didn’t add any more plies mainly because the face of the Clickbond had too much flox and glass on it and was keeping the duct flanges off the BL23 sidewall just a hair… so I had to do some judicious sanding on both the Clickbond face and the vapor box mounting tab. Which did the trick. But no more plies of glass for this bad boy…
With a bit of flox leftover, I went ahead and mounted one of the 90° angle 3-ply tabs on the side of the fuselage. I then added a ply of BID over the tab with some peel ply.

About an hour later (I used fast hardener) I pulled off the tape that was securing the duct to the BL23 inboard sidewall.
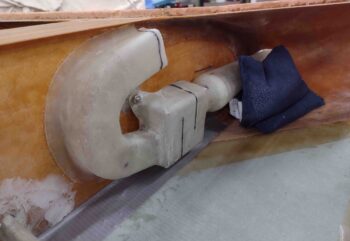
I then left the floxed duct to cure overnight. I have to say, so far I’m really digging what I’m seeing on this RAM air scoop setup.