
Today was the annual seafood festival here in Morehead City, NC so I was out and about quite a bit before getting into the shop for a few hours.
I made a template and then cut the 2 plies of BID before prepregging them. I then wet out and laid up the BID plies as the final layup to finish the installation of the GIB air vent duct.
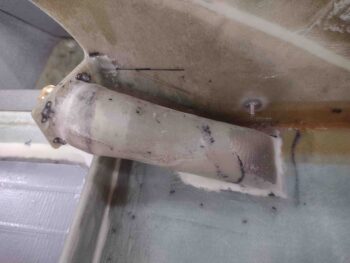
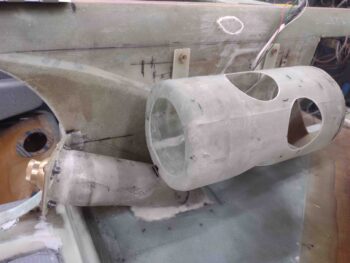
On the duct itself I laid up the 2 plies of BID overlapping onto the edges around the opening. However, on the forward edge of the NACA duct opening I split the layup… one ply on the inside (top) while the other side overlapped onto the face of the external NACA scoop (underneath).
In between these 2 plies of glass right where they spit into single plies —internal and external— I laid in a bead of micro.
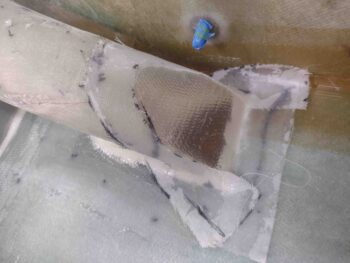
Here we have the external ply laid up on the external face of the NACA scoop. I then peel plied all the areas that required it.
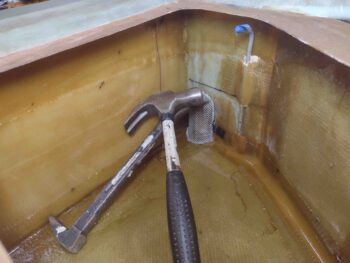
As I finished up the GIB air vent layups above, I had a decent bit of epoxy left over in my cup. I decided to use this extra epoxy to flox in the fuel tank drain screens.
I started by tracing the left fuel drain screen with a Sharpie . . .
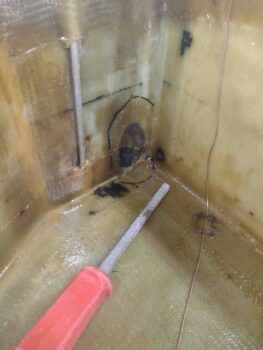
I then sanded the shiny epoxy under the marked line, and then cleaned the sanded areas with acetone.

I then used the leftover epoxy to whip up some flox to set the left fuel tank drain screen in place. I then used a taped up block of wood with a shot bag weight to secure the screen in place against the tank side wall and floor.
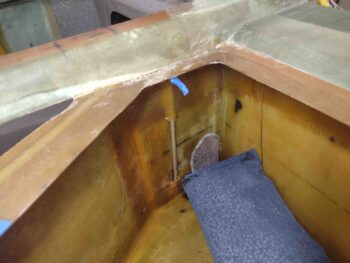
I had just enough flox to do the left side, so I mixed up a bit more epoxy to make up a bit more flox to flox the right fuel tank drain screen in place as well. I then weighed the screen down a little to press the edges firmly against the tank side wall and floor.
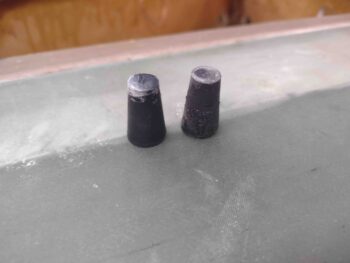
And just so YOU know…. and moreover for MY peace of mind, I grabbed a shot of the two removed protective rubber stoppers that I had in the tanks’ drain tubes to keep dust and debris out.
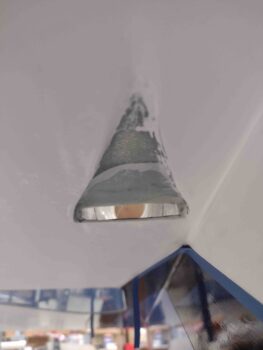
A few hours later, after the epoxy cured, I pulled the peel ply from the layups.
I then installed the eyeball vent with a new set of screws, and with this I’m declaring the GIB air vent install complete.
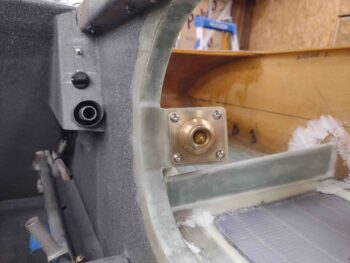
I then installed the O2 bottle mounting sleeve to check the clearance with the GIB air vent duct… which is very little. There is just a hair of space between the two components, but I have a fair amount of meat on the corner of the O2 bottle mounting sleeve to remove a bit to create a decent gap (note the black Sharpie marks which is where I’ll do some trimming).
With a week under my belt since I’ve been back from Rough River, let’s revisit the list of prerequisite tasks that need to be completed before closing out the strakes:
First, the following were completed this past week:
⇒ O2 bottle mounting in composite sleeve
⇒ Installing main fuel tanks drain screens
⇒ Installing/glassing GIB strake/baggage compartment windows
⇒ Installing/glassing right strake GIB NACA vent duct and eyeball vent
⇒ Installing/glassing GIB strake/baggage compartment cross support mini-bulkheads
That leaves these tasks to be done:
⇒ Outboard storage compartments on the top strake side initial tasks
⇒ Wiring and install prep main fuel tanks fuel probes
⇒ Installing/terminating main fuel tanks vent lines
⇒ Cleaning up fuel site gages edges (cosmetic)
⇒ Wiring fuel site gages LED lights
⇒ Installing/glassing/wiring GIB map light
⇒ Designing/constructing/installing left/right fuel site gages video camera mounts
⇒ Wiring/installing fuel site gages video cameras
⇒ Constructing/glassing/installing left strake RAM air scoop/ducts for oil heat system
⇒ Prepping/priming/painting strake baggage and final cockpit areas