
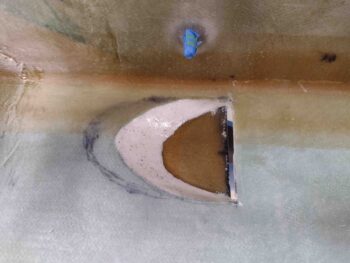
My very first task in the shop this morning was sanding the inside of the NACA scoop to smooth out the micro and transition between it and the underlying glass. The dark speckles are due to me cleaning it with acetone beforehand and it pulling in some of the black Sharpie ink into the pours of the micro. Oh well…
I then applied and left the thin application of epoxy to cure.
I spent about 20 minutes cleaning up the layup that secures the second duct segment to the first. Since there is an internal edge from the initial duct form fitted into the second/longer duct, I applied some micro inside the duct and covered it with peel ply.
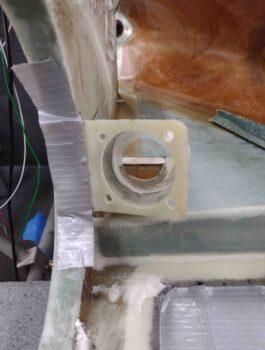
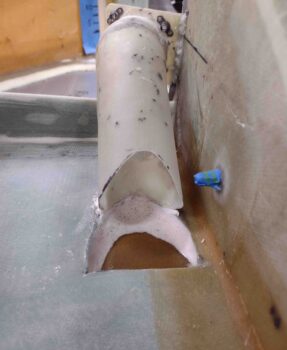
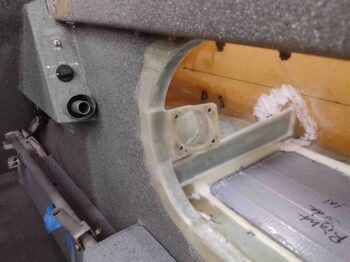
I then test fitted the GIB air vent mount and duct in relationship to the NACA scoop opening.
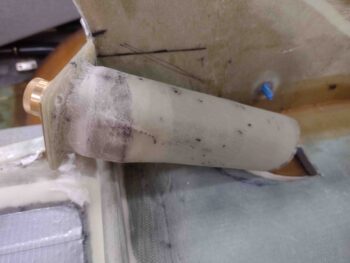
Here’s another shot of the test fitting. I then slowly started cutting away the NACA end of the duct.
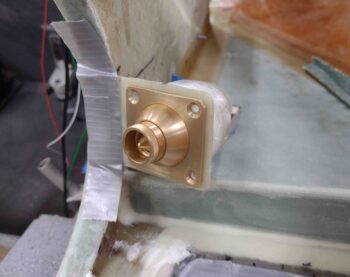
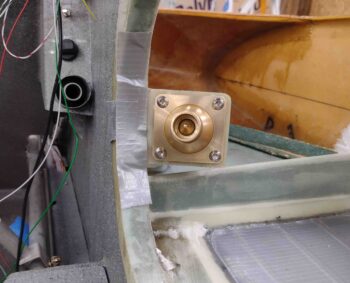
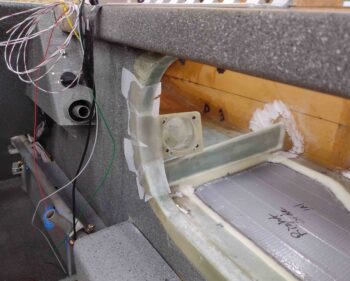
I wanted to see how the entire assembly would look in general with the gold eyeball vent installed, so I temporarily set it in place.
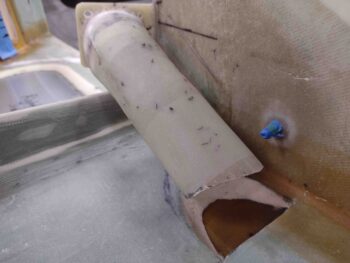
With the eyeball vent removed, you can see a fairly straight shot —even with the slight duct dogleg— between the eyeball vent and the opening of the NACA scoop.
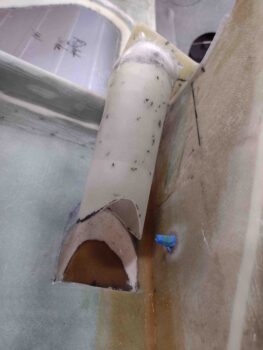
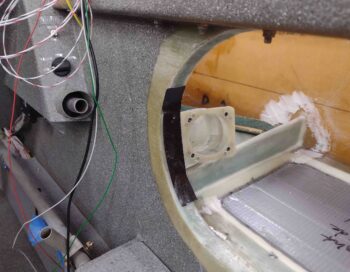
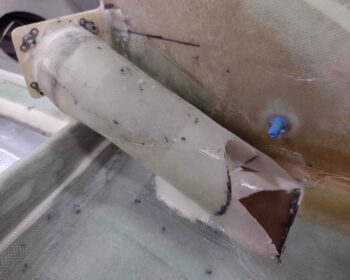
After a good 45 minutes or so, I had finally trimmed the GIB air vent duct to the shape I wanted, that gave me the best interface with the NACA scoop opening.
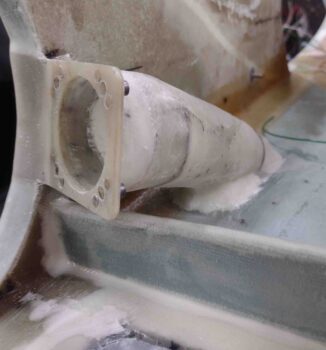
I should note that I was a hair off on my floxing and glassing the forward duct segment to the aft one… the resulting gap between the mounting flange and the curved sidewall opening when the forward duct was aligned with the NACA opening was a bit more than I wanted. Although I hate doing this, I took the heat gun to the flange and warmed it up enough where I could manipulate it to then narrow that gap. My heat trick didn’t eliminate the gap completely, but it did reduce it significantly to a point where I was comfortable with it. Moreover, my issue with the gap wasn’t really appearance, but rather weight and strength… I didn’t want a larger glob of flox having to take up the space in the gap and do most of the work of holding the mount to the sidewall.
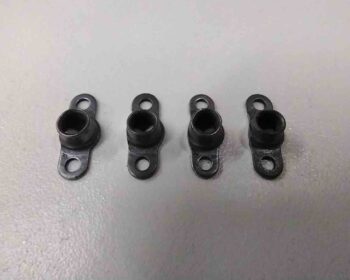
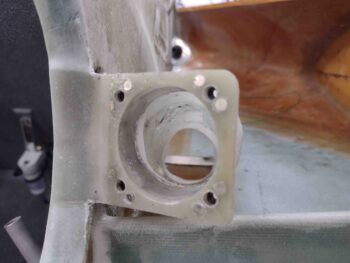
With the initial fitting out of the way, it was now time to mount the nutplates to allow for securing the GIB eyeball vent assembly to the mount/duct. I used the smaller footprint nutplates but even then the space was so tight I ended up grinding off the small flange on the side of each nutplate. If you look closely below, the left sides of the nutplates are shaved off.
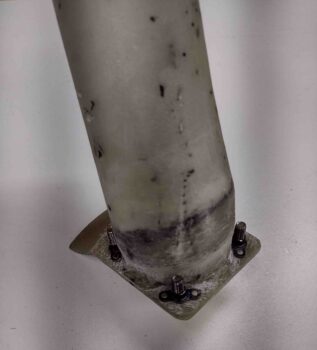
I then mounted the nutplates to the flange on the GIB eyeball vent mount… which was a very tight fit. (Note the micro under peel ply in the opening of the duct).

My riveting of the nutplates to the eyeball vent mount flange was NOT pretty or done with style, since getting the rivet squeezer into place was challenging lacking the space. But the nutplates work, are functional, and I’m pressing forward!
Again, I wanted to see how the eyeball vent would work and ensure the screws all fit well so I mounted the eyeball vent to the mounting flange with button head screws. I’m very happy with the outcome so far.
With nutplates on the mounting flange and my configuration looking good, it was go time. I floxed the mounting flange (aft) to the curved sidewall opening, using just a small blob of 5-min glue in the center for a really fast attachment.
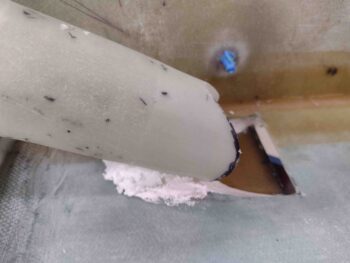
Concurrently, on the forward (NACA scoop) end I piled up some dry micro in a U-shape leaving just about a 1/4″ square area open right where the duct actually contacts the strake/baggage compartment floor. I also placed a small dab of 5-min glue on the bottom edge of the duct to secure it to this aft edge of the NACA scoop opening.
[I had thought about using pour foam in lieu of the dry micro, but I saw that building dams and shaping the foam would be a lot more challenging —especially on the fuselage wall side where it’s tight— than just using dry micro here.]
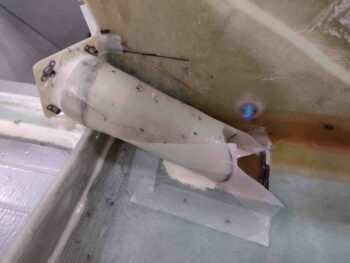
After holding the GIB air vent mount & duct assembly in place and tight against its contact points for a few minutes, I then cleaned up the area around the mounting flange. As you can see in the pic I also used a strip of black Gorilla duct tape to secure the aft mounting flange in place against the curved inside fuselage sidewall.
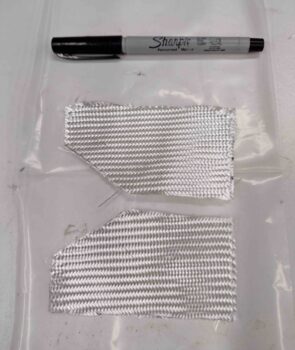
For securing the forward intersection between the duct and the strake/baggage compartment floor, I had measured (and test-fitted) a template to create 2-ply BID tapes for the job. I then prepregged the 2-ply BID pieces and wetted them out. The Sharpie pen is just there to show the size of the BID plies.
I then applied the BID tapes to the junction between the duct and the strake floor. This of course cleaned up the initial jagged shape of the dry micro and smooth it out. I added a ply of BID on the very aft side to cover a narrow strip of dry micro that was peaking out, and then I peel plied the majority of the exposed edges of these BID plies… to eliminate the possibility of hands/arms/fingers getting shredded when putting stuff in/out of the baggage compartment.
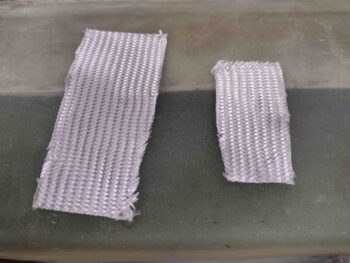
On the mounting flange attaching the assembly to the sidewall, I grabbed 2 pieces of BID out of my scrap pile to use… the larger BID piece on the left covered the flange on the outside corner and overlapped onto the inside fuselage sidewall.
The smaller piece of BID on the right went into the inside corner on the outside wall of the fuselage and can be seen in the pic above with a small piece of peel ply on it.
I then peel plied the outside corner BID layup and left it to cure.
A few hours later I pulled the peel ply from the outside corner BID layup that secures the GIB eyeball vent mounting flange to the fuselage sidewall. I then razor trimmed the overhanging glass and sanded the remaining peel ply goobers to clean it up.
I also pulled the peel ply on the duct-to-strake baggage compartment floor/NACA scoop layups and cleaned it all up as well.
I realized I hadn’t gotten a good pic of the dry micro filler so I added this shot here.
Finally, I pulled the peel ply and sanded the inside seam of the duct segments to smooth out the internal contour of the GIB air vent duct.
I have to add/shape some micro inside the added BID plies on each side of the NACA scoop. I then have one more 2-ply BID layup to close out the NACA intake scoop and this GIB vent addition will be complete. I plan on knocking that out first thing tomorrow.
Your passengers are getting a huge amount of consideration for their comforts. I hope they appreciate it. Mine won’t be so lucky! Sorry in advance if you get a ride. Hahaha
No doubt brother! They better friggin’ appreciate it!