
With my plies of BID —one for each side— already cut, I went ahead and sanded and micro’d the added foam before laying up the glass. I then peel plied both sides.
While the layups on the inboard edge of the fuel site gages cured, I whipped up a batch of EZ Poxy flox using my just tested (and passed) E-Z 84B hardener.
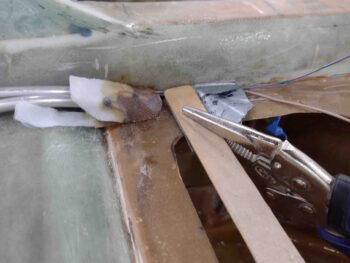
I then applied a nice good bit to the top and inside of the aft corner flange of the left fuel tank around the exiting fuel vent lines (sorry, no pic right now of the inside flox). I then peel plied the external flox since it will get more stuff added to it when the strake tops are closed out.
Note that I also used the last little bit of micro in the cup from the fuel site gage layups to seal/secure the fuel vent lines going into the turtledeck.
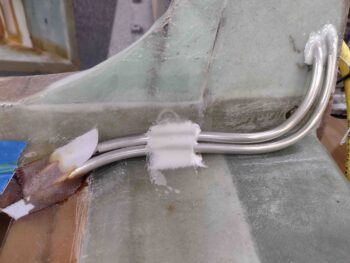
I then did the same thing to the aft corner of the right fuel tank, except with the stir stick being held in place that in turn is holding the fuel tank probe wires in place, I didn’t have access to slather up the underside of the fuel vent lines exiting through the flange. I’ll get that in the next day or so.
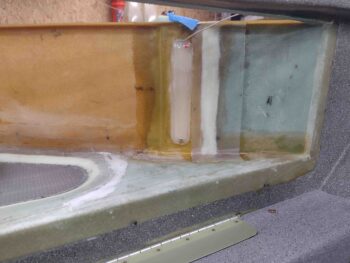
I then took a hard look at the required angles and possible configurations for the outboard strake storage compartments. I jotted down some ideas before turning back to the task at hand: cleaning up the fuel site gages edges.
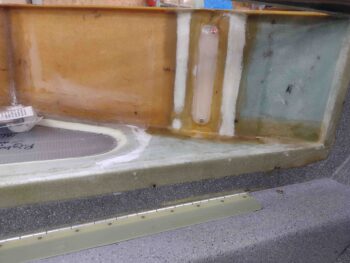
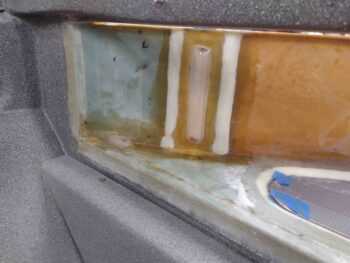
Once again, I used MGS 335 with fast hardener, so after a little over an hour the layups were cured to the point of being dry to the touch. I pulled the protective tape off the site glass bubble on each side and reversed it to focus on the outboard/forward side of each site gage.
I then thoroughly sanded and cleaned the the outboard/forward edge of each site gage.

I then built a couple more taped cardboard forms and poured in some foam. I got greedy and tried to do both from the same cup of pour foam, which resulted in only the top half of the right side getting foam. I had to cut another hole half way down, reset my funnel in place and do another pour. Sorry… no pics.
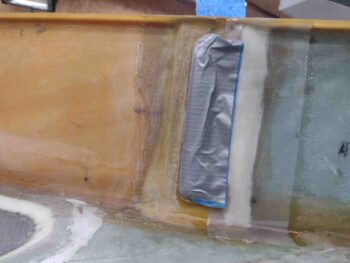
I then sanded down the set foam on the outboard/forward side of each site gage.
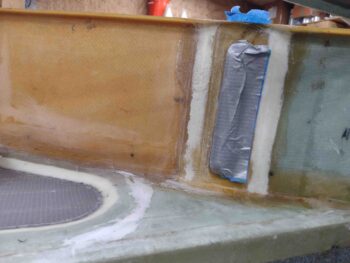
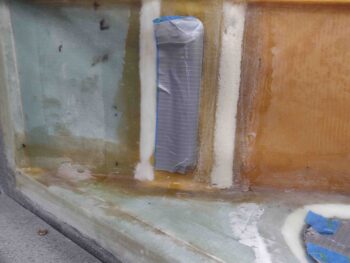
And then as I did on the inboard/aft sides, I micro’d the foam and laid up a prepregged ply of BID on each side. I then peel plied the layups.
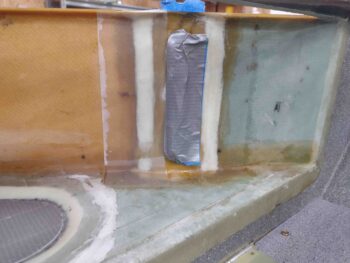
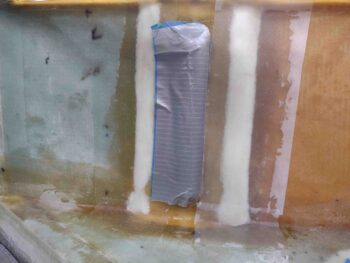
A few hours later I pulled the peel ply and Voila! The fuel site gages are looking WAY better and much less lopsided top-to-bottom on the edges than they did before. Although not perfect, this is significantly better than what I had before!
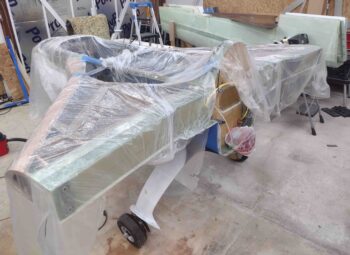
With yet another significant prerequisite task completed, I wasn’t in the mood to start on another in-depth task this evening. So I decided to knock out some painting.
First up, I shot some primer before some interior gray granite paint on the very aft ring of the O2 bottle mounting sleeve. This is pretty much all that will be visible when it’s installed in the strake baggage compartment.

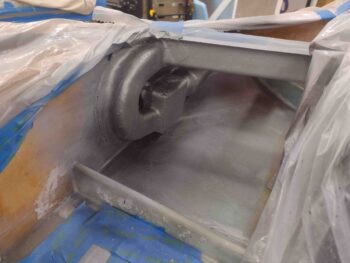
I then spent a good little bit of time covering up the fuselage, strakes, sides, etc. with some protective plastic for a specific part I wanted to paint that will not be the standard gray granite interior paint scheme.

I decided to spice things up just a bit and have some fun by highlighting the RAM air scoop/vapor box/ducts by painting them a metallic silver. First up I hit the components with some primer.
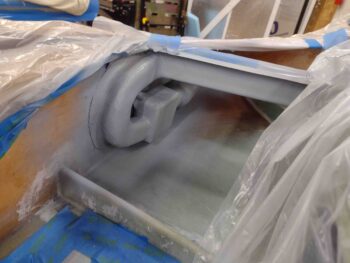
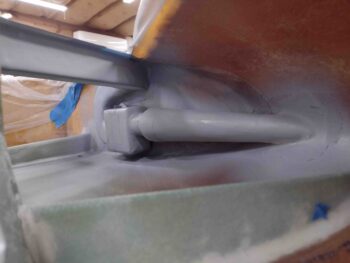
Before shooting some medium dark metallic silver paint onto the RAM air scoop components.
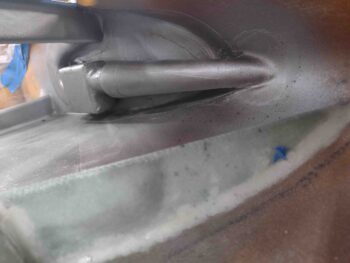
I’ll let all the painted stuff cure overnight before clear coating them in the morning. And with that, I called it a night.