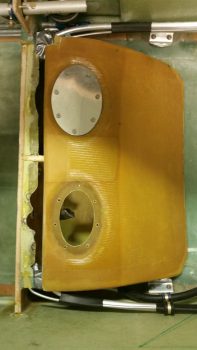
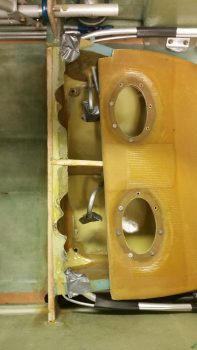
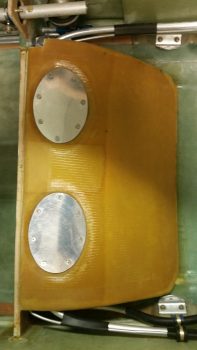
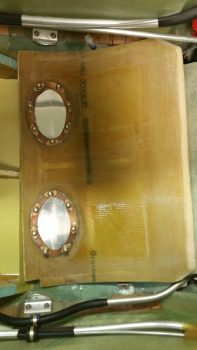
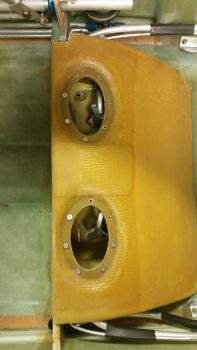
For clarification, the glassing of the fuel sump top is final, but I have yet to flox/glass it in place on the sump tanks assembly . . .
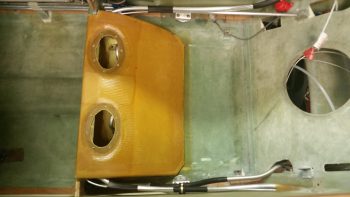
So, as I mentioned last night, I let this layup cure to around 80% and then placed it on the sump assembly in the fuselage, where I then weighed down the edges (again) and cooked it to perfection with heat lamps! Before I actually put it back onto the sump assembly though, I did pull the peel ply (while it was EZ!) and knife trimmed all the edges. I also removed the peel ply intersection ridges and drilled out the 7 screw holes on each access hole perimeter flange.
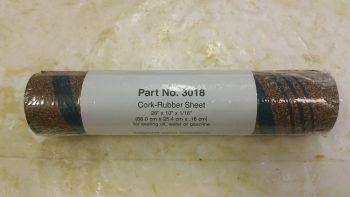
The usual temp that the backseat area gets to in this configuration is around 120° F, so I figured I would let this cook for about 4 hours. I went upstairs and spent a good hour migrating my blog posts over into the build log pages, and then went for a quest for some 8-32 screws –which I bought at my local village hardware store– and some cork-rubber gasket material, which I picked up at a local auto parts store.
I chose cork-rubber gasket material since the sump access port perimeter surfaces that I’ll be using the gasket on is not perfectly even nor totally smooth. Cork is the most forgiving of the affordable gasket materials, and from all accounts, once married up with the venerable Permatex #2, it’s virtually leak proof.
Upon returning home I got everything prepped and ready to start back in on the sump build, while the sump top itself had post-cured for right at 5 hours. Again, I had pulled all the peel ply and knife trimmed it before I cooked it, so this time around I was just checking the layup over for quality (there were some minor delams where I folded the glass around the edges of the foam which I simply cut away) and giving the edges a nice final sanding with the hardboard [FYI/FYA – Pulling peel ply after a part has been post cured is NOT fun!].
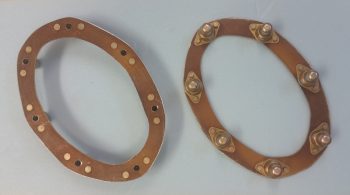
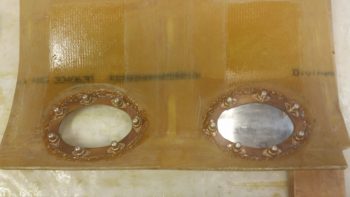
One of my first tasks out of the gate today was I needed to trim down the outside edges of each sump access hole nutplate ring. Since the glass on the bottom side around each hole went just a tad wonky on me, I needed to make the footprint for each nutplate ring as narrow as possible. I trimmed up each ring with the Dremel tool and a cutoff disk, and then finished the edges with a couple rounds of filing.
I then started an iterative process of trimming away half circles on the front sump wall flange to allow clearance for the nutplate rings once mounted in place on the underside of the sump top.
I was also a bit concerned with the sheer wonkiness of the right access hole glass, so I checked it out first with the top cover plate in place to ensure it didn’t need any special attention. Actually, the only special attention I had to give anything was that I had to curve the top cover plates a bit for a better mounting contour. Now, even though these cover plates are ONLY 1/16″ 2024 aluminum, they are NOT EZ to bend!
Well, I got the top plates bent well enough, and then test mounted them both into place with a full compliment of 8-32 screws into their respective nutplate rings on the opposite/interior side of the sump top.
After a half dozen rounds of trimming the sump front wall mounting flange, I was able to slide the sump top into its final mounting position with clearance for both access holes’ internal nutplate rings.
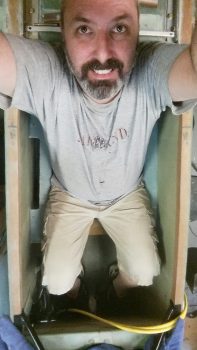
With the sump top ready to be mounted, I decided I wanted to try it out to ensure there just wasn’t any unforeseen problems I was missing. Plus, I was curious how well it would work. The picture below may seem like some crazy guy taking a really weird pic, but I wanted to show that both GIB left & right armrests were installed, plus the sump top was in place. This is the first time that I’ve sat in my plane when it actually felt like a real seat in it!
How does the thigh support feel? AWESOME! I haven’t sat in too many Long-EZs, but whether or not any builder is using a thigh support sump, they should definitely go for the thigh support. It felt so good I almost fell asleep just sitting there pondering my build!
The next step was to get the access holes’ nutplate rings floxed to the hole flanges on the internal side of the sump top. I whipped up some flox using E-Z Poxy and very carefully floxed the nutplate rings in place. I had planned on using the access hole cover plates to help ensure the angle of the screws were correct, but right about when I was getting ready to put the screws into the flange on the left side, I heard a huge crash upstairs. Something had definitely fallen. Well, my fingers were all covered with flox so I quickly put the screws in and tightened down the nutplate ring, removing all the excess flox that was oozing out as I tightened the screws.
Before I did the right side, I went upstairs to investigate the potential calamity . . . well, apparently Jack Wilhelmson’s canopy latch kit didn’t like my tall surround sound speaker and took it out. I uprighted the speaker and separated the two, and then got back down stairs to finish floxing on the right access cover nutplate ring. It was then that I noticed in the distraction of the loud bang of something falling down upstairs, that I had forgotten to place the access hole cover in place on the left side. Oh well, I’ll mount it when I do the screw swap outs to ensure the screws don’t get floxed into place.
I plan on letting the floxed nutplate rings cure for 2, if not 3 days, to ensure the flox really holds these guys in place.
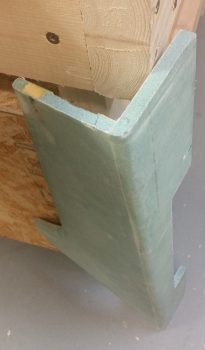
Since I knew I would mixing up flox, before I started the process of floxing on the access holes’ nutplate rings I marked & dug out the foam on the front edge of the GIB right armrest to create a mounting tab hardpoint. Thus, after floxing the nutplate rings into place, I added some micro to the leftover flox for a good mix of flocro and then filled in the hardpoint divot on the GIB right armrest. When I get a chance over the next few days, I’ll flox the GIB right armrest mounting tab into place onto the aft side of CS118 mini bulkhead.
Tomorrow I’ll be working on other tasks besides the fuel sump as I let the floxed nutplate rings cure fully. I do need to prep the internal floor of each sump tank with a 4-40 click bond (most likely a roll-yourself one) to ensure the Holley Hydramat stays in place on each side. I also need to clean out the fuel lines before the sump top gets glassed into place.

