I started out today by spending over 6 hours updating various parts of this website. I cleaned up the electrical system main page by adding subpages, and I added a subpage to the Chapter 21 page for the GIB thigh support fuel sumps.
I then finally made it into the shop very late in the afternoon to start in on the fuel sump top exterior. My goal was to get the sump top exterior glassed today, which I was able to do.
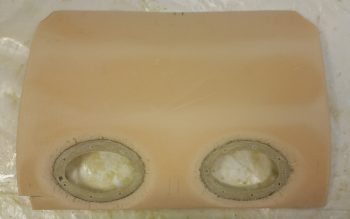
I started by spending a couple of hours working on the sump tanks access ports’ holes. My theory on the glass pulling away from the foam was right for the most part, which distorted the shape I had created for the way the metal nutplate rings would lay in the depression ring around the underside of each hole. Being an ‘ol Bomb Disposal Tech, I simply improvised, adapted and overcame by taking the topside hole perimeters down to glass. The glass ring around each hole isn’t optimum for what I want to do, but it’s definitely workable. Most notably, what it will probably mean is that each top cover plate will have to be curved slightly to match the (now) more curved shape of the just glassed rings.
Once I removed the foam around each access hole and took the hole perimeter down to glass, I then found the optimum alignment between top and bottom plates, then drilled the 7 screw mounting holes in the ring around each access hole.
I then sanded a transition in the foam around each hole to the surrounding foam surface, and also hit the raised “square” edge lines that where an unwanted byproduct of curving the foam with heat and using a weighted board to make the curve. I should note that I had already sanded both the right and left sides of the top to get the edges aligned with their respective sump walls, exterior/outboard sides. Once I cleaned up the top foam surface of the sump top, I then vacuumed it in prep for glass.
As for the glass schedule for the exterior of the fuel sump top, it was slightly different than how the rest of the sump was glassed.
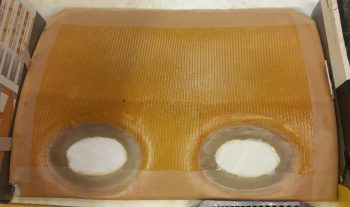
Obviously I want this sump to be more impact resistant than if I had just used BID alone. So, for both strength and impact resistance, and to add another ply for fuel resistance, I made the first ply on the interior sump walls Kevlar. However, since the top will see its fair share of things dropped on it, getting stepped on, pointy things trying to pierce it, etc. I went ahead and put the Kevlar on the exterior side, covered by a ply of BID. I did add another 6″ wide strip of BID across the front of the top cover for strength, especially for the glass-to-glass access holes’ rings. Then, immediately around each sump tank access hole, I added another ply of BID.
Finally, before I laid up the final top ply of BID, I added a small strip of Kevlar in the center in between the access holes (where the bridge of the “nose” is on my very humanoid looking layup . . . can you see the eyes?!) which is essentially where the GIB will step every time when ingressing & egressing the airplane.
I’ll let this layup cure to around 75-80% (i.e. in the morning) before placing it on the sump assembly in the fuselage, where it will get weighed down on the edges (again) and cooked to perfection with heat lamps!


