
Today I was able to knock out the left strake T-hat layups.
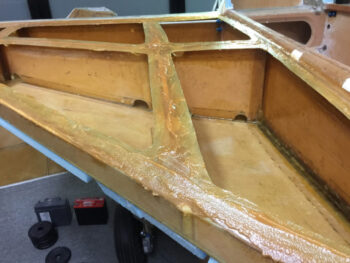
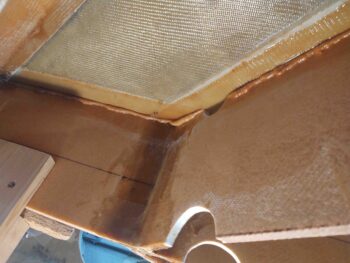
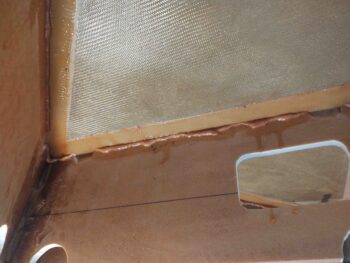
If you are wondering what strake “T-hats” are, I added a couple of shots of my buddy Dave Berenholtz’s excellent strake work here. T-hats simply provide more surface area to allow you to add a bit more flox to secure the top skin to the strake rib and baffle framework, since there are very little (in my case) to none (in some cases) direct glass-to-glass BID tapes applied to secure the top skin to the strake structure. You can see more of Dave’s excellent blog here.
In fact, the plans method has you apply the top skin directly to the ribs and baffles with nothing but flox piled up along the top edges of those. I would say that the T-hats also optimize leak mitigation since at the tank perimeter there is simply more glass and containment of fuel.

Now back to my T-hat effort on the left strake. I started out by wetting out and applying all the pre-cut strips of peel ply.
To review: the packing tape is a release to allow for the top skin to be removed after all the T-hat layups cure (in the chicken-vs-egg sequencing required (or desired) in these builds, access to layup BID tapes is required to mount the bottom skin… thus the need to have the top skin go on last). The peel ply is left on top of the T-hats, and once removed allows for minimal prep when it comes time to really flox the top skin back onto the cured T-hats.
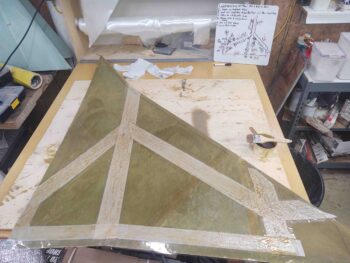
I then laid up the 2-plies of BID that will make up the T-caps. Notice the peel ply along the back edge of the top skin (bottom of pic) where there is no glass. This glass will get added after the skin is in place and weighed down. Along the aft edge and in the inboard corner the BID is laid up as a simple 90º/right angle corner bracket, if you will… not a T-hat.
I then whipped up some flox and applied it to the top edge of the majority (save the very outboard, which are accessible to get BID tapes) of ribs and baffles. This is close to what it would look like in the plans if I were simply going to plop the top skin down in place and call it a day.
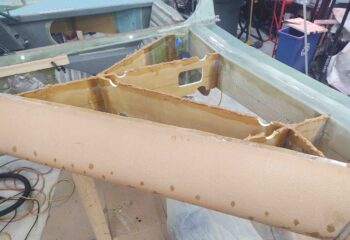
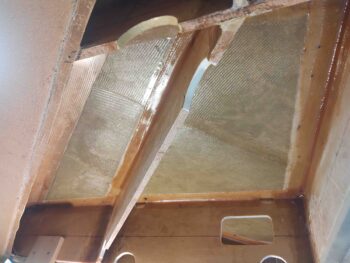
Once I put the top skin on, again with the laid up T-hat BID tapes and peel ply, I got a good squish on the rib/baffle-top flox. Here’s the R23 rib with the DB baffle taking up mid-to-right of the pic.
Another shot with the DB baffle along the left edge of the pic, and the R23 rib at the bottom half of the pic.
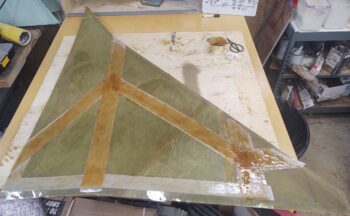
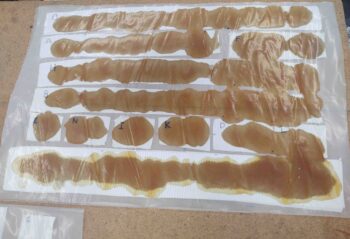
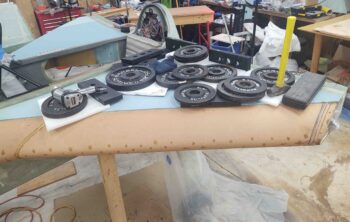
I thought I had taken a shot of ALL the glass, but apparently not. This is about 60% of the glass that went into securing the horizontal underside (overhang) of the T-hats to the vertical rib/baffle 90º to the T-hat. As you can see, I prepregged all the BID tapes.
Here we have the final T-hat layups (looking inboard)… ready to be left alone to cure.
And here’s all the weights I piled on the top to keep the skin down tight against the ribs and baffles. Note that I put a support 2×4 along the front edge of the R23 rib to ensure I didn’t stress this strake out too early with weight.
Tomorrow I plan on prepping the right strake for the T-hat layups, including sanding all the ribs and baffles, applying packing tape to the skin core, and cutting all the peel ply and BID tapes. However, I’m going to let this cure for at least 24 hours before I take the weights off and pull the top off, which will delay the right side T-hat layup for another day or so.