
Today was all about configurational planning and test fitting the right strake’s outboard fuel rib/wall, which of course is the converted original OD rib.
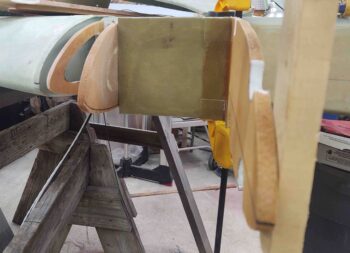
First off, here’s a quick look at the peel ply on the bottom edge of the layup that secures the extended outboard fuel cell’s aft wall to the outboard side of the R45 rib. Not sure why during the cure it lifted off a bit in the corner, but after a bit of judicious sanding it will be fine to add more additional glass along that edge.

I then cut the outboard fuel wall rib (again, original OD rib) to shorten it to length to align the tip of it with the very outboard rib (left) and the R45 rib (right).
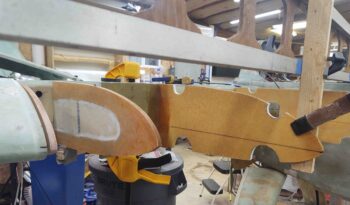
As you can see, I will need to shape and trim the aft wall of this extended fuel cell both top and bottom to match the contour of the top and bottom strake skins.
Also, as it sits in the pic, the rib itself stands a bit too high for the top skin to fit correctly, so I’ll need to trim it down a hair (note trim line along forward bottom of rib).
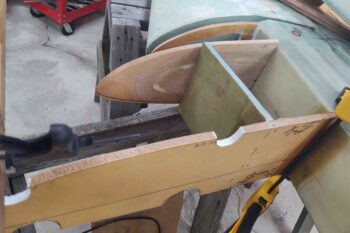
Yet another shot of the outboard fuel tank wall rib, which is just the front portion of this converted OD rib. The aft squarish pocket will not contain fuel. In fact, after pondering this configuration for a bit, I decided to open up the aft portion of this outboard rib so that moisture doesn’t get trapped inside this enclosed, isolated pocket.
Here’s one last shot of my test fitting the outboard fuel tank rib/wall. Again, note the trim line along the forward bottom of the rib.
I plan on glassing this rib in within the next day or so, and then will start working on the left side outboard fuel tank wall/rib. The left will be a bit more entailed since I’ll have to do some pre-configuring on it to allow mounting the 2 GRT EFIS magnetometers.