
I started off today assessing mounting hardware, components and configuration for the FT-60 “Red Cube” fuel flow sensor and the oil heat pump. I also reviewed my plan & sequencing for the sump build and all the stuff that needs to be mounted in the aft seat area.
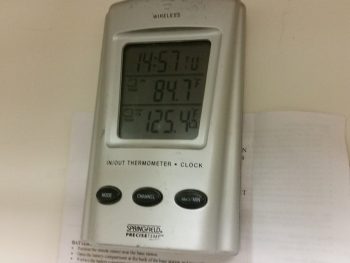
Meanwhile, I checked the temp on the curing GIB thigh support fuel sump base glass, which appeared to have held steady at around 125° F all night long. This was the last check I did before taking off this afternoon to go visit some friends.
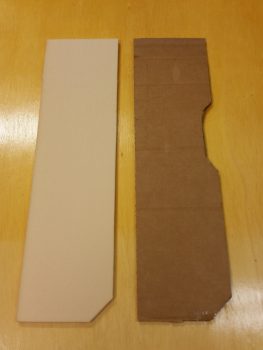
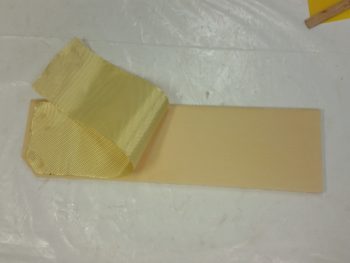
Before I left though I grabbed a fresh sheet of 3/8″ Divinycell foam and marked it up to cut out the front wall of the fuel sump.

Here’s a shot of the actual foam piece I’ll be using for the fuel sump front wall piece, next to the highly modified (from initial version) cardboard template.
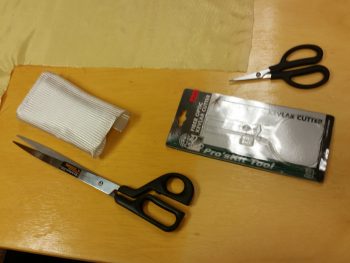
I then cut 2 plies of BID out (one ply each for the front & aft side, respectively) and a ply of Kevlar for the initial ply on the aft side (interior) of the front wall.
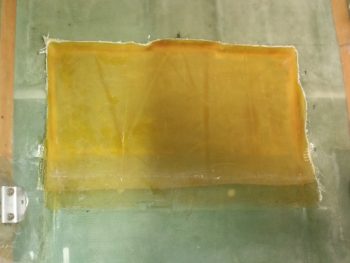
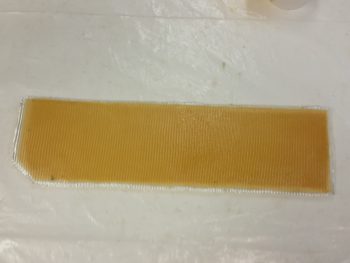
After returning later this evening [including a couple of really good conversations with Nick Ugolini on a myriad of topics], I removed the heat lamps and started pulling the peel ply from the fuel sump base glass layup.
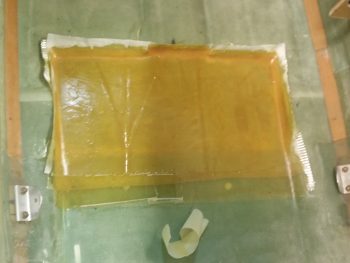
I have to say that at the seam of the peel ply pieces a fair amount of it was a bear to remove. After some perseverance I finally got the peel ply removed, although I’ll still hit that area with some good sanding to ensure it’s all good. I also took my razor knife and did an initial trim of the excess glass.

I then started in on glassing the aft side/interior of my fuel sump front wall. I started by whipping up some E-Z Poxy and then some micro slurry for the foam. After I got the foam surface micro’d, I then laid up the first ply on the interior sump wall: Kevlar.
I then laid up a ply of BID over the Kevlar.
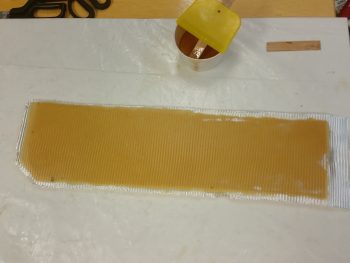
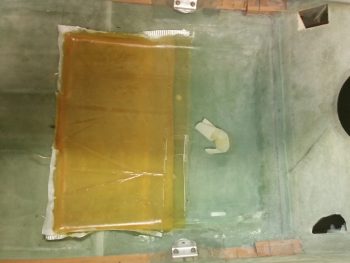
Here’s a shot of the final 2 ply Kevlar & BID layup fully wetted out & trimmed for the fuel sump front wall interior side.
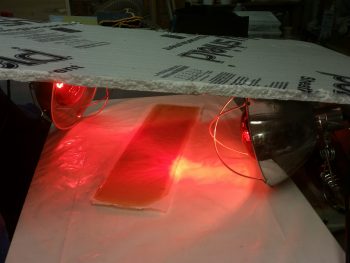
I then peel plied the layup (no peel ply pic except below) and set it under the heat lamps to cure. I had a fair little bit of epoxy left, so I slathered it on the top of the peel ply, so this guy was definitely laid up WET!
After I got the glassed front wall piece situated under the heat lamps, I then climbed underneath the fuselage and wrestled something fierce to finally pull the plugs out of the sump fuel drain valve hard points. I should have done it a lot earlier as the epoxy was at a good green stage, but I forgot so these suckers were in there good. But again, I prevailed!
Tomorrow I’ll continue to work on the fuel sump, and continue planning out the component installs for the area around the sump.