
I started out today actually spending a little bit of time assessing and then making a decision on transferring my oil pressure sensor wires from the right-side firewall P10 connector —which is nearly all GRT EIS (Engine Info System) related wiring— to the left side P9 connector, which had about half the positions open. The 14-pin P9 connector is the more robust “power” connector while the 28-pin P10 connector is all smaller wire D-Sub “signal” type connections.
But it does make sense physically since the P9 connector is just inches away from the oil pressure sensor block. I just wanted to assess how “pure” my circuit logic should be with what wires are going to what components… no chaotic “Thunderdome” wanted in my GIB headrest/engine electronics bay!
My decision of course triggered updates of my firewall component diagram and connector detail sheets. On my wiring diagram I just made a pen & ink change for now.
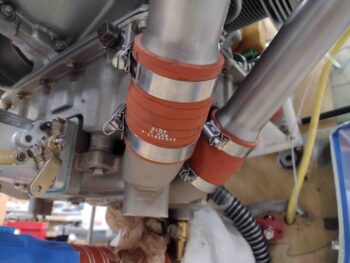
Out in the shop I first spent a little bit of time knocking out a good-to-do task that I picked up from some RV guys that they did on their Superior cold air plenum pipes: safety wiring the hose clamps to ensure they stay tightly secured.
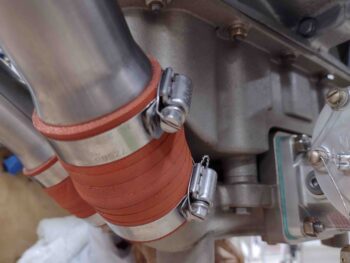
I don’t know if these things have a history of loosening up, since I don’t see this much on standard air induction pipes on Lycomings… but it doesn’t hurt anything and may prove beneficial. Monkey see, monkey do!
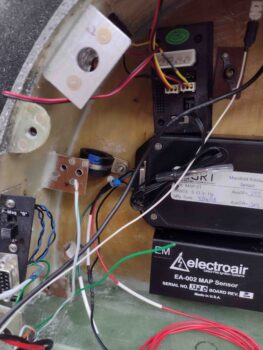
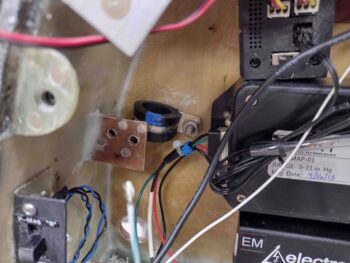
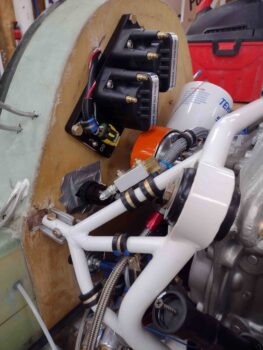
I then drilled a hole through the firewall just to the side of my GRT MAP sensor for a future CS screw that will serve as a “poor man’s” Clickbond to secure an Adel clamp that will in turn wrangle all the P10 connector wires.
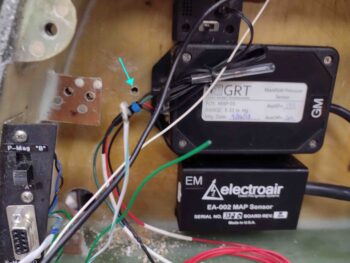
To ensure I didn’t puncture or damage anything on the engine (e.g. the oil filter) I wedged some wood on the aft face of the firewall for my drilling op.
I have a number of Clickbonds on hand, but I was told by the Cozy Girrrls that they won’t be selling any more of them. I could roll my own like Marco does, but I’m currently lazy and don’t want to spend the time doing that, so I will conserve them when and where I can.
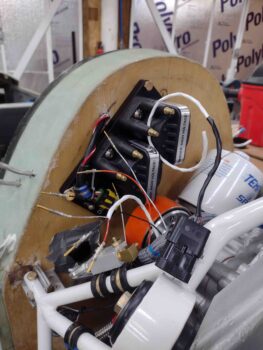
I then installed the Adel clamp on the back wall of the GIB headrest/engine electronics compartment.
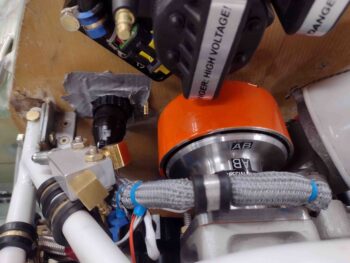
A bit closer shot of the Adel clamp here. I’ll note that I positioned it to allow me to easily swap it out to a larger clamp if need be.
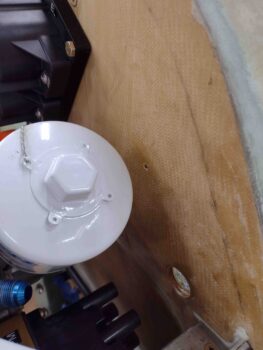
I then took a few minutes to clean up the layups on the lower corner nutplate tabs that I glassed last night. I had already pulled the peel ply and here I’ve razor trimmed the excess glass plus gave the edges a quick sanding. They’re much more secure now.

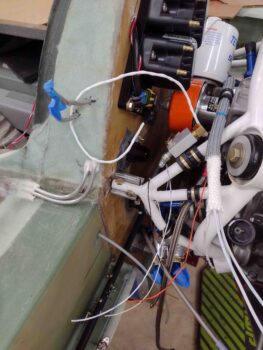
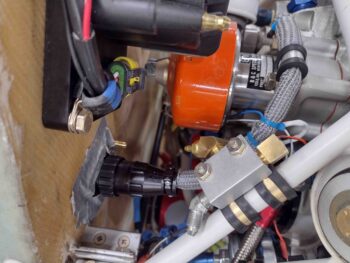
The next 6-7 hours were all focused on 2 things: First, the placement and securement of the engine side MAP manifold distribution block, which ties into cylinder #3, the P-Mag and the firewall forward 2x MAP sensors.
Starting out I wasn’t even sure if I was going to use the manifold block or simply use another Tee fitting as I did with the oil pressure sensors. I spent a good 45 minutes trying different mounting locations on the engine mount, but this one gave me the most direct route from cylinder #3 to the firewall barbed pass-thru fitting, and thus the MAP sensors themselves (most direct & shortest route as per the Electroair manual). I have to say that although this spot requires that I purchase a shorter 12″ -3 AN hose, it more than exceeds my requirements for placement and configuration. I’m very happy with it.
The second target was knocking out prepping and terminating all the wires for the P9 firewall connector, including the 4 new oil pressure sensor wire additions. I cut and terminated the wires for the oil pressure sensor first, added a small dab of Loctite to the screw threads and applied dielectric grease to the ring terminals before determining length, cutting and terminating CPC pins on the other ends of the wires. Of course all the terminated ends were pull and continuity tested.
Three (3) of the wires utilizing my P9 firewall-transiting connector are from what was a fully enclosed single 3-wire cable (plug & cable shown) that goes to the Electroair Mag Timing Housing, which resides in the left magneto position on the engine accessory case. These wires connect to the Electroair electronic ignition controller inside the GIB headrest. Below you can see that I cut the 3-wire cable and terminated the individual wires with CPC pins.
For the B&C SD-8 backup alternator specifically I added added a length of white composite hi-temp sleeving before the wire-wrangling gray sleeving (secured in place by high-temp blue zip ties). I also added an Adel clamp to one of the top studs on the SD-8 to secure these 2 big wires, and subsequently this entire new P9 connector cable. I then cut the SD-8 wires to length and terminated them with CPC pins… which I’ll point out that were so large that I couldn’t employ my normal CPC connector terminal crimper. I had to go old school and use the older style terminal crimper to get the job done.
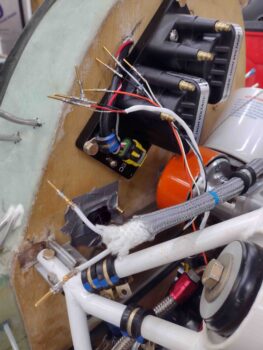
I haven’t done any wiring on the P-Mag yet, but in order to complete the assembly of the P9 connector I crimped a CPC pin onto the end of a white 20 AWG wire (P-Mag “kill switch”) and blue 18 AWG wire (P-Mag power) and plugged them into their respective slots. You can see these wires draped over the oil filter below… as well as the clearly completed engine-firewall “power” P9 connector. It’s no perfect beauty queen as far as cables go, but it should definitely be functional and get the job done!

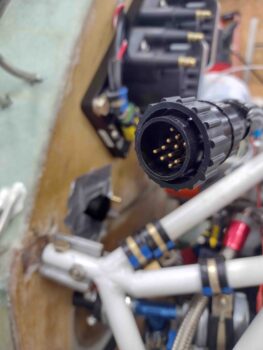
Here we have a shot of the pins inside the engine side of the P9 “power” connector. Again, P9 is a 14-pin connector and with the addition of the 4 oil pressure sensor wires I now have 3 positions open.
Here is the engine-side “power” cable & P9 connector terminated into the firewall side of the P9 connector. Although the pressure from this somewhat stiff cable pulled the bottom of the taped firewall-side P9 connector up just a bit, this is very close to how the cable will run when connected.
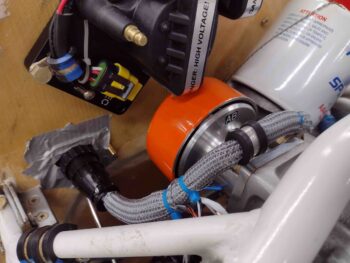
To ensure that the clearance and configuration were both good, I then reinstalled the MAP distribution manifold onto the engine mount. Before reinstalling the MAP manifold I gooped up the fittings and torqued them to specs.
However, once the MAP manifold was back in place I needed to tweak the P-Mag fitting (up/aft side) and the inboard 45º street elbow (that I stole from the sniffle valve… it’s getting a cleaner, upgraded fitting soon) that will connect the MAP distribution manifold to the MAP firewall pass-thru barb fitting.
I do need to add one more piece to this puzzle, and that’s a 3/16″ barb fitting with 1/8″ NPT threads into the 45º street elbow. I should be able to pick up one of those tomorrow. Here I installed a 1/8″ barb fitting just to show the configuration and how the tube will connect in a curved fashion between the firewall MAP barb port and the barb fitting on the engine MAP manifold.
So after a VERY long day/night, and with 2 very good target kills under my belt, I’m calling it a night. Tomorrow I plan on working the fuel pressure sensor install before I then start making up some fuel and oil hoses.