
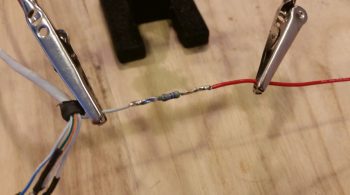
I started off today with yet another attempt at getting the wiring for the dimmers knocked out, thus my first task was to review the wiring diagram. Well, as soon as I opened my wiring book my eyes went straight to the fuel site gage wiring. Hmm…. well, looked like I totally forgot to wire in the 470 Ohm LED light resistor at the beginning of the fuel site gage LED wire lead. Thankfully this end of the fuel site gage video camera & LED light leads cable is already torn apart having just looked for (and found) the electrical short.
I then removed the heat shrink from the fuel site gage LED light wires to then insert a 470 Ohm resistor in series on the positive power wire (red). I then soldered it in place.
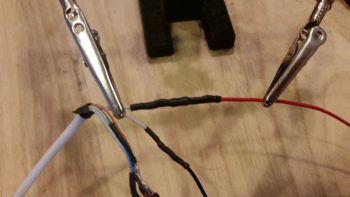
And of course reapplied some more heat shrink over the solder joints.
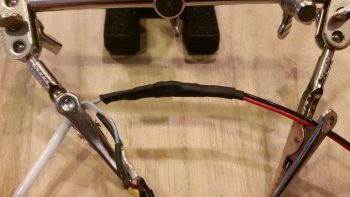
And secured both fuel site gage LED wire leads together with heat shrink.
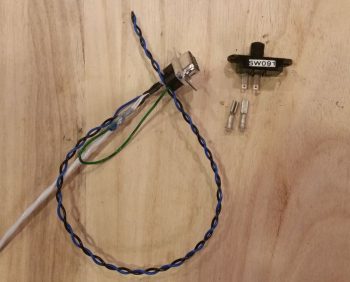
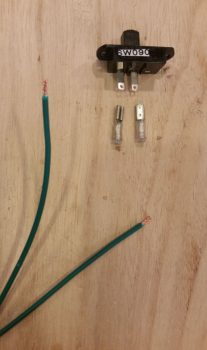
In my latest delivered Mouser order I received the 2 slide switches that I had ordered (correctly this time!), one for the PMag “A” Power Curve to “B” Power curve switch (sw091) and the other for the Electroair MAP sensor signal cutoff switch used in troubleshooting (sw090). I swapped the labels out with the mini toggle switches that at one point I had planned on using, and then got to work terminating the ends of the wires with narrow PIDG Fast-ON terminals.
After I crimped on the pair of Fast-ON terminals, I then applied heat shrink to the connectors and overlapping onto the wires. I don’t know why I didn’t clue in on this earlier (it takes me a while to “get it” sometimes!), but I figured that I’ll start actually covering the business –exposed– end of a lot more of my Fast-ON terminals.
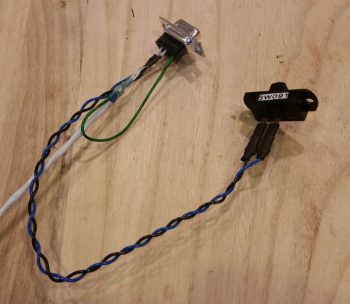
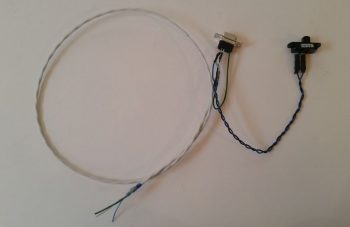
Here’s the entire setup for my PMag “A” ⇔ “B” Power Curve setting switch and my 9-pin D-Sub serial I/O cable to connect a laptop to the PMag unit to allow for use of the EICAD program.
I then prepped the Electroair MAP sensor signal wire by cutting it and prepping each for termination with a narrow PIDG Fast-ON terminal.
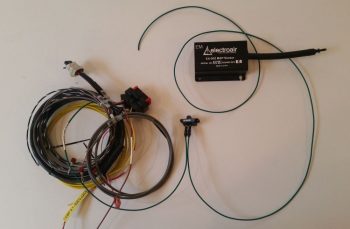
And here’s the Electroair setup showing the entire wiring harness for the Electroair EI control unit, the now switched green MAP sensor wire and the actual Electroair MAP sensor unit itself.
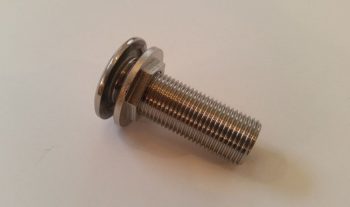
I figured I would add one more thing for show & tell, and that’s my 1/2″ ID stainless steel threaded firewall pass-thru that I picked up to assess. As with all stainless steel, it’s a bit hefty currently, but when I end up lopping off the majority of the threaded part it should weigh in at about 2 oz. as mounted on the firewall. I should say IF it gets mounted since I’m still in R&D assessment mode.
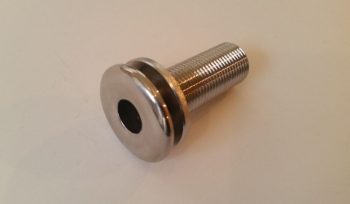
Here’s an aft shot of my 1/2″ ID stainless steel threaded firewall pass-thru.
A couple more things that of note build-wise is that although I have been attempting to knock out the dimmers, I just did a “standard” software update on my Mac laptop that has pretty much thrashed it. I spent hours removing and backing up all my Gigs of build pics and build files, etc. to no avail. It’s now very unstable and slow and I’ll have to contend with this sideline issue.
I did do a thorough assessment of my pilot map light and did a circuit redesign after some mental armchair flying to change the switch from
- TOP: White
- MIDDLE: Off
- BOTTOM: Red
to
- TOP: White
- MIDDLE: Red
- BOTTOM: Off
I was able to this by swapping out the switch from an ON-OFF-ON switch to a spare progressive ON-ON-ON switch I had on hand. As you can see, this allows full down to be “OFF” to minimize having to try to nail the middle position during, say, turbulence. Plus, it really does make it progressive and much easier to manipulate without looking, especially in trying to stay clear of the white light position during night ops.
My other piece of noteworthy news is that I spoke with my engine builder and we’re scheduled to finish the engine build this coming Wednesday, Feb 28th.
Over the next few days –in addition to some final electrical system taskers for the time being– I’ll be doing some major shop cleanup both in prep for the upcoming (I hope!) good shop build weather, and to organize space for the engine.