
And strike 3! I’m out!
Or maybe the title of this blog post should have been: “How to destroy a dimmer” . . .
Hmmm….?
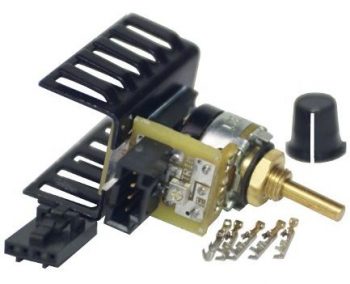
Well, below is the subject dimmer. I pulled the photo of this dimmer unit off of Stein’s site, although I did not buy this specific dimmer from Stein. I wanted this pic because it shows the SOUSOO (“Sockets of Unknown Style or Origin”) in the lower right corner. Actually, I can spot right off that the terminals in this pic are different (read: standard)than what came with mine, which NONE of my plethora of crimpers worked on the very odd esoteric terminals included with my dimmer.
I want to start off by saying that mistakes, redos and rework is often the bane of the homebuilder. Moreover, although sometimes there are issues with the products, I am very, very happy that people make products at home to sell to (other) builders. Now, that being said, I am NOT a fan of this dimmer. Or more specifically, the mechanics required surrounding the installation of this dimmer.
The instructions were vague enough that I got the terminals –which were all grossly disfigured to start with after my multiple attempts to crimp simple 22AWG wires to these frail terminal bodies– installed backwards . . . again there was no clear instructions on which crimper to use (etc.).
Thus, when I hooked it up and tested it on an LED, it didn’t work. Then after taking some readings with my multimeter, I realized it was all in reverse. Ok, I’ll just cut the lines and resolder the leads back on in reverse. The crimps were so bad/frail that the wire-stripping process on the red power wire broke the socket in half, merely yanking the half-terminated wire right out of the terminal socket. On the black ground wire it wasn’t quite as ugly, with the wire simply and cleanly exiting the terminal altogether, leaving it in the connector block.
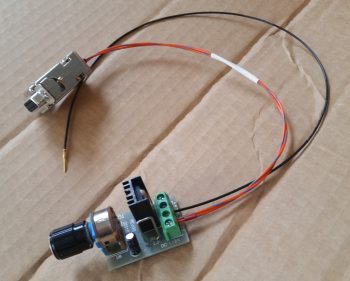
So, with no usable connector and no extra sockets (I couldn’t have extricated the broken or stuck terminals anyway), I simply broke the plastic housing away on the dimmer itself to expose the 4 male pins to allow me to solder the wires right to the pins.
Improvise, adapt and overcome… right?!
Well, in my continuing comedy of errors, I noted on the first two pins that the solder was just not wetting out well. Sometimes it can be a little finicky, but I will note for the record that the risk of using a soldering iron with the heat dial on the handle is exactly what happened here: it was turned down about 100° C off max (which is required on this soldering iron). This meant my “dwell time” in fiddling with getting the solder to wet out was 2-3 times longer than it would have normally been.
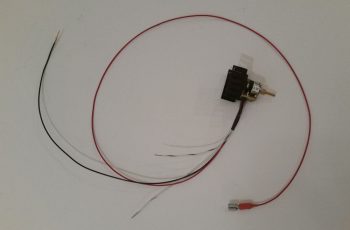
No biggie (I was unaware of this at the time… so ignorance was bliss for about 15 minutes), since I found the issue by the third pin and quickly resoldered the first two pins. I then covered all my good solder joints with some nice heat shrink and all looked ok. Here’s the finished dimmer wire connections, round 2.
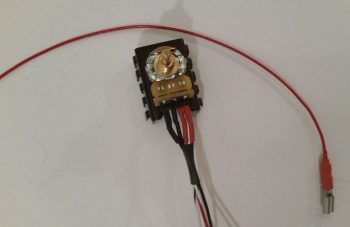
And a closer shot of the soldered wire connections.
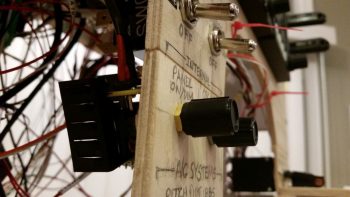
I then remounted the dimmer in my panel mockup, connected the power, ground and LED test light leads and fired up the panel. Nothing. I tried and tried different configurations, popped 2 (more) fuses in trying to get voltage readings off the tiny board…. and eventually pulled it off the panel to inspect it.
In inspecting the PCB, it looks as if my soldering dwell time (we’re talking 6-8 seconds vs 2-3 seconds) actually caused some cross-flow of solder on the board itself. A bit unusual for what I’ve experienced, but it’s the only thing I can figure out, because after 20 minutes of messing around with the dimmer, it was still simply INOP.
Thus, I’ll save the heat shrink as the most expensive heat shrink I’ll probably ever buy, and order a new dimmer…just not another of this make, but rather another one of these:
I’m not a fan of hoity-toity, fancy-schmancy esoteric connectors that are difficult to work and frail in construction. For something along the lines of a dimmer I’ll use screw post terminal blocks any day of the week and leave the “cool stuff” where it belongs, in the garbage can.
So, on my next ACS order (of course I just fired off an order earlier today!) I’ll order a new dimmer to replace this POS one. Tomorrow will be shop cleaning/organizing day since, if all goes well, I’ll be bringing my engine back home Wednesday (fingers crossed!).