
Today I got the minimum completed to call the strake prerequisite build tasks complete.
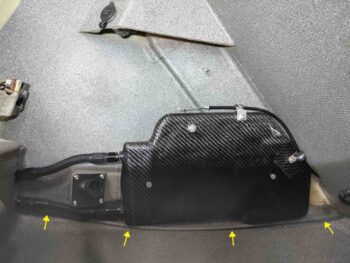
I started off today with the final install of the landing brake. Yep, that’s right FINAL install. I say that because since 2012 I’ve had on my list of things to do: replace the shipping bolt on the landing brake with aircraft grade hardware, and today I did just that (green arrow).
I’ve been trying to coordinate all my actions and avoid any potential conflicts in spacing, routing, interference, etc. as I get down to the final install of a lot of these components. As is often the case, for quite a few years now I had envisioned the landing brake wiring running over to the power cable bundle somehow down in the farthest lowest aft corner where the pilot seat back bulkhead meets the floor pan. As I was assessing this earlier in the day it hit me that A) it would be visible from the back seat (not necessarily horrible, but I like how the paint turned out down in that area!) and B) maybe because I’m a few years older, but working down in the cramped corner is not fun nor easy.
Then I had a Eureka! moment… a last minute epiphany. Why not drill a small hole bottom centerline of the seat and take the wire straight through the middle, then over to the power cable bundle from the front side of the seat! <face palm>. Yep, I sez to myself: that’s exactly what we’re going to do… SO much easier.

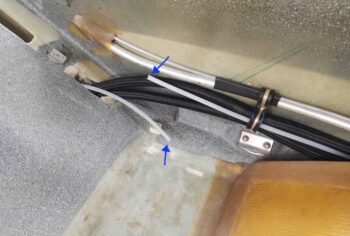
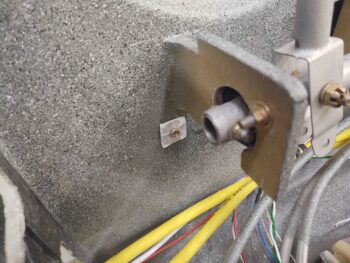
As you can see, in the yellow oval above is the drill bit peaking through. Below you can see that I drilled the hole at a sharp angle to facilitate the wires heading over to the big power cable bundle on the left side of the screen. [Note the Molex connector above–light blue arrow].
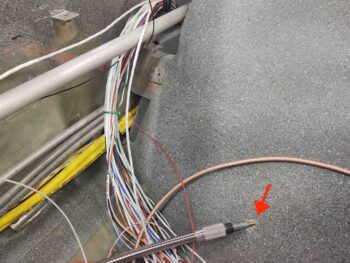
Since I can’t seem to find the opposite side of the Molex connector anywhere, I summarily lopped it off and decided to stop wasting time and simply hardwire this thing. The best color choices I had in 18 AWG wire was green and white, so they quickly got pressed into service as I solder spliced them to the existing red and black power wires.
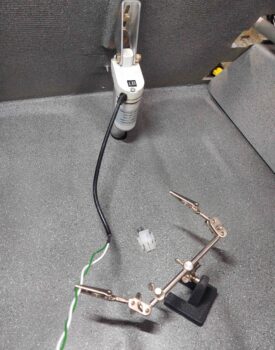
I covered a good bit of the landing brake’s new green and white twisted power wires with about 6″ of heat shrink, overlapping a bit onto the existing black power cable. I then did some cable management with an Adel clamp and rubbery zip tie.
When I developed this plan earlier in the day (as well as contemplating my relief tube last night), I primed and painted the protective Nylaflo tube so I didn’t have to mess with it later.
I ran out of my favorite 5-minute glue so I had to run to the store for some supplies acquisition. When I returned I 5-minute-glued and floxed the protective wire conduit in place on the front side of the pilot seat. I then temporarily secured the tube with strips of Gorilla duct tape.
Note that this wire conduit sits horizontally at the approximate junction point between the upper and lower seat cores of the front seat, so I expect it shouldn’t cause any bumps or fitting issues.
I then moved on with my flox and 5-minute glue to secure the also-painted and emplaced Nylaflo relief tube.
Here we have the upcoming junction (with double-sided nylon 3/16″ barbed connector) between the relief tube segment I installed in the gear (from aft/left side) and the new segment of relief tube that I just installed tonight (from right side) . . . the ends denoted by blue arrows.
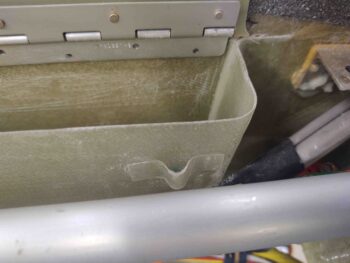
Also with the flox I made up I did a few tasks that honestly seem to be an endless flow of small –but important!– jobs. Here we have a tab floxed to the rear seat armrest storage box for securing the upper wiring bundle (I actually decided to add one more towards the front after this one went on).
And yet another tab in the front seat area for also securing the upper wiring bundle.
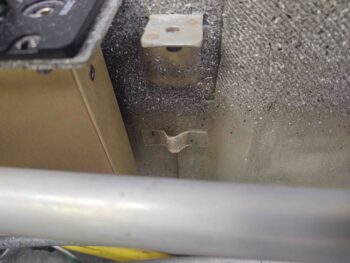
Finally, just forward of the pilot control stick mounting bulkhead I floxed a 10-32 RivNut into the side wall that will secure yet another upper wiring bundle Adel Clamp.
Although there are some general minor tasks that still need to be accomplished dealing with wire & cable management –mainly in the front seat area– I consider all the critical strake prerequisite items complete and am giving myself a green light to start back full tilt on the strake build.