
I started out today by re-drilling the holes in the pilot seat thigh support CAMLOC receptacle mounting tabs where I had added 2 plies of BID (no pic). I was ready to install the mounting tabs with CAMLOCs in place, but realized it wasn’t the best idea with only one CAMLOC receptacle on hand. Obviously I need to order one, so I added it to the small ACS order that I’m compiling.
I then started reviewing what I had left to finish my panel mockup. With the 2 AG6 warning annunciators, I’ve ridded my panel of all extraneous warning lights save 2 (one red, one green) that specifically are allowed on my panel for the JBWilco Gear & Canopy warning system. Interestingly, out of all the LED panel assemblies I have in stock, I did not have a green light. I had the nice Cadillac of LED panel lights that my friend Eric at Perihelion Designs peddles, of which I have a Red & Amber version of, but I don’t have a green. I went to Eric’s site, but alas I didn’t see them on there (I’m sure even if I missed it he would sell me one). Interestingly I found Eric’s nice LED assembly on Stein’s site… ok, I had an identified source of supply for my green light! Check.
So I marked up the panel using the sexy red LED panel light assembly I had on hand … Uh, Houston we have a problem, and it’s space…. not outer space, but space for the fancy robust flange included with Eric’s LED light assemblies. They could easily fit, but at almost 0.45″ in diameter, they do take up some real estate!
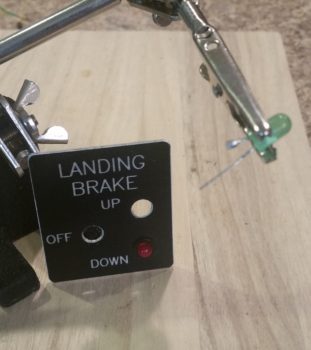
In my quest for a green LED, I did run across Jack Wilhelmson’s Landing Brake switch plate that included a red and green LED… bingo! Of course I had to rid the LEDs of their soldered component webbed matrix bondage stuff, but after I whittled them all down I ended up with a green and red LED light, albeit with short, solder-encrusted stubby leads. Knowing how these lights look in a panel, plus the diminutive plastic “grommets” used to hold them in the panel, I decided to go with these. Plus, I really like repurposing stuff that might otherwise just end up in an old parts bin!
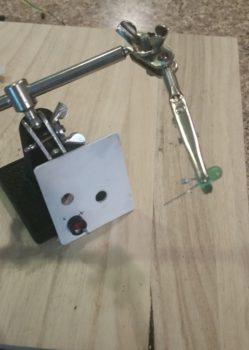
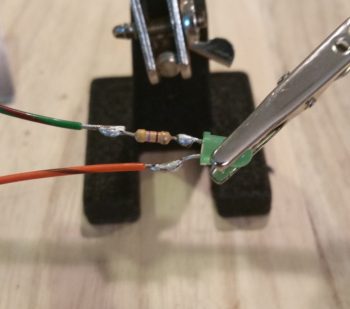
I checked Jack’s included landing brake wiring schematic (I’m too lazy to attempt deciphering the resistor color band codes) to determine that he did in fact use a 470 ohm resistor . . . perfect! Thus, I reused that as well in my evil plan here. I soldered Jack’s repurposed resistor to Jack’s repurposed green LED. I then added the appropriate color-coded 22 AWG wire leads by soldering those into place as well.
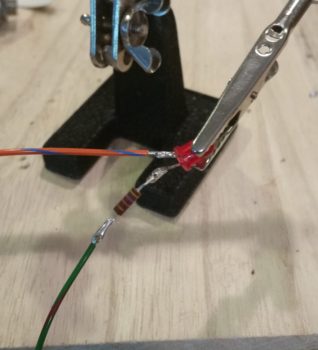
I then soldered one of my benchstock 470 ohm resistors to the red LED, and also soldered on the appropriate color 22 AWG leads.
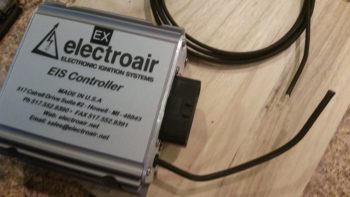
While I had the soldering iron fired up & soldering kit ready to go, I knocked out a quick soldering task that I had open on the books: I ridded myself of a big, bulky, heavy and unnecessary deutsch connector that resided on the ground wire to my ElectroAir EIS Controller. To be clear, in my latest phone call with the ElectroAir bubbas, I specifically asked if this would present any issue: obviously they stated no, the connector was simply in place for ease of installation. In my case, it would not make installation easier . . .

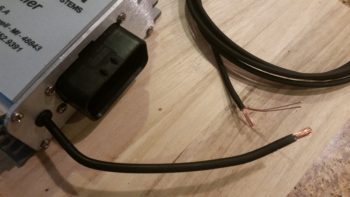
So, I unceremoniously lopped off each side of the deutsch connector.
I stripped the wires and prepped them for splicing (notice the longer 3-strand “tail” on the top wire).
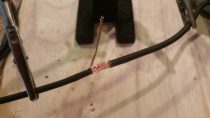
I then joined the wire together, wrapped the lead (“tail”) around the joined wire bundles to secure the wires together tightly, and then soldered the whole affair.
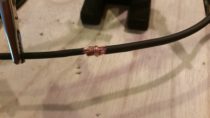
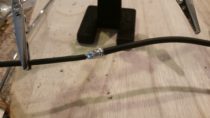
I then added a piece of heat shrink to finish out my ElectroAir EIS Controller ground wire streamlining . . . Voila! Aaah, much better.

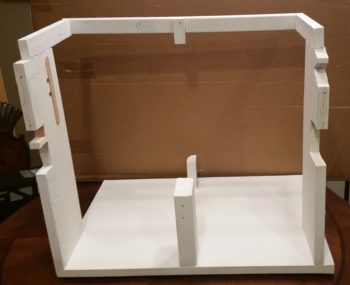
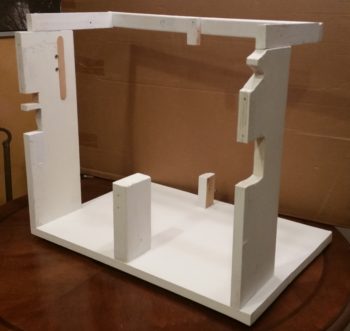
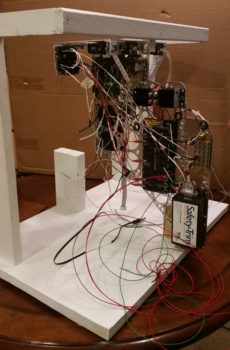
Unlike my cleaned up ground wire above, my next task was to add complexity to the instrument panel mockup base by creating a mounting frame for the Triparagon, since it’s such an integral part (read: epicenter) to the electrical and avionics systems.
I added a top frame assembly that mimics the F28 bulkhead, including a mounting tab for the Triparagon. On the forward bottom side I simply screwed a small block of wood in place. I then slathered on a couple quick coats of white primer to make it all match and let it cure while I was drilling and cutting out mounting holes in the panel mockup.
Quite a few hours later, I brought the dry instrument panel mockup base upstairs, since it was ready to be pressed into service.
I then mounted the Triparagon in place.
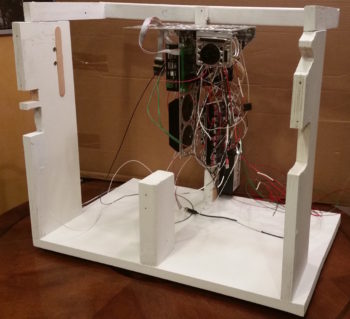
Here’s an aft/side shot of the Triparagon.
I then mounted the ELT control head (bottom component on center strut), switches and circuit breakers into the panel mockup. Right as I was getting ready to mount the panel into the base, I realized I had left out the diminutive Push-to-Test button for the top row Korry lights [I haven’t even address the actual wiring for the GNS480 external Korry light annunciators yet]. So after figuring out it’s exact location, I hauled the panel down to the shop and quickly drilled the mounting hole (with some requisite panel-thinning immediately behind it so it would fit depth-wise). I then mounted the panel onto the base front uprights.
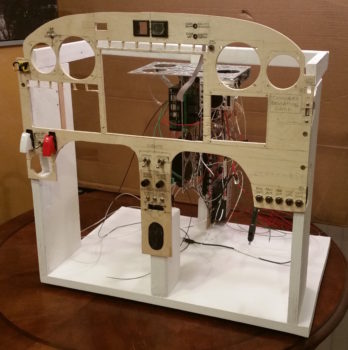
I then mounted the compass card, GRT Mini-X EFIS, TruTrak ADI, and MGL clock.
I didn’t realize it until much later, but for some reason I inexplicably mounted the MGL clock on the front (outside) of panel vs from the back. After looking at it for a bit, I realized that I really like it this way. I will try mounting in the traditional manner and assess, but I am really liking how it looks mounted on the front side of the panel.
I then went offline for a bit panel-wise and had to dig into the Garmin GNS480 unit manual for the details on installing the backplate onto the mounting tube (bracket). My GNS480 came with the tube and an entire new mounting kit replete with a myriad of tiny screws, washers, etc. to assemble the backplate, D-Sub connectors and antenna connectors.
Once I got the backplate installed onto the mounting tube, I then mounted the tube into the panel mockup.
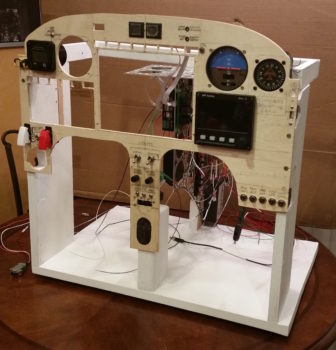
I then spent the next 2+ hours installing the remaining panel components: GNS480, GRT HXr EFIS, and Korry indicator lights.
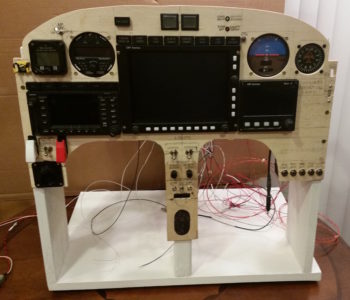
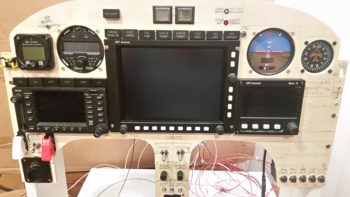
I also mounted the 2 LED warning lights that I soldered up previously. Here’s a shot of just the instrument panel . . . closer to what you would actually see in the plane.
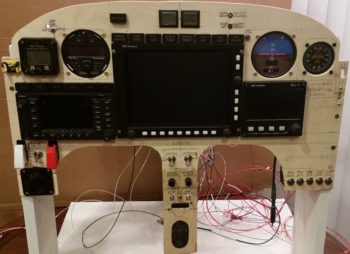
And an even closer shot of the panel components.
Over the next few weeks/months I’ll do all the wiring and cross connects for the panel & Triparagon. I would like to get it wired to the point that in the next 7-10 days I can fire it up and check out the HXr to ensure all is good with it. As for now, I’m done with my major digression and will get back to working on the pilot seat area & left pilot armrest console in my continuing quest to finish off the lion’s share of interior cockpit component installs and configuration. This will of course facilitate closing up the top of the nose and getting the canopy installed.