
Today was still all about the panel mockup. With a number of changes I’ve made to the wiring on the back side of the panel, I needed to check those changes to ensure they would fit my design requirements. Once I determined that I was heading in the right direction, I made the changes which required a fair amount of pulling wires out primarily out of the PQD P6 connector and then re-adding them to other connectors and/or splicing them directly into the Triparagon side wiring.
The main reason behind all this is I had a major rethink on the process of removing the panel. I had giant brain blank earlier when I didn’t take into account that my removable panel component wiring wouldn’t be routed through one giant opening in the panel, since the current composite “shadow” panel will in most respects mirror the outer 0.063″ 2024 aluminum panel overlay. This means as wires from each instrument traverses their respective holes to a common connector point, then if I tried to remove the panel after disconnecting that one connector (eg PQD P6), all the wires would get hung up at the connector as the panel was being removed.
Hard to follow? Think of an octopus on the back side of the panel reaching each of his 8 tentacles through a different hole on the panel. Then think of him grabbing ahold of 8 rods larger than each hole. You can’t pull the octopus away from the aft panel unless he releases all the rods, and you can’t pull the rods away from the front of the panel without squishing poor Mr. octopus against the back of the panel. In this scenario though, all the rods (instruments) are attached to the front panel overlay and Mr. octopus represents the panel quick disconnect (PQD) connector, while his tentacles represent the respective wiring to each instrument… hope this analogy makes sense.
Ok, so I removed the PQD P6 connector out of the equation for my MGL Clock, TruTrak ADI, and a few other panel mounted components. Thus, instead of A→B, B→C, I now simply have A→C with B (P6) cut out of the pic. Of course this change entailed lopping off wiring terminating pins & sockets and then re-terminating the wires by splicing them together. It also required a fair amount of wire relabeling as well.
My new method of panel removal for these smaller components will be to simply remove the connector at the back of each component. In the end, it should only add a few minutes to panel removal, and will also allow me a cleaner wiring harness overall since I won’t have as many convoluted wiring runs.
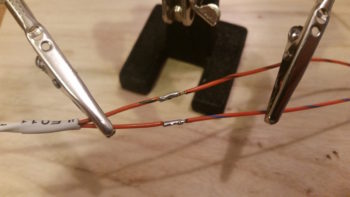
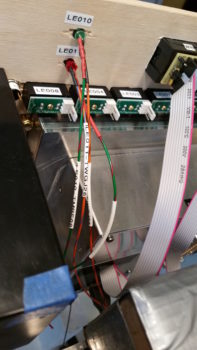
In line with all I stated above, I finished the wiring for the red & green Gear/Canopy warning system wires that I initiated yesterday. I soldered spliced the wires together for a straight shot from LED light to warning module on one side, and LED light to E-Bus power on the other. I of course labeled all the wires as well.
If you recall, I have 3 connectors that make up the Panel Quick Disconnect (PQD) connectors: 24-pin AMP CPC, 37-pin D-Sub, and 15-pin D-Sub. On the PQD scheme, I switched things up a while back by claiming the 15-pin D-Sub to handle the GRT Mini-X wiring only, while the 37-pin D-Sub handles the GRT HXr wiring only. However, since I didn’t have enough pins in the 37-pin D-Sub for all the HXr connections, I decided to separate out the 4 power/ground wires and connect them through a mini-Molex connector.
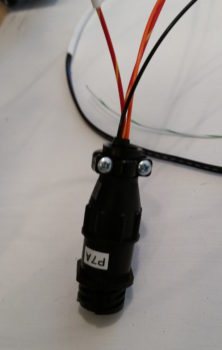
Thus, since the 24-pin PQD P6 connector is an AMP CPC connector, when I pulled the main, secondary, tertiary and ground wires from the P6 connector, I would need to cut off these connectors to re-terminate the wires for the new 4-pin mini-Molex connector. I then remembered that I possibly had a spare 4-pin AMP CPC connector, and after some searching around –Voila!– I did. I weighed the AMP CPC vs the mini-Molex and the difference was the AMP CPC being 0.08 oz heavier. With a much better & more robust connection, plus not wasting a couple of dollars in lopped off connectors (which I’ve already had a fair amount of!) I pressed forward with simply removing these wires out of the P6 connector and popping them into my new P7 connector. So HXr power wires on the Triparagon side are complete.
I guess my old military side came out because I then went through and labeled all the D-Sub and antenna connectors on the back panel of the GNS480 GPS unit.
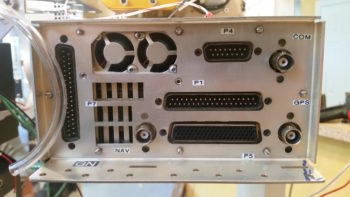
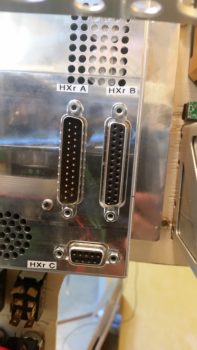
And the back panel of the GRT HXr EFIS.
The moving of wires off of one connector onto another connector, or connecting straight to a wire lead all required a ton of annotations on my connector pinout diagrams. I have company coming in tomorrow, and a heavy social calendar this weekend, but I will try to get all these changes on my electrical system updated ASAP. After I get the required adminstrivia updated, then I can get back to actual shop work.