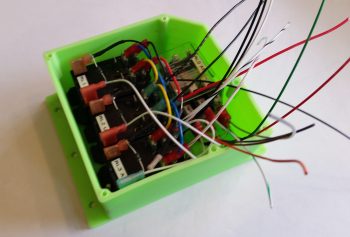
Today I received the Nose Gear RCU box in the mail from Marco. He did a great job and the relays fit perfectly! A little too perfectly actually . . . The holes are aligned exactly as I designed them in CAD, except I put them in a little too close to the end wall of each relay so that I won’t be able to fit a normal aviation/MIL-SPEC nut on the screw.
After thinking about this issue a bit I realized that the answer was fairly simple: nutplates. Nutplates are narrow enough that they’ll fit and even though a bit higher cost solution than normal AN nuts, they’ll definitely do the trick.
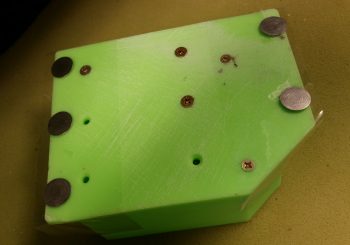
With the relay mounting issue out of the way, I prepped the box to be mounted with 5 Clickbonds. The mounting holes’ diameter were just slightly narrower than designed, so I spent a few minutes drilling those out to size. I then taped the back side of the box with clear packing tape. After roughing up the back sides of the Clickbonds with sandpaper, I cleaned them with Acetone. I then mounted them in the box, whipped up some 5-min glue and put a good dab on each Clickbond face.
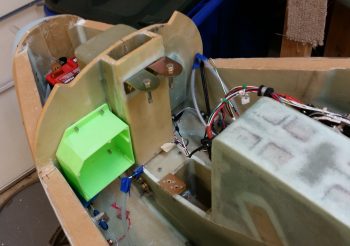
I then mounted the box on the aft side of the Napster bulkhead aligned with some position marks that I had previously made. I held the box in position for a little over 5 minutes to let the 5-minute glue cure.
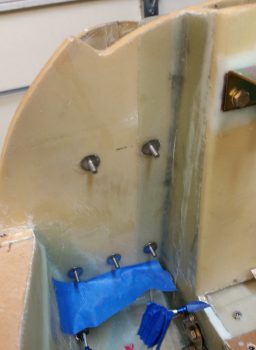
With the 5 Clickbonds attached to the aft face of Napster I pulled the RCU box off of the bulkhead. The Clickbonds set well and the attachments were solid. I cleaned up some of the 5-min glue gunk and left the Clickbonds alone to fully cure.
While the Clickbonds cured, I measured out the dimensions I would need for the BID tapes for the top and bottom row of Clickbonds. I wanted at least a good inch from each Clickbond stud to hold it securely in place. I cut 3 plies of BID 2″ high and with a slight angle for the outboard side of the upper row, for a total of two sets of 3-ply BID. I then configured the BID plies in plastic for pre-preg setups and called it a night.


