
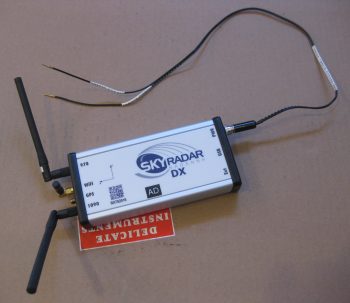
Well, as per usual I knocked out one of the “low-hanging fruit” items first. I had to go down to the shop to measure some stuff & check component fit in the nose, so I drug the Radenna SkyRadar ADS-B receiver and power cable down there with me. I checked the required length of the cable and then upon returning upstairs, I cut the power cable. This included cable, by the way, had a cigarette lighter charger adapter on the end of it.
I then verified positive & negative sides of the cable and then terminated each wire with a D-Sub pin. Later on, without the ADS-B receiver in hand, I looked up its 2-character code and somehow derived that it was “DX,” so that’s what I used on the labels. Then after affixing the heat shrink labels I realized that the code was actually “AD”…. not “DX”. Ugh! So, instead of redoing the labels, I double checked my list and sure enough I wasn’t using “DX” for anything else, so I simply swapped the component ID sticker label to DX. This all took place after I took the pic below, but the component ID is now DX for the ADS-B receiver. Endless fun in Never-never Land kids!
I then got to work on my main task of the day: getting the heated pitot tube circuit completed between the airspeed switch #3 (40 Kt) control relay and the pitot tube power relay. Since I got the correctly rated relays –as defined by Bob at TCW Tech– in from Mouser, I could move forward on wiring up my #2 and #3 airspeed switches. To be clear, my buddy Marco is working on a high end control box for the heated pitot tube that when completed can easily be implemented into this system. As for now, I’m simply using a $3 relay to ensure that my pitot system is ready, barring any delays that Marco may incur on the Arduino-based heated pitot tube control system he’s developing. After all, he has an airplane to build as well!
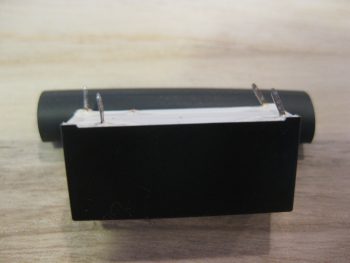
Here’s a shot of my general purpose relay. Again, the main requirements for these specific relays that I’m using for the airspeed switches was A) minimum 600 Ω resistance on the power coil, and B) small, narrow body to allow EZ placement inline to the wiring.
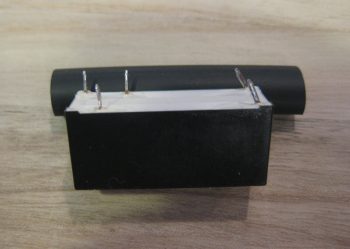
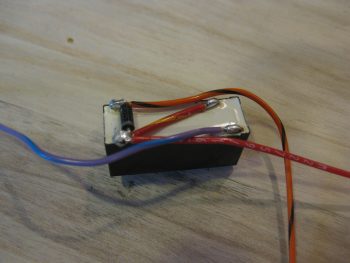
Since I was going to heat shrink wrap this baby after I finished, I went ahead and removed the NC (normally closed) pin since it had no role in this circuit design. What remained where the 2 coil posts to the right, then moving left the common (C) terminal, and then far left the NO (normally open) terminal.
I then soldered the power (red & red/yellow) wires into place. And the ground control wire that hooks into tab 1 of the airspeed switch (orange/black). As per Bob at TCW, I also soldered in a 1N4001 diode between the power connections across the coil.
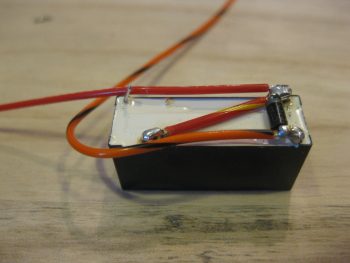
On the NO terminal I soldered in a long 22AWG wire that terminates into + side of the heated pitot tube POWER relay (here I’m working on the control relay… again, there are 2 total relays for this circuit).
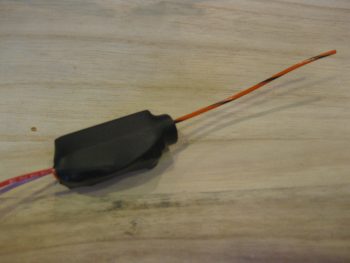
I then wrapped the wire leads around the body of the relay for strain relief and then heat shrank the whole assembly together.
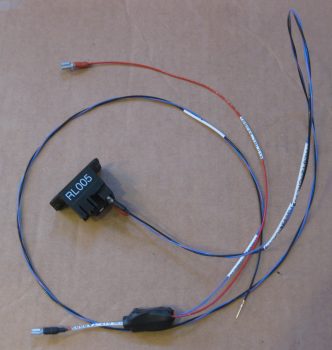
Here’s the finished product, with each wire appropriately terminated and labeled. The black wire twisted in with the purple/blue wire is simply the return ground for the + / − coil control on the heated pitot tube POWER relay (RL005).
Over the next few days, when I get a chance, I plan to build the airspeed switch #2 relay much in the same fashion as this one. AS #2 will be a 70 Kt control relay for taxi light (allowed to extend below 70 Kts), the RAM air valve open warning (below 70 Kts), and the Low Speed (~stall) warning.
Again, with social events and out-of-town guests stopping by over the holidays, I’ll be busy with all that. But I will try to sneak some work in here and there when I can.