
I started off today with a phone call from Sam Tilleman at Saber Manufacturing to discuss the modifications to my prop extension. Since I found out from my engine builder, Tom Schweitz, that my engine mount bolts are 7/16″ vs the original 1/2″ bolts that they were identified as, I worked out the plan with Sam for him to drill those out as well. Although a bit more money to have Sam modify the prop extension, again this actually worked out serendipitously in that having 3/8″ bolt holes drilled in between the 1/2″ bolt holes on the prop side of the extension, and 7/16″ bolt holes drilled in between the 1/2″ holes on the engine flange side, simply gives me a prop extension with 1/2″ lightening holes machined on each end. Talking to Sam, this is pretty much the same configuration that Klaus Savier has on his airplane…. definitely not a bad model to emulate!
After getting the prop extension configuration settled with Sam, I then spent a few hours cleaning up the lightening holes by hand. I also figured out where my #12 mounting holes for the Triparagon screws will be placed. After figuring out the mounting screw locations I drilled the mounting holes and then countersunk the screw holes.
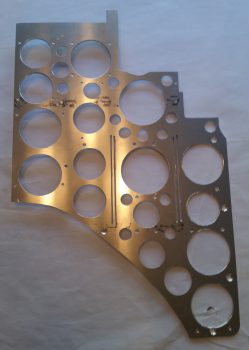
Here you can see the left side of the Triparagon with the cleaned up lightening holes.
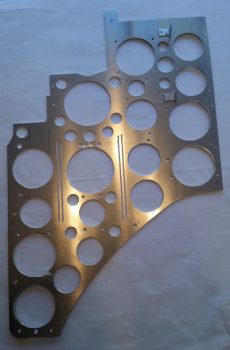
You may have noted that there are a some visible gouges on the edge of a couple of the lightening holes. This is directly attributable to the new style cordless drill batteries in that they twice the batteries seemed to have died while I was drilling and as I was removing the hole saw bit from the lightening holes, the drill surged again causing these edge gouging. Obviously I’m not happy about these unsightly marks, but it doesn’t change the functionality of the Triparagon, it just slightly diminishes its appearance and thus knocks down my cool points tally a bit!
After cleaning up the Triparagon lightening holes I then worked for about 3 hours on redesigning my electrical system by removing the relay that controlled the circuit between the battery buss and E-buss as per the recommendation of Bob Nuckolls. Technically, I repurposed that relay to be used as the heated pitot tube control relay with a net result of one less relay in the system. I then updated the main electrical system diagram & the grounding buss matrix list.