
Not literally on… in the airplane that is. But definitely on the list as the primary thing to work.
Ok, enough banality!
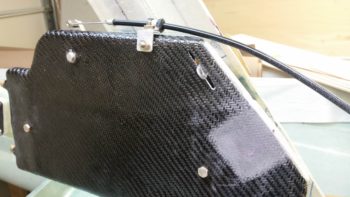
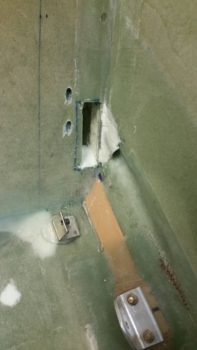
I started off today installing the push-pull cable on the top of the heat exchanger (HC) for the heat restrictor butterfly valve. I quickly realized that the attachment assembly on the valve lever arm was not happy with the offset alignment I had with the Adel clamp set a bit more inboard, so I whipped up a little L-bracket to allow the Adel clamp to be mounted on the top edge of the HC vs the side. It worked like a champ.
I then set about determining where the #2 Clickbond should get mounted on the surface of the heat exchanger. I played with the alignment for a bit, and ran through a number of maintenance and troubleshooting scenarios in my head, all requiring the HC to be removed. This mandated in my mind which side the cable needed to go (on the forward side so that by simply removing a cotter pin it frees up the lever arm so that the HC can be removed).
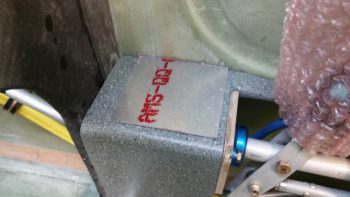
After determining where the Adel clamp would go and the configuration of the cable run for the fresh/heater air valve, I sanded down the area around it approximately 2″ x 2″.
I then 5 min glued the Clickbond in place and set it under a heat lamp.
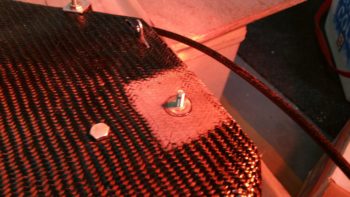
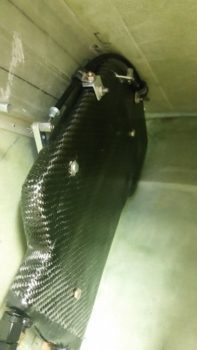
After the 5-min glue cured, I then glassed the Clickbond in place with a ply of BID covered by a ply of Carbon Fiber [Yes, I know the weave is not aligned with the original CF weave, but this was the only spare carbon fiber I had on hand and I wasn’t about to waste any by cutting it off the roll…]
Here is the mounted and glassed Clickbond…. jumping ahead a couple of hours.
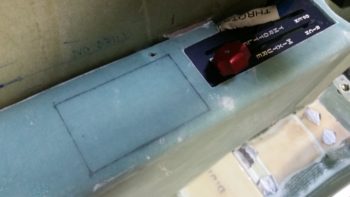
I then finalized my design for the 3-lever heat/air valve panel that will get mounted in the top middle of the left armrest, just aft of the throttle quadrant.

I then cut the top surface of the mounting plate out of 0.040″ thick 2024 aluminum. As you can see it extends out further than what will be seen through the hole that I’ll cut into the top of the armrest. I’ll mount 4 nutplates in the corners of this plate and mount it to the bottom of the armrest so that I can then unscrew the mounting screws and remove the plate from the armrest whenever the latter needs to be removed.
Since I had the sheet of 0.040″ thick 2024 aluminum out, I went ahead and cut the 3.3″ x 3.5″ plate for the 2 “Mag” switches (we’ll say, although both are electronic ignition) and the master switch. As you can see by the pic, these switches will get mounted just forward of the control stick on the right armrest.
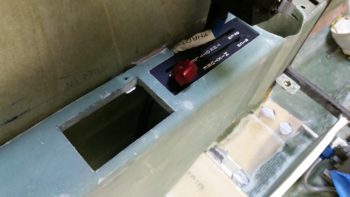
I then marked the area to be removed from the top of the left armrest for the 3-lever heat/air valve panel.
I then cut out the area using the “Fein” saw.
I then spent some time developing my plan for the actual cable runs coming from the heat/air valves to the 3-lever heat/air valve panel. Yes, developing mods and incorporating all of them in one place like the left armrest can definitely be a slow process at times. But I think a very necessary one in deconflicting all these components that are to be mounted. So often one decision begets another one, and even more so it may countermand a previous decision. It’s all a balancing act when cramming this much stuff (grant it, stuff I think is the right stuff to have on hand) into this bird.
For example, having just really dug deep into my cable runs, I know have to reassess my mounting location for the fire extinguisher. I may be able to simply move it to one side or the other, but right now it looks like I’ll now have to remove it from the armrest completely. I think I should be able to still mount it in the location I chose, but now the variables have greatly expanded again on where the fire extinguisher may possibly need to get mounted.
Ok, back to the actual build. I used a bit of the flox that I made up for mounting the click bond to the HC for helping to secure the 2 crimped aluminum cable ferrules that attach the valve cable to the valve plate on valve #3, the Pilot/GIB air distribution valve.
[NOTE: I made a major boo-boo in that I measured the throw of the top edge of this valve at 2.3″, which is what I used to design the lever slot for the Pilot/GIB air distribution on the 3-lever heat/air valve panel. However, a bit later when I mounted it, I determined that the cable geometry would work better if mounted it lower on the valve, closer to the fulcrum. When I tested out the valve cable runs a bit later (below) I then realized the cable only has a travel of 1″ since I relocated the cable attach point on the valve plate. Oops!]

I then drilled the holes for the #1 and #2 valve cables (the fresh/heater air valve and heat restrictor valve, respectively) into the pilot seat back right next to where the duct traverses the pilot seat back as well. The #3 valve cable actually travels through the duct until it exits out.
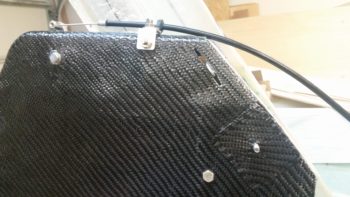
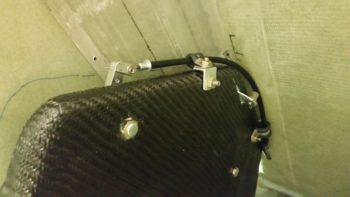
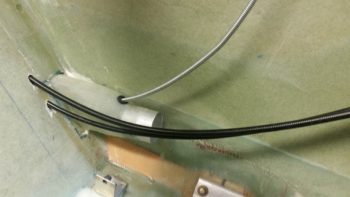
I prepped the cables and Adel clamps on the HC for valve cables #1 and #2, and installed valve #3 with the cable attached right to it. I then mounted the GIB heat/air ducts and the HC in place (temporarily). I ran the cables through their respective holes into and through the pilot seat back.
Here’s a bit closer look at the valve actuation, cables and securing Adel clamps on the HC. Plus, you can see the cable runs through the pilot seat bulkhead.
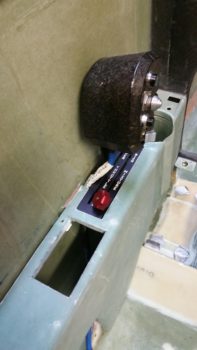
I then configured the cable for valve #3, which travels through the duct for about 6″ then, again, exits out of the duct shortly after it enters into the pilot area. To be clear, the cable conduit only barely enters into the duct via the rubber grommet, so the 6″ of cable in the duct is just the wire, not the entire cable assembly. This helps limit any negative impact on the volume of air traveling through the ducts.
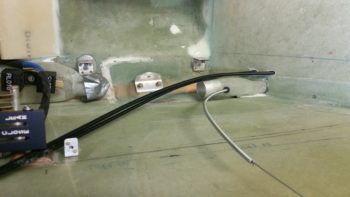
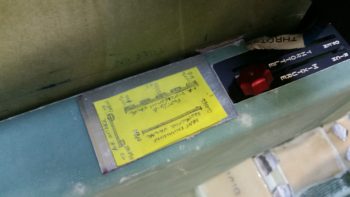
Here’s the final shot of the evening, with the 3 heat/air valve cables coming into the pilot area under the left armrest. I have to say, it was a good feeling crossing things off my 3×5 card task lists that I made up months and months ago….
I won’t get much farther than this since tomorrow is packing day. I don’t think I’ve advertised it much, nor mentioned it on this blog yet, but I am in the slow process of moving down to North Carolina. I say slow because my priority is still to finish this airplane first, if possible, before completing the actual move sometime next summer timeframe. Thus, tomorrow I’ll pack up a bunch of stuff, then Thursday I’ll load it up in a trailer to take down with me on Friday when I leave.
I’ll update my blog when I’m down there, but in general my plan is to give myself one more week to finish installing cockpit components after I return, with my focus back on the GIB area and the nose area. After a week, I’ll hard reboot into working on getting the lower engine mount extrusions glassed & mounted in place, the engine mount itself drilled and installed, and then after I configure the few components mounted in the hell hole, glass the firewall onto the fuselage. Then comes the prep for the top nose and canopy build, which will be a concurrent build to get the lines smooth all the way from nose to tail. Shortly into that prep, I will be building my engine and bringing it home.
Then the fun really begins!