
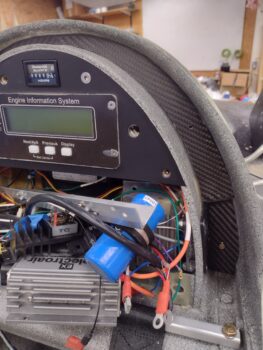
Although I started out today working on the GIB headrest-to-turtledeck gap cover, I ended my shop time working again on knocking out some final bottom cowl tasks.
Yesterday I used a big sheet of yellow vinyl to place the single ply of laid up CF face down on, then weighed it down with a myriad of stuff: steel sheets, wood blocks, cordless drills, and epoxy cans to get the flat, even surface of finished CF… without a rough peel ply texture nor an even rougher, bumpy no-peel ply natural cured finished.
I had concerns with how the CF weave would turn out when I flipped it face down. With a decent amount of excess epoxy to ensure the surface would come out smooth, the epoxy grabbed the vinyl a bit and pulled on the just laid up ply of CF and ended up putting a bit of a wave in it vs the straight diagonal line I was shooting for.

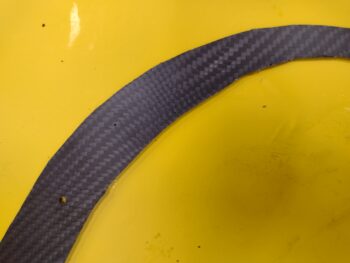
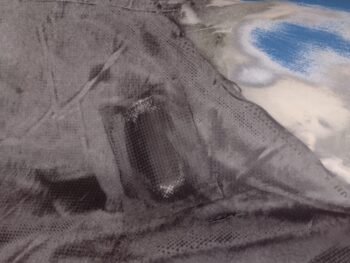
Moreover, when I pulled all the weight stuff off and then the cover off the yellow vinyl this morning, somehow there was an actual strip of the layup that didn’t get weighed down properly. See the outside right edge about middle of the pic below? What the…? BTW, clearly these pics were taken after an initial razor trim of the CF layup.
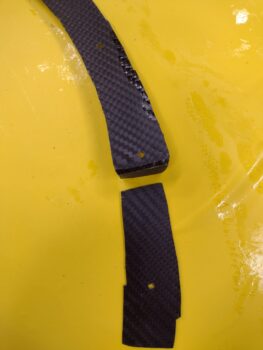
Since this was my first time attempting this type of flat, even-surfaced CF layup, to bring about this finished look post-layup —without multiple rounds of applying epoxy or clear coat with even more multiple rounds of wet sanding— I had a backup plan with some CF vinyl ready to apply over the top of this in case it turned out bad, or as Jess jokingly calls things, “an actual turd!” (usually houses on Zillow!)… which at first I thought the CF on this cover turned out to be.
[Note: this was also a test run for this type of layup that I may employ on the more visible inner cylinder baffles to make them look as sexy as possible <wink>]
I still needed to shape the edges and get it mounted back in the gap around the GIB headrest, regardless if I was going to cheat and use the CF vinyl that was now in the shop and ready to be pressed into service. However, once I got the the cover in place —a good hour of test fitting, trimming/sanding, repeat— the weave honestly wasn’t horrible (or an actual turd! haha). Mainly because the slight curve of the weave is fairly symmetrical, at both left and right “upper corners.”
The cover is far from perfect, but it clearly does its job in covering the unsightly fuel vent lines behind it, and the weave of the CF while not straight and factory finish looking is real and a product of my effort, so I think I’ll fix the blemished edge and call it good… AKA: this dog will hunt!
Below are closer up shots of each side… not a perfect edge in getting the CF trimmed and sanded down for the cover to fit back into place, BUT it will not hinder the airplane from flying, makes this area look 10x better, and has a nice contrast… so again, I’m pressing on to more important tasks on this bird!
One final point of note on this cover: Yes, it’s cosmetic and in no way would hinder me from flying this airplane in any way. So why create it now when there are so many important flight-related tasks that need to be completed? Because, analogous to wheel pants, if I didn’t complete this now I’d be flying around for a good 6 months to a year+ with an unfinished, unsightly cabin component with me constantly saying, “Oh yeah, after this next trip I need to get around to doing that…” Nope! I want to get these seemingly small, time-busting innocuous things out of the way now and off the plate for good (Seriously, you’ve all seen this on peoples’ builds… especially with getting planes painted and out of primer 3-4-5 years after they’re flying) .
One of the half-dozen “final” tasks I have listed for the bottom cowl (not including finishing and painting) is something I never got around to after re-skinning the aft half on each side of the bottom cowl: sanding the newly laid up CF surfaces.
I took the bottom cowling outside and spent a good 45 minutes sanding down the lumpy and bumpy new-ish cowl surfaces with my DA sander. Again, I didn’t sand the surface to 100% perfection, but I’d say a good 80% of the major lumps and divots were smoothed to greatly minimize the amount of micro fill required. I also sanded the inside as well just to eliminate any roughness or peel ply lines in prep for laying in the bottom cross cowling rib baffle/stiffener, and to remove excess material just to lighten up the cowl as much as possible.
Here’s a shot of some my bottom cowl surface sanding and also the cured CF ply over the 2nd generation right side cowl bump to provide required clearance internally for the aft right cold air induction pipe. Tomorrow I plan on adding & shaping pour foam, then contouring it to blend in as best possible with the lower right cowling before glassing it with a ply of CF.
Lastly, I pulled the peel ply, razor trimmed and cleaned up the now angled aft edge of the oil cooler exit on the bottom cowling.
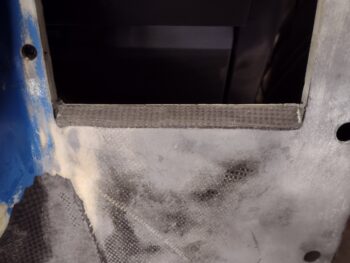
The bottom cowl sanding and the completed angled oil cooler exit aft edge are 2 tasks off my bottom cowling to-do list. Once I complete the right side bump-out for the cold air induction pipe clearance, that will be a third task completed. The last major task on the bottom cowling will be a clearance bump on the left side for the cylinder #3 exhaust pipe. After that, the final cowl tasks will be on the handful of items that need to be knocked out on the top cowling.
In addition, I plan on starting whole-hog on the exhaust pipes this coming week to get those finished up and configured nicely inside the mounted cowlings.