
The good news is that I met my strategic objective, but with some possible cleanup work (par usual eh?!). I cover my calculated risk a bit below.
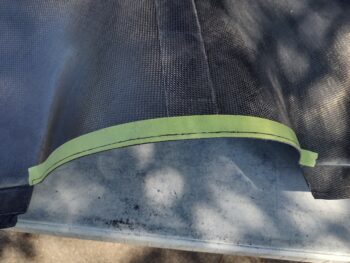
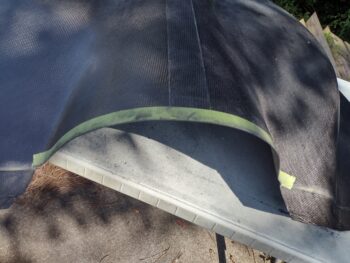
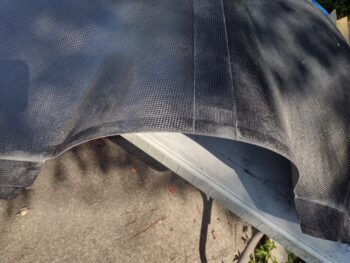
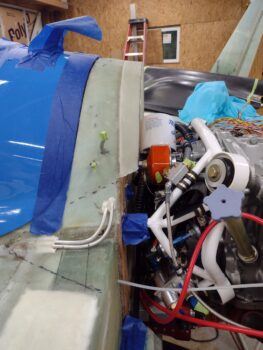
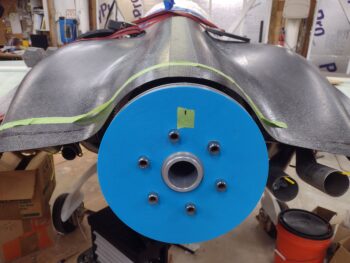
First, here are some shots of the initial situation of today with the stock plans lip coming off the D-deck and the top cowling set back in place.
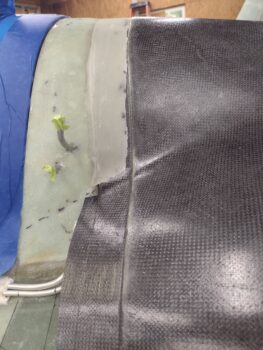
My first actual build task this morning was adding a 1-ply BID layup to the inside of the 4-ply D-deck lip layup I did yesterday. The reason for this layup is that I measured the cowl thickness at 0.065″ while the D-Deck lip (in 3 spots) measured about 0.054″ thick.
I prepregged a single ply of BID that covered the entire inside lip and overlapped onto the firewall around 1.5″. I also added a small flox fillet in the corner for transition between the two sides of this essentially 90° corner layup.
I also used fast hardener here to get this thing cured as quickly as possible so I could get the next big layup in (below). And I of course peel plied the layup.
I then trimmed the top cowling front —at the D-deck lip intersecting edge— to remove the current flange.
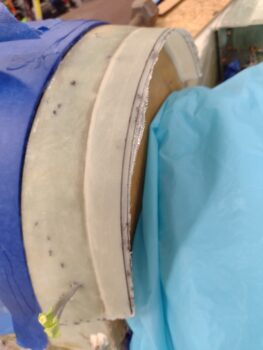
After cutting off the front flange I sanded the edge of the cowl straight and I thought all was good… luckily I picked up the cowling to take it back into the shop by this front edge. It was then that I noticed there was a distinct inward curve leftover from the front flange joggle.
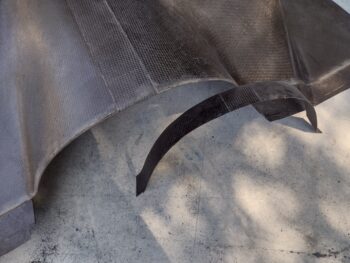
I didn’t want to remove any more than necessary, but this curved edge was not going to be removed by simply sanding it off. So I took the cowling back into the shop, assessed it, and decided that 0.18″ was a good amount to remove 80% of this curve. Then the other 20% could be easily knocked down with a sanding block.
So here is the final front cowling D-deck interfacing section trimmed to its final configuration.
Now it was time to trim the D-deck side lip. The plans say go with a 1.6″ lip, but that was the only lip on the aircraft side that one had to contend with. With the Melvill cowling you then need to essentially double that for the cowling to be “externally” mounted with CAMLOCs along its front edge.
That would result in about a 3″ flange, where you need to be able to get in and replace the oil filter —including safety wire!— in a somewhat already difficult area to access. Compound this PITA with a 3″ lip?? Uh, no thanks.
As with everything on this bird, we typically “bargain” our compromises in 0.1″ increments, and here is no exception. Every little bit counts. So my proposed “stock” D-deck lip width here is around 1.4″ wide. For the flange to secure the top cowling I’m looking at 1.2″ wide around the D-deck area. This gets us from 3.2″ down to 2.6″… and while 5/8″ isn’t much, it can mean the world when trying to get a wrench or any tool into such a cramped space.
I used the just-trimmed top cowling as a template to draw the cut line on the D-deck lip. Makes sense right? Since these will be the 2 interfacing edges.
I then used my trusty Fein saw and cut on the aft edge of the marked line.
And then used my straight sanding block to finalize getting the trimmed lip edge straight and clean.

Here’s where things got interesting and I had a big decision to make. To really get a spot on layup of the 5 plies of BID that starts on the firewall at least an inch, then turns 90° and covers/attaches to the inside D-deck lip, and then extends onto the (taped at this point) underside top cowling a minimum of 1.2″ —to create the mounting flange to secure the top cowling with CAMLOCs— I would need unhindered access to the forward inside of the top cowling.
Meaning the engine would need to come off.
But that would mean I would lose both the dialed-in top cowl angle I have with it sitting on the 1″ foam block spacer secured to the flywheel AND my centering hash marks that I established with alignment ticks on both aft cowl edge and spinner flow guide (shown a bit below). Hmmm?
–OR– I lay up as much of the 5 ply BID layup as far as I can, replete with peel ply, and then plop the cowling in place and reach up inside however able (and somewhat blind) to get the glass laid in as best possible.
I chose the calculated risk.
But what about this “Bridge too far” thing, you ask?
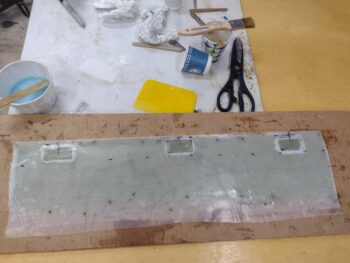
Well, I wanted to embed 1/32″ G10 into 3 of the 5 CAMLOC hardpoint positions on the top cowling lip that goes around the D-deck interfacing flange: the top center and lower CAMLOC on each side, essentially skipping the middle ones (#’s 2 & 4 out of 5).
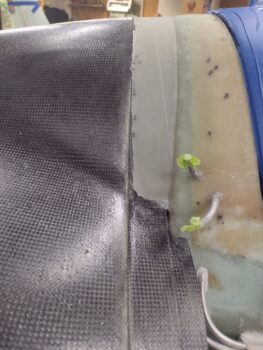
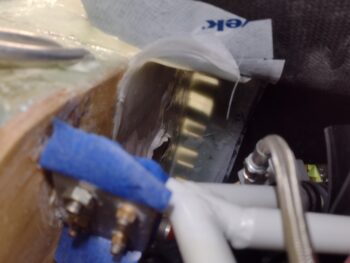
My plan would have worked during a normal layup, but I missed one key characteristic of using prepreg on an inside corner layup around a tight curve… you have to cut the prepreg plastic to allow for all those compound curves, or it will just bunch up on you and you have to seriously fight the plastic to get the glass to lay down. Which it will not do willingly [enter arguments for using foil here].
After I cut the prepreg plastic just prior to laying in the glass and pressed the glass into place, the cut plastic (not typical) couldn’t/didn’t maintain the original measurements. Any fiberglass builder knows that trying to manipulate wet glass is like trying to push a wet noodle in a straight line…. it ain’t gonna happen. And once it starts getting away from you, well, you have 2 options: go with the flow as best as you can, or pull the entire layup off and try to salvage it (and that too often ends up with all your glass and epoxy in the garbage can).
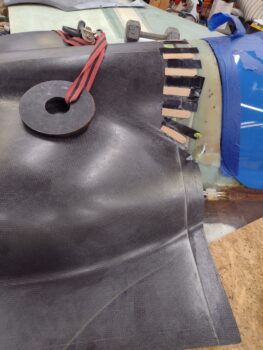
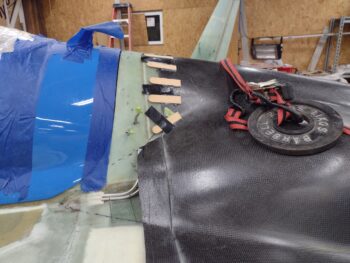
The resulting layup is one where it stretched on each end, diminishing my marked 1.3″ (remember 1.2″ was my goal, so a little wiggle room for trimming) flange width down to about an inch overlap onto the taped/peel plied underside of the top cowl. From what I could see and feel I did get a solid grab on the underside of the top cowling, with no drooping. I do know my flange is narrower than I planned and that my side G10 hardpoints are about an inch lower than where I had planned them to go… all’s fair in love, war and fiberglass layups!

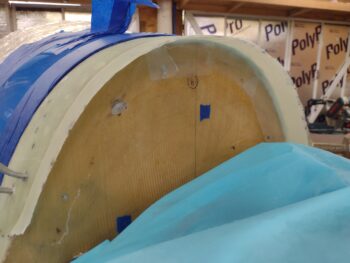
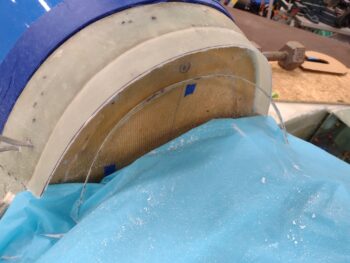
Even better news is that my pre-hot glued popsicle stir sticks did their job and held the top cowling in place. I had dry run this a couple of times and had hash marks here too to line up the top cowl to the D-deck lip. The weights are keeping the very bottom of the sides pressed inward just about 0.06″ for alignment between the 2 surfaces.

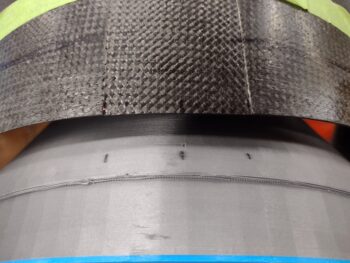
This shot is specifically to show the canopy to D-deck to top cowling angle… personally I think this dawg will hunt and it’s looking pretty darn spiffy at this point!
Moreover, I was able to maintain the left right alignment both at the D-deck lip to cowl front edge up front and the alignment tick marks on the aft side of the top cowl as well.
Another shot of the aft top cowling alignment tick marks sitting pretty . . .
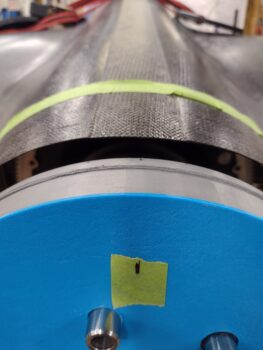
The top cowling aft curve around the flow guide isn’t perfectly symmetrically, but is definitely good enough for our birds. Here you can see why I made and use those alignment tick marks to maintain the curved portion of the top cowling centered around the prop spinner/flow guide.
I’ll of course perform a Battle Damage Assessment on the glassed flange tomorrow after I pull the top cowling off. I then intend to press on with the install of the upper cowling.