Today I wanted to knock out a bunch of small little tasks remaining on the baffles to get those off the to-do plate.
Once again, some of these tasks involved a good little bit of both research and decision making, which are both time burners.
I’ll start by covering a couple of early on tasks that I didn’t get any pics of: #1 was determining spacing and then drilling rivet holes in the front right corner where the front outboard baffle meets the front side (cylinder #4) baffle. This corner is left essentially rivet hole free in case an RV builder wants the option of mounting the oil cooler on the front (their aft) baffle wall. “Undocumented” task #2 was the final shaping & deburring of the top centerline crankcase bracket for the front baffle wall (again no pics).
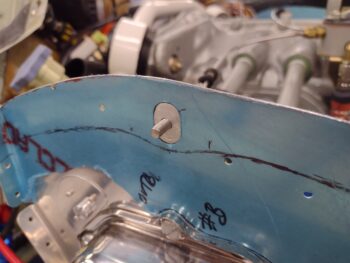
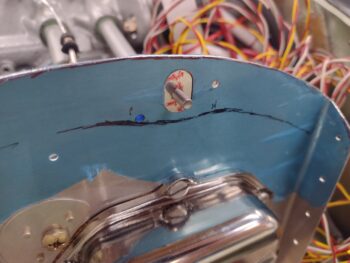
In keeping with my 1/2″ spacing between the aluminum side baffle walls and the top cowling, this left the decent-sized oval port —for spark plug wrench access— in place on the forward side baffle segments. Clearly I needed to determine how I was going to seal up these ports, whether with the baffle seals themselves, or the hardware that was included in the VAN’s baffle kit [sidenote: the hardware to seal these ports in the kit is unusable… must have been leftover from a previous baffle design?].
I felt I needed to do some sideline research to see if there was any standards or guidance on how much of the baffle seal gets attached to the aluminum baffle wall, and what distance from the baffle edge should the mounting rivets be placed? Well, after a good bit of looking in the plans, in both Tony Bingelis’ engine books, and online the only consistent standard I could find was to place the baffle seal securing rivets every 1-1/2″ to 2″…. all other install requirements were absent. No joy there.
Moreover, I had to make a decision on whether to install and use the front side baffle reinforcement stiffeners that were included in the VAN’s kit. Clearly with the shape of my top cowling, and thus my side baffles, a good portion of these stiffeners would have to be trimmed off. Plus, how would they interface with the baffle sealing material? (clearly no issue on RVs since their side baffles are much taller than our pusher aircraft). Finally, besides the designed U-notch to allow access to the spark plug port, how would these stiffeners work with accessing and using that port?
I spent a good hour going through different options on how to incorporate these stiffeners into the mix… I mean I have a row of rivet holes on the front side baffle segments, so I might as well use them if possible, eh? In the meantime, based on my baffle configurations, I decided that I would mount the baffle seals overlapping onto the baffle walls by 0.9″ with the rivets equidistant from edge of baffle to lower edge of seal at 0.45″.
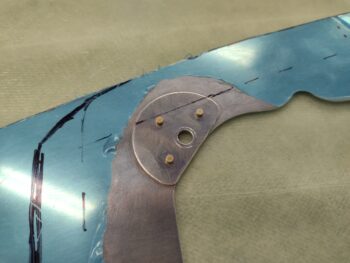
After discovering that the included VAN’s spark plug access port sealing hardware was simply not going to work, I started working on my own solution, with a bit more simplicity and elegance being a requirement. Moreover, as I worked through various machinations and tested out different designs, I concluded that the VAN’s reinforcement stiffeners were a no-go and dumped them. My best option came into view after I test fitted an AN970-3 wide washer to see if that would cover the spark plug access port. It did.
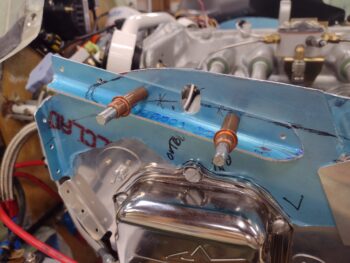
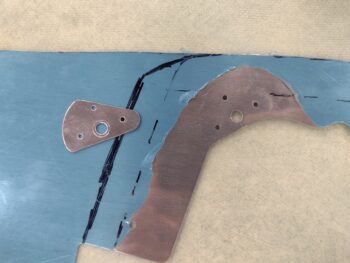
I then used some scrap baffle material to make up a couple of port filler pieces to simply fill in the middle area between the inside and outside AN970-3 washers: a glorified washer itself if you will, and here are the results.
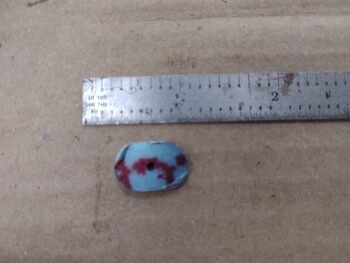
And also a closer shot of the size of this spark plug access port filler piece (sorry for the pic quality).
I then drilled a hole in the center of each filler piece to accept an AN3 sized bolt/screw.
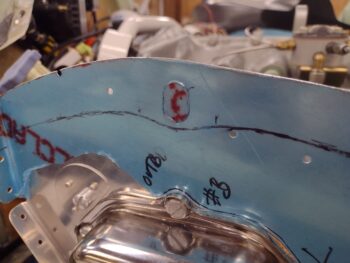
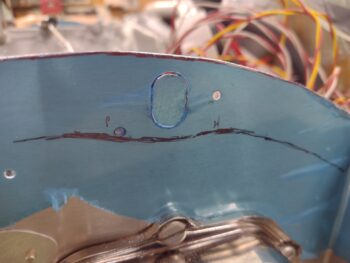
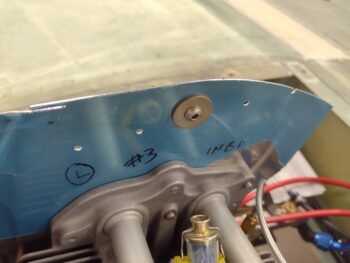
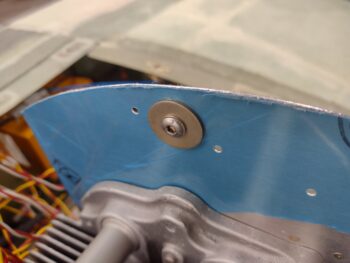
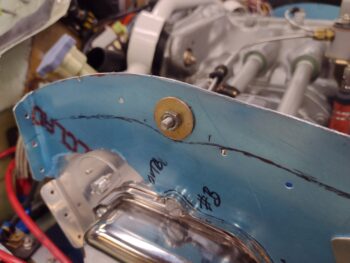
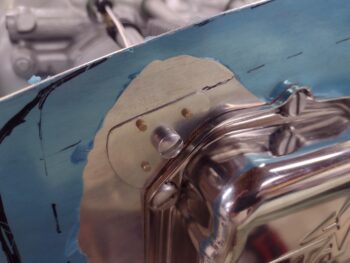
And then test fitted my new spark plug access port sealing hardware setup: an AN970-3 washer on each side, with the filler piece in the middle to support clamping pressure, and voila… EZ-PZ! Here is a look at the inside…
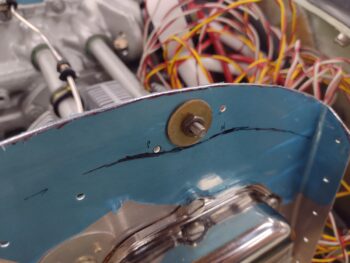
And the outside. Most likely I’ll just simply make an access hole in the baffle seal material as well to allow me to remove these port seals whenever I need to install or remove a front spark plug (And yes, way too much time spent on these things… and even explaining it all. But they’re done now!).
Moving on.
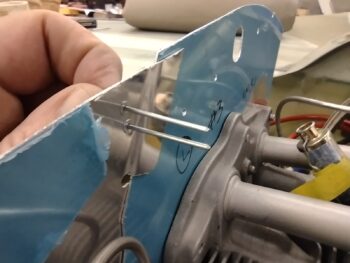
To help minimize vibration and chaffing, but still allow movement between the front and aft cylinder/baffle on each side, the VAN’s baffle kit includes these little side clips that get mounted on the outside of the seam between front and aft side baffle segments.
Normally, these are mounted just above the beginning of the split (lower) since there is more baffle material with sides higher in an RV installation. For me, with much lower baffle side walls, I am using them both as a securing clip for the baffle seams, but also to secure the baffle seal in place since I don’t have enough room to mount it just on the aluminum surface.
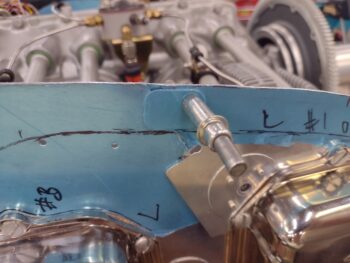
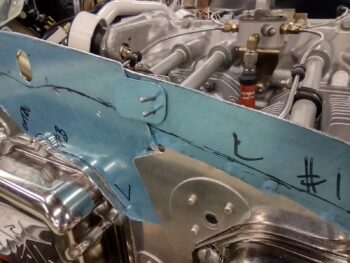
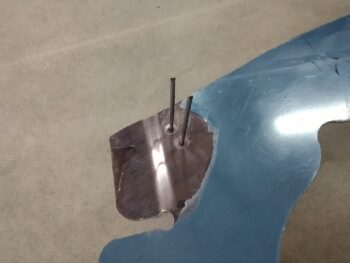
I drilled out #40 holes for the 2 securing rivets (pic 1), and then countersunk the holes on the inboard side of the baffle wall (pic 2). The left side is shown.
I then did the same thing on the right side. Clearly these clips won’t get installed until the baffle seals are installed.
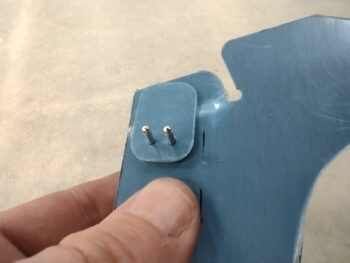
One minor issue that I ran across was my aft top doubler plate on the right side baffle at cylinder #2. When I drew my line to denote the baffle seal attachment area on the right side baffle segments, that line crossed the top of the doubler. Since I want to minimize any chances of air leaks with the baffle seals, I didn’t want any differences in elevation on the side wall… in short I needed to trim the top of the doubler off to allow the baffle seal material to sit as flat as possible.
I drilled out the 3 rivets, then removed and trimmed the doubler . . .
And then re-riveted the doubler in place. Another minor, but needed, baffle task completed.
As yesterday, I had a bunch more tasks on my to-do list for today, but after a bit later dinner and some household stuff I needed to tend to, I never made it back out to the shop other than to lock it up. With these niggling, low-hanging fruit baffle tasks done, tomorrow I plan to press forward with the final top cowl front baffle cross rib & stiffener as well as the bottom cowling inlet walls and ramps.

