
Today was all about baffles. As I’m letting the cowling side interfaces get a good multi-day cure, and it being a grey rainy day, I hunkered down and just did a ton of research and planning.
The first half of the day was mainly about the inter-cylinder baffles. I very likely have access to some molds that will allow me to make all the inter-cylinder baffles out of carbon fiber… not too shabby.
But then comes a requirement for hi-temp epoxy. It’s not mandatory, and I even found a forum post where Klaus thinks MGS 285 with slow hardener would fit the bill. But I actually may not have enough MGS 285 to do a project like making a whole set of inter-cylinder baffles.
After talking to Steve Beert and Mike Beasley, and doing a ton more research, I finally pulled the trigger on some HTR-212 high temp epoxy from ACS. While it is higher temp than MGS 285, it’s not as hi-temp as the Max HTE that Steve recommended. However, one major advantage that the HTR has is that doesn’t have to be post cured on the mold like Max HTE does.
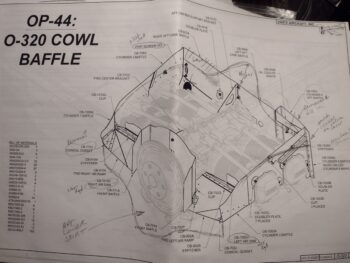
So as I transitioned into assessing my entire baffle requirements as a whole, I went back and reread the build plans (yes, it is for an O-235), pinged Marco with some questions on his bird (he responded at one point with a link to a great post that covered his baffles), reread Mike Melvill’s cowling install instructions —which includes pics and diagrams regarding his baffles, and did a myriad of searches in the old CSA articles and the newer COBA ones as well.
I then started constructing my plan. I had brought all the parts from my VAN’s baffle kit into my living room last night (I can do that cuz I’m not married!) and separated them into categories. Today I then took different parts out to the shop to physically and visually assess how they would fit into my cowls and on my engine.
One of the complaints that I hear Canardians state about the VAN’s baffle kit is that you essentially get 3/4 of a kit: the forward (accessory side), the left and the right. Since our aft end is their intake end, supposedly the kit doesn’t work for that side and you have to build it all from scratch.
But I disagree.
Mainly because I had an Ace up my sleeve: a cut out version of Mike Beasley’s “Beasley Baffles.” Using Mike Beasley’s segments for the aft end, where the aft “skirt” drops down to create the aft wall with openings for the alternator, starter, and exhaust pipes (and oil cooler too if you have it on the back baffle wall), I was able to identify how to modify the front inlet segments of the VAN’s baffles to create the top “shelf” of this “skirt” with flanges to mount the lower vertical wall to…
Now, it won’t be as sexy as Mike Toomey’s one-piece aft baffle skirt/wall pictured above, but it will serve the purpose with the least amount of effort, materials and expense to get these baffles done. Moreover, it allows me to keep the VAN’s cross section parts that butt up to the aft of the cylinders on each side to then be able to have ready available mounting holes for the side pieces, brackets, etc.
After going through the VAN’s install manual page by page, assessing literally every piece to decide whether I could use it or not (I would say I “tossed” about a quarter of the kit), I then got to work on getting some of the parts that needed disassembly (aka cut apart) knocked out.
Here are two 90° extrusions that are actually 3-4 parts apiece after they’re cut up. Also in the pic is a reinforcement plate for a baffle-securing bolt hole.
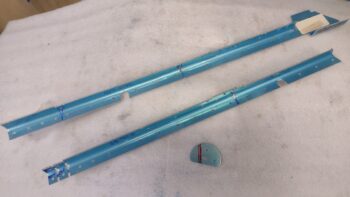
After I took the Dremel Tool to the extrusions, I was left with all my usable pieces in the bottom of the pic, while the 2 pieces at the top are excess.

When I get to it I’ll point it out, but there is literally an included bracket in the VANs kit that is used to hold up an oil cooler if you choose to mount it in the aft wall (our forward wall) of the baffles. Well, this bracket —with a bit of trimming— will work perfectly as a bracket Mike Melvill drew up in his cowling install manual to make up for the baffles. More significant work avoided! <wink>
Ok, although I didn’t get a lot of physical work done in the shop today, I think I have a pretty darn good grasp on my baffle plan. And with that folks, I’m calling it a night!