
I had to do a bunch of running around today so didn’t get into the shop until mid-evening. My goal was to get at least 4 baffle segments installed and I’m happy to report I accomplished that… in my effort of doing so it felt the same to me as a video I saw where a kid juggled Rubik’s cubes while solving them.
First, I removed all the aluminum outer front and side baffle walls to ensure I could get the placement down on the front cylinders’ base baffles.
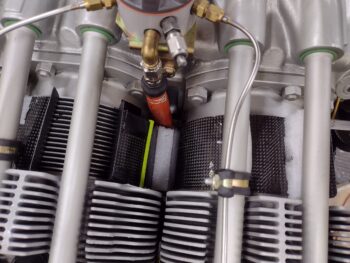
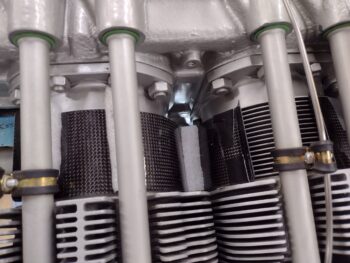
To get the 3x glue swaths in the correct spots and then get these internal baffles set into place was definitely quite the puzzle, unique on each one. On the aft side of the forward cylinder I actually applied the glue to the cylinder fins and only actually applied the glue to the baffle at the center. That baffle went on first.
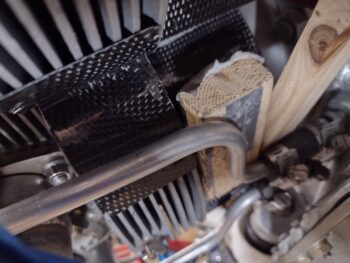
On the forward side of the aft cylinder I applied the glue to the center and top, then slowly and careful wove the baffle in under the push-rod tubes before setting the top and middle in place. Both Mike Beasley and Steve Beert said they used wood wedges and tape to wrangle the baffles and keep them in place during cure. Me being me, I went a slightly different route and found that the dense foam that comes in shipping boxes worked a treat for securing the baffles in place.
Once I got the aft inside baffle top and center secured in place, I got underneath the engine and used a pick to pull down the bottom edge of the baffle just enough to use a stir stick to apply the bottom swath of glue. After the bottom swath of glue was applied, by pushing the center larger piece of foam all the way down in between the cylinders, it served to press the bottom aft baffle edge up against the cylinder for cure.
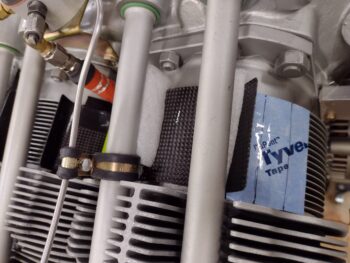
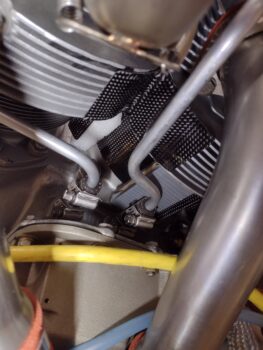
On the underside, for the forward baffle on the aft side of the front cylinder, I employed the cylinder oil return lines to secure wood blocks and some foam strips to add just enough pressure to keep the baffle in place. Note the installed outboard inter-cylinder baffle that I glued in place last night.
I then did the same thing on the right side.
Now, let’s discuss baffle angles and airflow through these base baffles. As you may have noted the forward and aft base baffle sets do NOT have the same air entry and exit angles: for a couple of different reasons (Also, let me point out here that I am focusing on FUNCTION over FORM and am looking to optimize airflow for cooling… not the goal of having standardized looking baffles).
First, the air coming off the ramps are significantly different in the angle at which they come into the cowling via the armpit air scoop. The air hitting the inlet ramps for the front cylinders turn almost directly upwards —or at least at a much sharper angle— as compared to the more shallow angle the air on the aft ramps is directed. This obviously means direct air flow needs to be more vertical, or slightly angled aft, on the front cylinders vs the aft cylinders (clearly there is a HUGE pressure component to how our engines are cooled, but I’m not getting into that here).
Next is a matter of simple space… or more specifically clearance. Even if my goal was to make the front and aft base baffle entry and exit points the same, the oil return lines under the cylinders would require major trimming of the bottom flange on the forward baffle. There’s just very little space on the bottom side of the forward cylinders. That being said, I will need to create a half-moon notch on the bottom tab of the aft right side base baffle (not installed at this time) to account for the cylinder #2 oil return line.
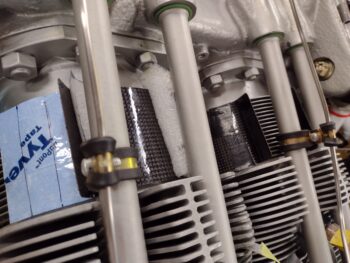
Here’s an underside shot of the right inter-cylinder base baffles glued and secured in place. Again, note the tape and wood shims removed from the bottom outboard inter-cylinder baffle (I discussed in yesterday’s post how the form for these outboard baffles is not perfectly true, which makes them set a little wonky when in place).
The pictures don’t do the amount of effort in planning, dry runs and execution justice to get these 4 inter-cylinder base baffles glued in place. All in all I spent nearly 4 hours on getting these baffles alone glued into place and secured for cure. Tomorrow I plan on knocking out another good chunk of the inner CF baffle installs as well.