
I started off today by locating my 2 CAMLOC install points and removing the 2 hot glued popsicle sticks situated at those spots. I then drilled a 1/8″ hole at each point and installed a cleco. After the clecos were installed, I then removed the remaining hot glued popsicle sticks and cleaned up the surfaces.
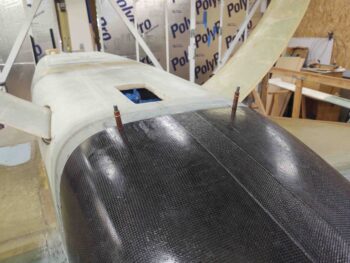
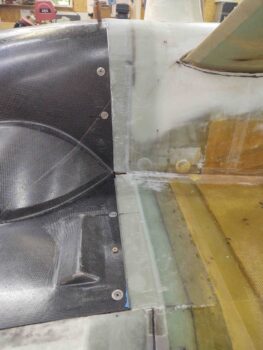
Here’s a couple more side shots with the very bottom front edge of the lower engine cowling secured in place. Thankfully each subsequent action of installing CAMLOCs on both the vertical sides and now across the bottom has served to minimize the gaps at the rounded corners rather than exacerbate them. To be certain though, they will need more work.

I then pulled off the bottom cowling, removed the protective tape from the inside cowling edge, and pulled the peel ply from the very bottom face of the freshly glassed cowl bottom mounting flange.
I then took a few minutes to mark, cut, sand and clean up the mounting flange.
I had quite the social day today and a took a big break to hang out with different friends, so I didn’t get back into the shop until late evening.
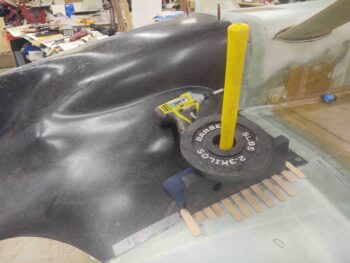
I wanted to get some glass “in the oven” to be curing overnight, so I first aligned the front 2/3 of each cowling side with the bottom surface of the wing. I set and secured that configuration again by using hot glued popsicle sticks and weights to keep the edges aligned.
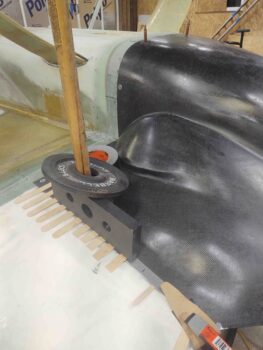
And then did the same thing on the other side.
A couple points of note here. First is that I am glassing the bottom cowl side edge-to-bottom wing root interface securing flanges in 2 parts. The front 2/3rds which I will actually install CAMLOCs to secure, and then after the front segment is set into place I will glass the aft 1/3 segment of the securing flange… the aft being trickier and a bit wonkier than the forward part, not to mention that I will have to create and fit the interfacing junction on the aft side with the aft side of the upper cowling.
The forward segment will get 3 CAMLOCs to secure it into place, while the aft segment will only get 2. Moreover, I will not being installing the aft 2 CAMLOCs, but will leave those positions only clecoed. This leads me to my second point of note:
While researching how many CAMLOCs I should install, I again went back to look at how Mike Melvill installed these cowlings. I noted he had a total of 6 CAMLOCs securing the sides of the bottom cowling, which seemed like quite a bit. I was thinking 4 total on the low number side, or maybe 5 max for more coverage. At first I thought he might have used such a copious number of 6 to maybe mitigate “oil canning” along the cowlings edge. Although that might be part of the reason, I’m now thinking it is most likely to wrangle these somewhat rogue bottom cowling edges into their required proper configuration!
I had sanded all the interior wing root edges that would be getting glass earlier, both top and bottom (trying to be proactive for when the top cowling gets installed!), so I just had to cut the 5 plies of BID and prepreg them.
After wetting out the glass and the tape on the inside edge of the bottom cowling, being the admitted peel ply fiend, I wet out and placed a strip of peel ply along the taped edge first (as I did with all the other cowl-mounting flanges).
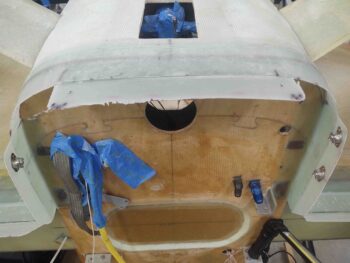
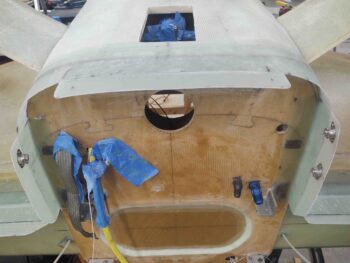
I then wet out the prepregged 5 plies of BID and laid them up on the underside (as situated) of each wing root. Yes, it’s hard to tell in the pics below that there is 5 plies of BID on each side, since I use the almost-clear MGS epoxy, but they are all on there (I hope! ha!).
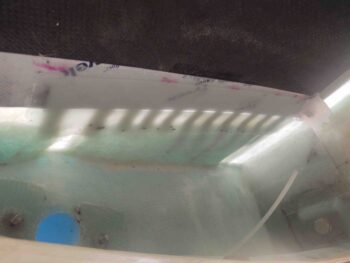
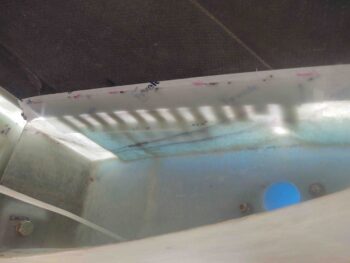
I then peel plied the top surfaces of each layup and left them to cure overnight.
Tomorrow I plan on installing the 3 CAMLOCs on each of these new side cowl-mounting flanges before “final” trim and configuration of the bottom cowling side edges to then glass the aft mounting flange segments into place.