
After another morning of running errands, I started off today by positioning the lower cowling so I could add the last little pocket of pour foam at about the 9 o’Clock position in the pic below.
As the pour foam was curing I began pulling the perimeter dams off the block of foam.
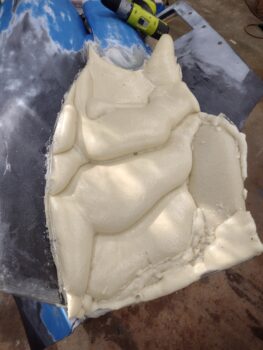
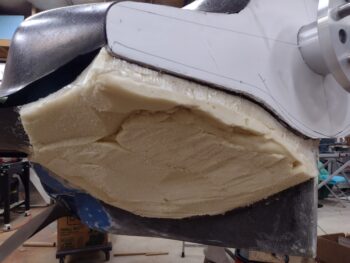
Not too much later I had all the pour foam in and all the perimeter dam pieces off. If you wonder, as I did, how much a slab of pour foam like this weighs, I can tell you it weighs 1.8 pounds.
I then took the lower cowling outside and starting doing some major trimming on the peaks and high points of the pour foam slab. An interesting characteristic of cured pour foam when you crack the outer shell and start hacking off significant portions of it is what I call the snack, crackle, pop effect. If you want to see a quick video as to what I’m talking about with this lively sound of pour foam, click here.
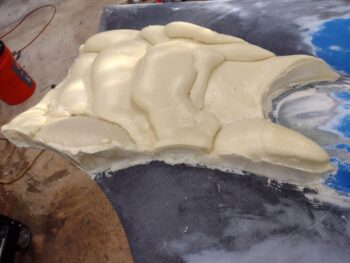
After knocking off a bunch of the foam dust I then brought the lower cowling back into the shop. Here it is after the high spots were knocked down quite a bit.
I bit later I got around to working the no-kidding plan for the aft cowling opening, created by both top and bottom cowling installed. This of course will dictate how the exhaust pipes need to be configured.
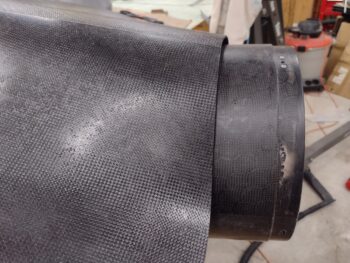
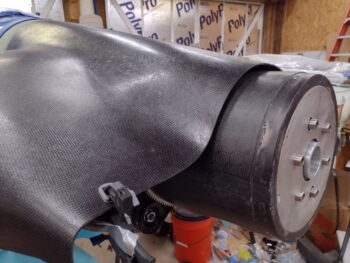
After re-mounting the top cowling, somewhat out of curiosity I set the Catto spinner “lampshade” flow guide back in place and grabbed a shot of the top cowl aft edge. I will need to do some minor position tweaks to keep the top cowling equidistant, or at least symmetrical, around the flow guide as the cowling is a hair off from its original state after having to wrangle the right side trailing edge to have it sit even with the wing TE.
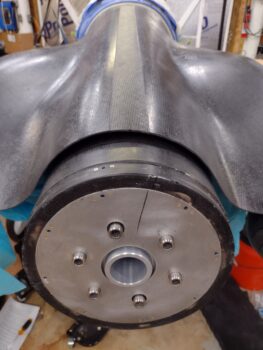
Another couple shots of the flow guide. I guess I could have popped the actual spinner on as well, but I was focused on the flow guide to cowling interface.
I then took the top cowling off and used its trailing edge as a template —after marking CL, etc.— to create the top line of the aft cowl opening template. For the bottom side I used the bottom cowling in the same manner, then I simply tweaked it to a pleasing shape.

I didn’t want to have to remove the right set of exhaust pipes, so I simply made a hole in the aft cowling opening template to accommodate those. I then set the template in place… I slit the template from the center hole straight down to allow me to gap it enough to slide it on and around the prop extension.
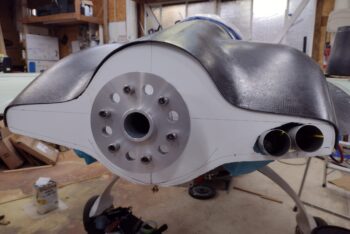
Another view of the aft cowl opening template in place. Yeah, it’s not on the larger side of cowl openings, but I don’t think it’s crazy small or narrow either. The openings at the furthest outboard are about 2.5″ high, where I would guess the average is at least 3-4″ high.

I then installed the bottom cowling. Interestingly the added foam slab had locked in just a hair wider angle between fuselage sidewall and strake, so I had to use a bit of extra oomph to get the cowling CAMLOC’d back on.
Also, the bottom cowling aft lip on the right side was pushing the exhaust pipes up just a bit, enough that it was offsetting my aft cowl opening template CL to the left a hair. I slung a few 2.5 lb. weights off the right inboard pipe just enough to get the template centered.
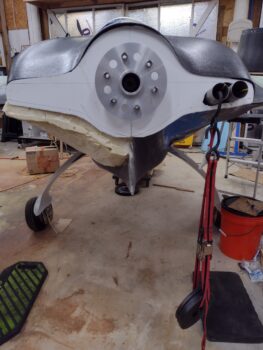
Since the bottom cowling aft edge is closely aligned vertically with the top cowling aft edge, I needed to angle the aft cowl opening template forward at the top just a bit to get the bottom sitting flush up against the bottom cowling aft edge… now with included foam on the left side.
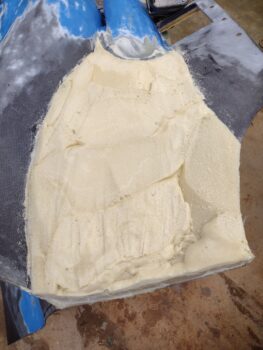
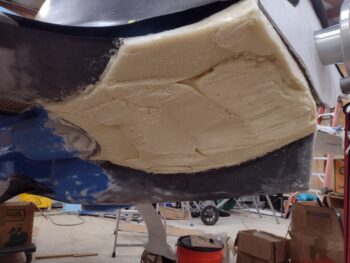
Once I got the template centered and where I wanted it, I marked the aft edge of the added left foam using the template as a guide. This of course will be my guide line where I sand up to in order to create a new lower cowling wall on this aft, bottom side.
Here we have the added foam slab on the left bottom cowling. Now, to be clear this pour foam will not become a permanent resident on this lower cowling. When I re-glass (actually CF) the new cowling segment, I will then cut out the old cowling and remove nearly all this foam.
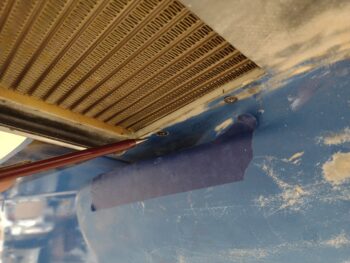
A couple final tidbits on the oil cooler. When I put the lower cowling on, I could tell that the newly installed oil hose was pushing the oil cooler aft about 0.15″. I had to use a punch pin on the aft inboard screw hole to lever the oil cooler just a scooch forward to then install the two inboard screws.
Also note that the forward screw is now a CS screw vs the bolt I was using previously… again since I used the Dremel to create the forward countersink.
It was late in the evening, so no more bottom cowl sanding ops tonight. Tomorrow I’ll hang some plastic “curtains” around the bottom cowling area to help contain the dust and also cover up the oil cooler. I’ll do a good rough sanding on the left side, but then leave a good bit as well before pulling the bottom cowl to pour foam the right side. When I do the final sanding I want each side foamed up so I can balance —as best possible— the two sides and get as symmetrical, optimized and visually pleasing new bottom cowling contour as I can.