
Chapter 23 – Engine Baffles
This page will cover the planning, construction & installation of the engine baffles.
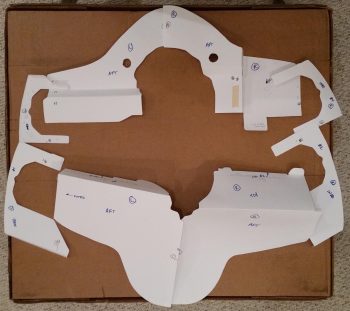
12 September 2017 — In prep for Rough River this year, I sent a note to Mike Beasley, Long-EZ builder extraordinaire, asking if he could bring his O-320 engine baffle templates he created a few years ago. Previously he had told me I could get a copy, so I figured now was a good time. Mike actually had soft copies of his templates, sent me those and I immediately went down to Staples and had them printed off.

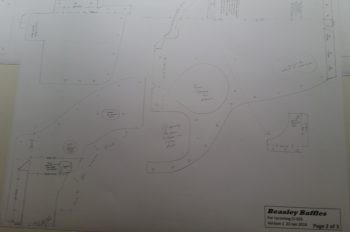
Here’s a closer shot of one Mike’s engine baffle templates.
•••
13 September 2017 — Today, since I was on the computer upstairs updating my electrical diagrams, I took a good half hour to familiarize myself with Mike Beasley’s engine baffle templates. I cut a few of the template pages into pieces so I could better get them organized, and after I had a decent understanding of what was going on I left them alone & headed down to the shop.
•••
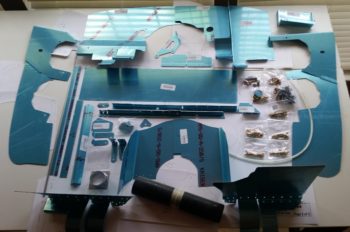
16 October 2017 — As I was getting started in the shop I heard the UPS guy drop off my VAN’s O-320 engine baffle kit. It was another hour before I could collect it up and inventory all the parts. I know I will have to make both the standard mods to the baffling kit (i.e. trim for EZ cowling), but I’ll specifically have a significant mod in the forward right hand corner where RVs have their oil cooler located.
Still, I’m extremely happy I got this kit since it gets me about 80% there on getting the baffles finished and installed. (I’d like to recognize and thank Buly again for his tip to go this direction!)
•••
20 March 2018 — This morning, as it was raining and sleeting outside, I decided to let the shop warm up a minuscule amount before heading down. So I started off my day by creating yet another tab on my Excel build tracking spreadsheet to compile all the pertinent engine torque values. This endeavor involved calling a couple of companies, one being B&C, to obtain/verify torque values on their products. In addition, some of the engine torque values were shared with me by master engine & Long-EZ builder, Chris Seats.
It being a very cold day outside, I also decided to do some more assessments on oil heat fittings and firewall pass-thrus before adding them to the buy list as well.
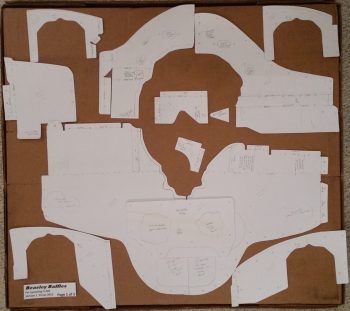
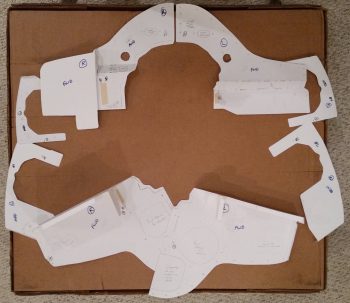
Later in the evening, still wanting to get as much done during this very cold spell of weather we’re having, and to free up as much time as possible during the upcoming good build weather (if it ever comes! ha!), I decided to cut out my Beasley Baffles templates that were created by the benevolent Mike Beasley.
If you remembered that I purchased a 320 engine baffle kit from VANs Aircraft, you’d be correct. So you may be asking why I need to cut out the templates from the ones Mike B. so graciously (yes, a lot of gracious canardians around . . .) provided me. Well, the VANs baffles would be a great direct use-as-advertised item if I was building a tractor, top-down cooling airplane with an RV style cowling. But clearly I’m not. So although the VANs kit will give me a huge head start on the engine baffles, it will not be without a good amount of modification to get it all to fit and work.
That’s where Mike’s Beasley Baffles come into play. Since his baffles are specifically for a 320 in a Long-EZ, it allows me to dial in my baffle design much, much closer by using these templates to modify the VANs baffle kit as needed.
As a reminder, Mike sent me his Beasley Baffles via email in electronic form a bit before RR last year. I then took the 3 files down to Staples and hand them printed out on card stock. As for tonight however, it took a good hour and a half to cut these baffle templates out of the card stock.
When I went upstairs to grab the Beasley Baffles to cut them out of the card stock, I also grabbed the outline of the firewall I had traced onto 2 large pieces of scrap paper I had. I cut & taped the firewall outline together for a real size version of my firewall that will help in determining the final layout and configuration of all the firewall components.
•••
21 March 2018 — Today, not feeling well after returning from North Carolina, I grabbed a cuppa and went through Mike Beasley’s baffles and –while looking at his website– taped a number of the pieces together to get a good idea what his were all about.
The initial confusing part on his just looking at them is that all the annotated & marked sides are actually the interior side of the baffles, with the blank sides ending up what you see when you piece them together, or the exterior side.
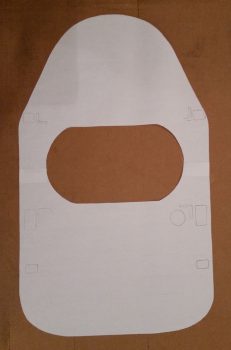
 So once I got that little tidbit down, I was able to get a good handle on what was going on. Here’s the inside (looking aft) of the lower skirt that wraps around the alternator & starter.
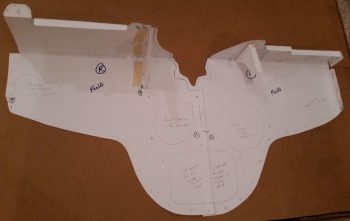
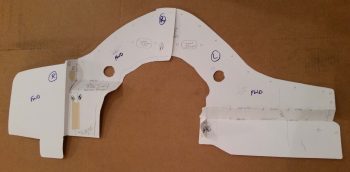
Here’s the top looking aft.
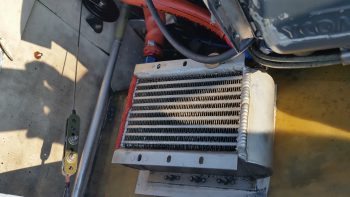
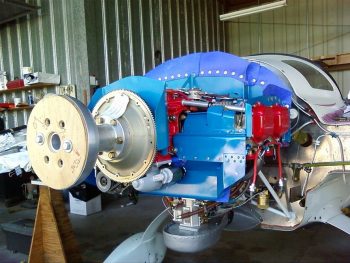
Now, since I’ll have my oil cooler in the plans location on the side of the engine and not nestled in the aft underside region of the motor, I won’t need the aft lower skirt positioned like Mike’s (and countless other EZs) so far aft that it just barely covers the aft end of the alternator and starter. Here’s Marco’s oil cooler in the plan’s location, just forward and to the left of the motor.
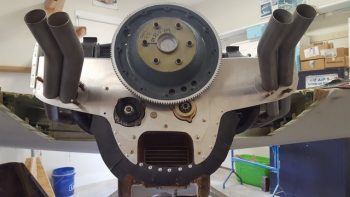
Here’s Mike Beasley’s real world baffles, with the lower baffle skirt far aft to account for the oil cooler placement. If I were going to place my oil cooler in this location, I think it might have been a better, cheaper option to just use Mike’s Beasley Baffles. From what I can tell Mike really did a bang-up job on his baffle templates, so they are certainly a viable option for most builders that are installing an O-320.
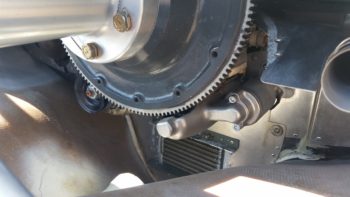
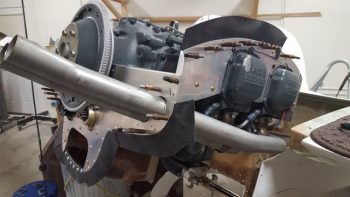
That being said, here’s a lower baffle skirt placed much farther forward that has both the alternator and starter exposed, but still has a centerline mounted oil cooler. My baffles will look more like this, only without the oil cooler mounted in the centerline position. So in my situation I think it will work out better having the VANs baffle kit on hand to modify.
(To be clear, I will be using Mike’s baffle temples extensively –as I have been doing– to modify the VANs baffle kit).
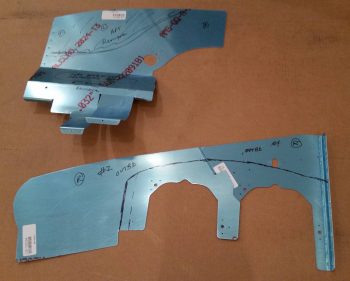
I then compared Mike’s baffles to the VANs, and assessed what I would need to modify on the VAN’s baffles. On the set of side baffles (bottom of pic) you can see my proposed line cuts off that big blank piece of aluminum, which would be on the aft side.
This expanse of baffling would normally match up to the considerably wide shelf going aft of the cylinders (see 3rd pic from top, above) and which then drops down to create the skirt running across the aft faces of the alternator and starter. Here’s another example on Mike Beasley’s bird.
Again, since my lower aft baffle skirt will be located forward of the alternator and starter, I only need a very narrow shelf just aft of the rear cylinders to then drop down to create the lower baffle skirt. Here’s a good depiction of what I’m talking about on Buly Aliev’s Cozy, where he used the VANs baffle kit.
•••