
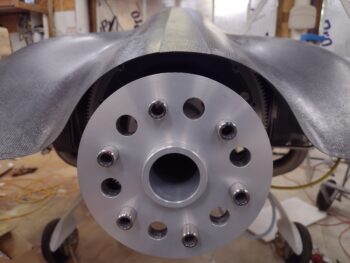
With the engine back on the plane, I started off this morning by placing the top cowling in place and weighing down the corners to keep it pinned in place.
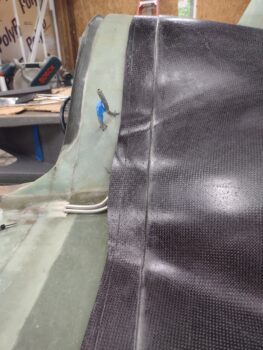
On the aft end I have the top cowling literally resting on the flywheel, so we know it’s as low as it can go for this test . . .
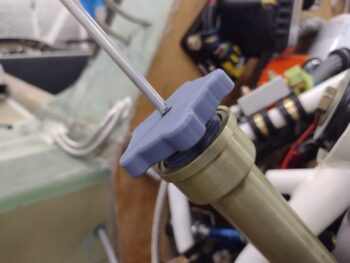
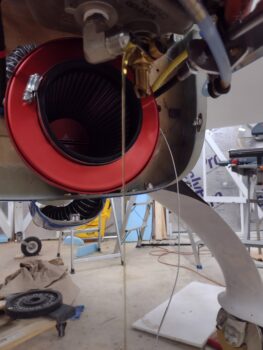
I then grabbed a shot of the newly installed 10.57″ long oil level tube with the dipstick cap mounted in the top. As you can see, plenty of clearance with the cowling set in pretty much the lowest possible position… although this clearance is in line with my calculated measurements, I’m always very happy to see it confirmed in a real world fit check.
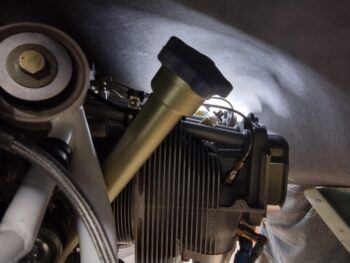
I’ll remind ya’ll that Mike M. made these cowlings to fit around an O-360, so there is a scooch more room (theoretically… not on the bottom side with my engine eh?). Again, I’m very glad to see this new dipstick setup fitting nicely into the scheme of things.
Before pressing forward with my other tasks, I refreshed the desiccant in the top spark plug contraptions… this hot humid weather is burning through my desiccant!
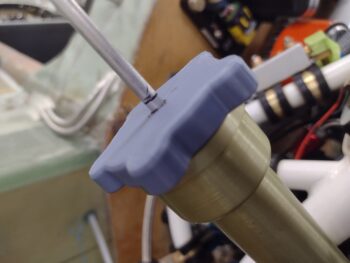
In prep for installing the oil heat system oil pan feed fitting to dial in the standpipe collector flow, I did a quick check on the new dipstick length. Since the new oil level tube is 4.2″ taller than the old one, I simply added 4.2″ to the raw stock 3/16″ dia. 6061 rod that will be my new dipstick. I drew a Sharpie reference line at the top of the dipstick cap to keep track of the dipstick length.
Well, the dipstick bottomed out inside the engine and pushed the dipstick up about a 1/4″ when the cap was threaded all the way in. My goal is to have just the end of the dipstick touching the top surface of the oil with 2 quarts in, and I wanted this ready to go when I added oil for the oil heat standpipe check.
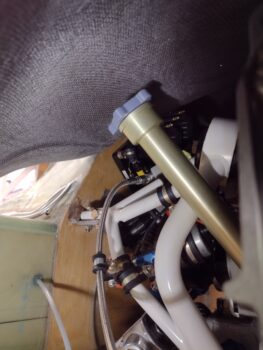
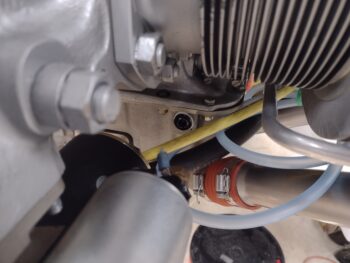
I then removed the bottom plug from the oil pan where the oil heat standpipe fitting gets installed. As the little bit of oil drained out, I gathered up the oil heat standpipe fitting and my tools in prep for installing it. Since this is just a temp install, I used Teflon tape to keep the oil from leaking around the fitting.
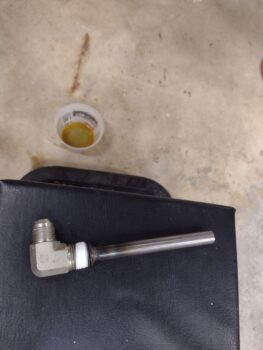
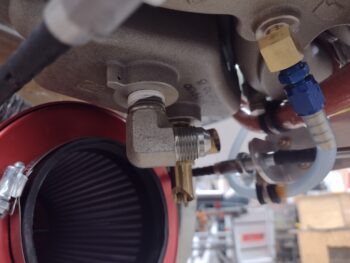
I then installed the fitting into the bottom of the engine pan. Notice how massive this -8 90° elbow fitting is… unfortunately this sucker is too big and intrudes into the space of the air induction SCEET (orange) tubing. More on that in a bit.
Back to the oil heat standpipe oil flow test. I don’t even remember how or why at this point, but I know I calculated the height of the standpipe at 4.4″ to give me somewhere between 2.5 to 3 quarts of engine oil in the bottom of the oil pan before it starts flowing into the standpipe for the oil heat system.
This is obviously a failsafe to keep a leak in the oil heat system from causing a catastrophic engine failure due to engine oil depletion. Lycomings are happy enough on 2.5-3 quarts of oil, thus my calculation.
Well, all these many years later I have to say I nailed it! At 2.75 quarts in the oil started flowing out of the oil heat fitting. I confirmed this by measuring the collected oil after putting 3 full quarts of oil into the engine, and the oil that flowed out was almost exactly 0.25 of a quart.
The issue now (I have to say, at this point I’m not surprised!) is of course the underside clearance between the oil heat fitting and the SCEET induction tube. The induction tube is not moving, so that means I need a new solution for this oil heat fitting.
So just as I did with the Sniffle Valve, I ordered a 1/2-NPT brass street elbow and a length of brass tubing. Since I now have a confirmed length on the required height of the heating oil collection standpipe, I can braze a brass tube to the street elbow and hopefully get the clearance required betwixt oil heat fitting and SCEET tube.
I then ran down to Harbor Freight and Lowe’s to grab some tools and materials I needed (in part) to install the oil plug on the aft side of the engine oil pan. I will say that I had a steel plug here to replace the one that came out, but after reading an entry by Klaus on a W&B thread in the COBA forum, I have to say I was re-motivated to trim as much weight off as possible on this bird.
So I ordered some more aluminum fittings, including this plug, to save a bunch of ounces in the engine compartment.
In fact, also due to that forum post I recently went around weighing all my new/latest stuff and re-tweaking my overall estimated weight. With the addition of an O2 system (5+ lbs), the near-doubling of my estimated upholstery weight (13 to 25+ lbs), rounding up my estimated paint weight another 8 lbs, and including both the RAM air scoop and aft nose/avionics cover weights… I’m at 1050 lbs. Remember, this includes the weight for the oil heat system as well and literally every single component going in the plane, plus a 10-pound padding just in case I missed something.
Tomorrow I plan on remounting the exhaust pipes and the lower cowling, and then cutting the exhaust pipes to fit the lower (and upper) cowling.