
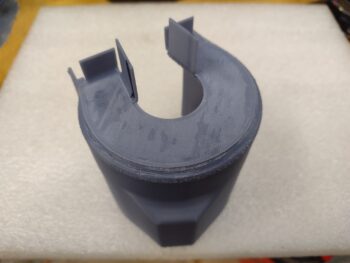
I started off this morning by sanding the interfacing surfaces of the fuel pump cooling shroud layup plug before using some super glue and clamps to secure them together.
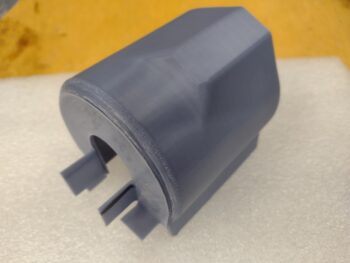
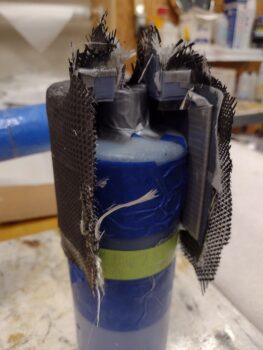
The tabs up top are all about securing the cooling shroud in place. If you’ve seen the Lycoming shroud it has holes that go around (or under?) the fuel pump main mounting bolts.
Not wanting to mess with removing the bolts and re-safety wiring anything, let alone the fact that the Lycoming shroud is metal and I don’t want to have my fuel pump secured in place with a layer of composite in between, I chose to simply “surface” mount this thing.
I’ll do this by glassing in strong magnets upright in the back tabs to help secure the shroud to the fuel pump mounting bolt faces. Then I’ll RTV the interior tabs to each side of the riser on the top middle of the pump.
It took a decent bit to tape up the plug… here it is in all its splendor.
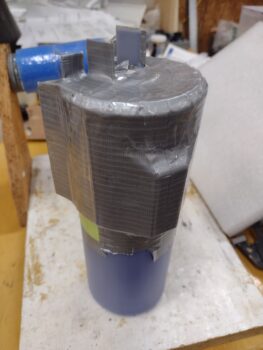
I was using fast hardener in my MGS epoxy, and with the outside weather over 100° F I didn’t realize that the much “cooler” feeling shop was still nearly 80° F. Thankfully I didn’t mix up much at first since I started with an internal application of peel ply over the tape.
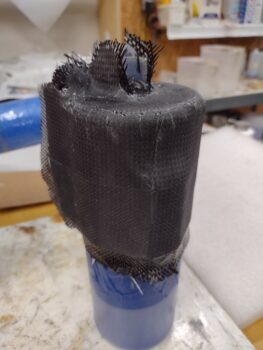
I really hate wasting expensive composite materials, so the first ply of BID
[again, only because this shroud will be directly touching the aluminum body of the fuel pump… I don’t want any galvanic reactions going on between the CF & aluminum in a place I can’t easily inspect without pulling the engine off]
was 4 pieces of scraps, followed by the first layer of CF which was another cobbling together of scraps, followed by a single ply of CF.
As I was laying up my first ply of BID my cup of epoxy exothermed. That’s when I found the thermometer that the rascally squirrels (they’re a total PITA!) had knocked over. Ahh, it was much warmer than I thought in the shop. It actually happened a bit later as well when I had barely any epoxy in the bottom of my cup, being pretty much done with the layup.
I did actually peel ply the layup after I finished, but didn’t grab a pic of it. I had some friends that needed to borrow my trailer in a bit of a rush, so I was trying to get this thing knocked out in general, but to help them as well.
I finished the layup in late afternoon and then made some phone calls regarding the exhaust pipes. I then got cleaned up and headed downtown to take Jess out to dinner… don’t want her feeling like a Long-EZ build widow!
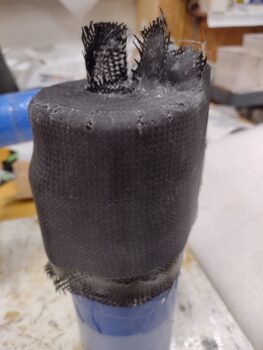
I pulled the peel ply and grabbed these pics you see here after returning from dinner.
Tomorrow I’ll pull the plug off the bottle of canopy protective goop (that I never used… glad I got some use out of it!) and then trim it up. Clearly after a trim and some judicious sanding it will look much more presentable!
Pressing forward.