
‘Cuz I sure did create a nice smile on the aft cowl of my bird! But more on that in a bit…
Today was a cool but nice day with no rain. So I wanted to get some painting done, albeit for about 10 total minutes worth. The painted panel that I’m making up at the inside top (when open, aft when closed) of the aft nose/avionics cover measures 9″ high by 18″ wide. I wanted to copy close to what I have on the landing brake with the red lettered “Long-EZ” and “N916WP” over a black and white checkerboard pattern.
With the 9″ x 18″ panel, my checkerboard squares are 2.25″ x 2.25″ (funny how that just happened to work out that way!). I had to run out and buy some wider painters tape, as well as some more drill bits for my little baffle snag (below). I then spent literally a couple of hours cutting and applying the blue tape squares. One thing to keep in mind is that this surface is not flat, and this is also merely fun bling, so the checkerboard won’t be perfect . . . just, good enough!
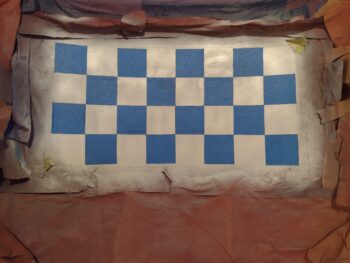
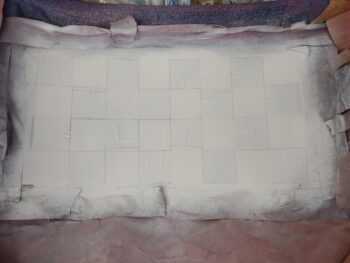
After getting the tape squares on and firmly pressed in place, I then took the aft nose/ avionics cover outside and shot it with a few rounds of white paint. Now, clearly I had already sprayed on a couple coats of white paint, so why the squares over the white paint now?
Well, white needs a good few coats to cover well, and I didn’t want a really thick build up of white, to then cover those coats with more black paint. I wanted to keep it as thin (and light) as possible for the base coats, then add more white just where the white squares are… then clearly the black over just the couple light coats of white. If that makes any sense.
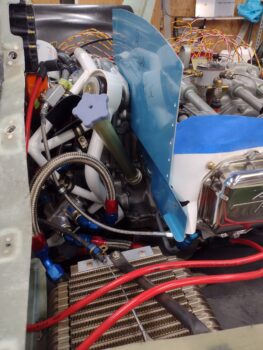
I then moved into baffle mode… for a bit longer than I wanted or planned. I test fitted the left front VAN’s baffle panel to see how it fit. It took a bit of finagling at first for me to figure out how to put it on, but then I got the gist of it. Once on (see below) it fit near perfectly… except one issue. Which has nothing do to with the VAN’s baffle kit, but rather my engine.
The 1/4″ mounting hole for the baffle was plugged. I’m not sure exactly how or why, but it was a flush plug that was barely visible with the engine painted (sorry, forgot to grab a shot). I hit it with a small drill bit, hoping it was something along the lines of Bondo or a cured filler, but nope, it was a flush metal plug.
I spent nearly an hour trying to get in there at different angles to drill it out, but I just didn’t have the right drill bits to do it. My cobalt drills bits were working great, but again the angle was off and I just couldn’t get to it with the fuel spider and lines in the way (I can hear the wailing and gnashing of teeth now with you all screaming about that’s why it shouldn’t be up top!).
I bought some Titanium bits with the hex chuck-side fittings at Harbor Freight while I was out running errands today, and when I got back to the shop I used my flexible drill bit holder to finally get the hole drilled out and metal filler plug removed.
I then had to tap new 1/4-20 threads, but didn’t even have room for the smallest of my tap handles to fit in there with the space so tight. I ended up having to use just a crescent wrench and the bare tap to create the threads.

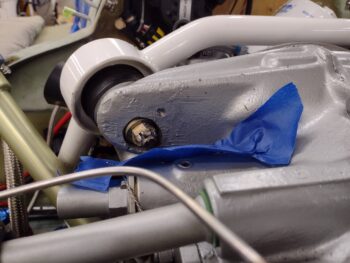
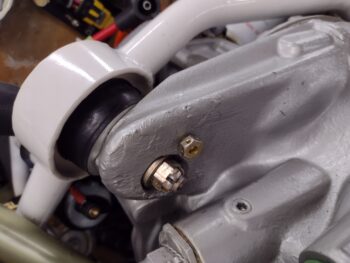
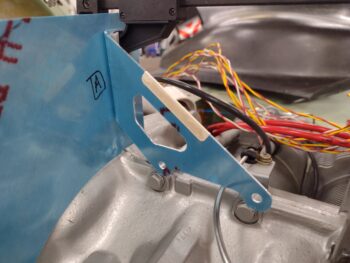
But my perseverance paid off and it worked! Here is the new drilled, tapped and threaded hole below (pic #1). I then grabbed a 1/4-20 bolt and threaded it in… it worked a treat! (pic#2)
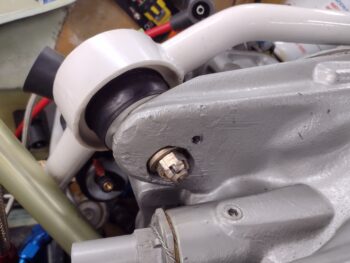
With that, I then set the forward left VAN’s baffle segment back in place for another test fit. As you can see, the mounting hole on the baffle piece lined up perfectly and the bolt hole worked as advertised.
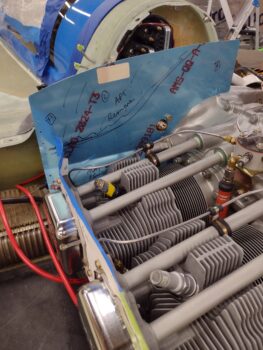
The only minor issue that I could find with the left front VAN’s baffle segment is that it is a little close at the outside bottom corner to the MAP line to cylinder #3. I’ll watch this and trim/adjust as necessary. Other than that the baffle segment fit great!
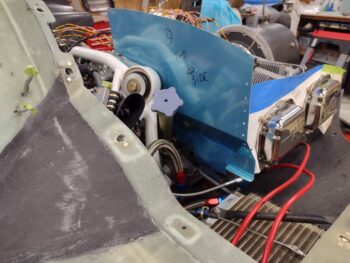
Here’s another shot of the front left baffle segment.
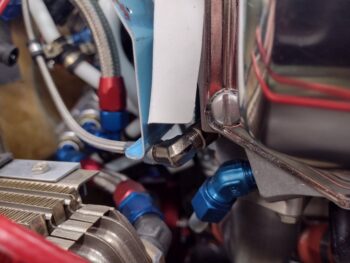
Uh, Houston, we just found baffle problem #2 for the day!
As I was checking out the baffle fit above I mentally noted that with the stainless steel spider fuel line (Yup!) that runs out to cylinder #4 in its current (and for now permanent) position, that the forward brace that secures the forward baffle wall in place to the engine bolts will not fit.
Luckily I’ll be cleaning up and bringing my plasma cutting table back online soon to cut out the firewall. With the plasma table up and running I can simply whip up a new bracket design in Fusion 360 CAD and cut it out on the table in a few minutes.
With my baffle tasks done for the day I finally got to work on the top aft center of the bottom cowling. I assessed how I wanted the new curved aft edge to look and how I was going to go about making it.
I then made up a cardboard dam for pour foam and taped it into place.
And then whipped up a small amount of pour foam and poured it into the small space created by the taped cardboard dam.
My new pour foam is a bit finicky (I guess as the old stuff was too) and it seemed to take nearly 30 minutes total to cure. After about 10 minutes I realized it needed some more time [hopefully, since I didn’t want to have to rip it out and repour it].
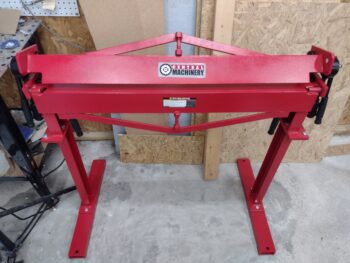
While I was waiting for the pour foam to cure, I went ahead and spent about half an hour assembling my “new” (bought a year or so back) Harbor Freight metal brake. It went together easily enough and should make bending up baffle panels much easier than using 2x4s, clamps and a hammer!
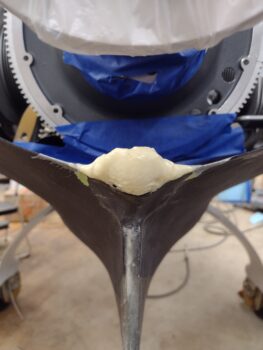
Thankfully the pour foam finally cured and I trimmed off the overflowing excess. Here’s a shot of that:
WARNING! The following is for mature audiences only! Please ensure children and small pets are nowhere in the vicinity as you view the following content:
Haha!
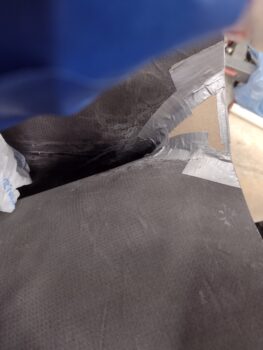
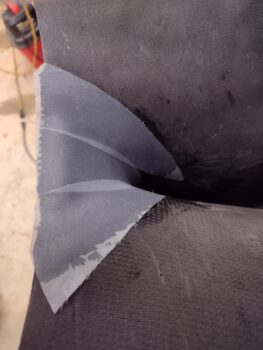
As I was taking these pics of my bottom cowl aft edge “smile” creation, I realized they look a bit racy! Here we have the pour foam shaped and taped up. I then wetted out the prepregged 3-ply CF layup and also added and wetted out a G-strin… er, uh, some peel ply before laying in the CF plies.
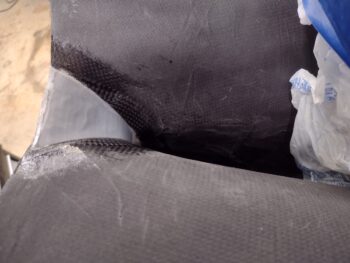
This artwork is called “woman in yoga pants” … ha! Or rather, the 3 plies of CF laid up and ready for peel ply.
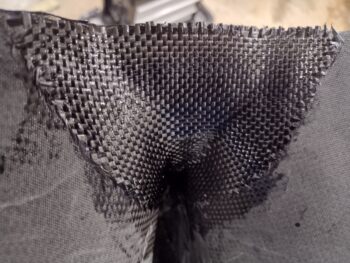
Which I did next.
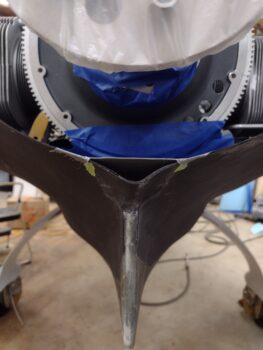
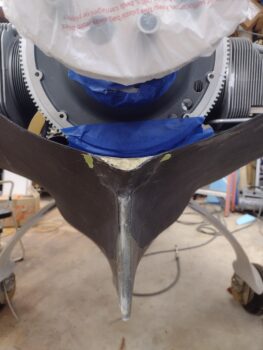
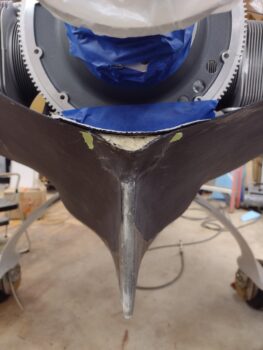
Sorry for all the risqué pics… it had to be done! But as I stated in the opening of this post, note the new smile I created on the aft top center of the bottom cowling. I think it looks much, much better. Next I’ll have to finalize the design of the area beneath this new cowl lip AFTER I trim the bottom cowl aft edge to its final length to match the top cowl aft edge.
I then left the layup to cure overnight.
Finally, I’ll note that when I went back into the house I saw that Curtiss from Eureka CNC had sent an email notification that he shipped my spiffy canard and elevator templates to me… which I’ll use for the very final finish of these components pre-paint.
Inching forward…