
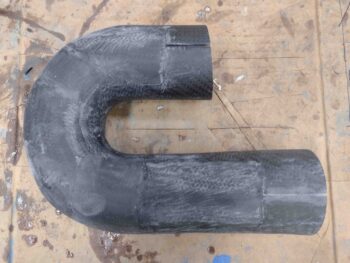
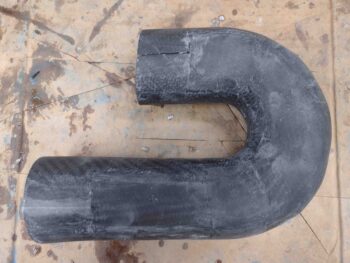
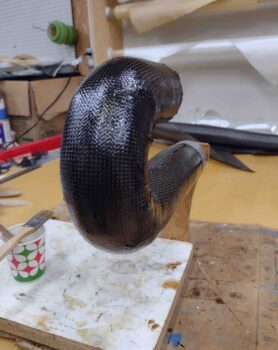
I started off today by pulling the peel ply from the carbon fiber patches on the sides of the now reconstructed air induction tube. I also pulled the peel ply from the flox inlaid into the narrow channels on the internal walls. I then cleaned everything up.
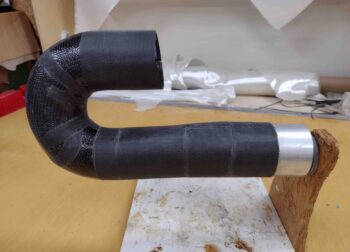
I then attached the 2.5″ diameter 6061 segment of tubing to the lower front of the air induction tube using duct tape internally to secure it in place.
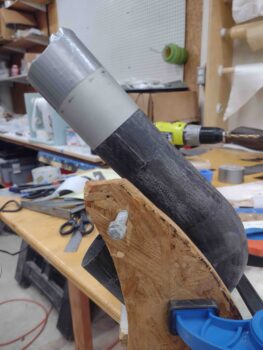
I then laid up 2 plies of carbon fiber to secure the 6061 tube segment to the front of the air induction tube. The carbon fiber overlaps onto the both the 6061 tube and the air induction tube by around 1.6″ each side.
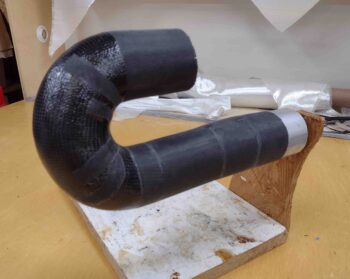
I then peel plied the carbon fiber securing the 6061 tube segment to the front of the air induction tube, and gave it a few hours to cure (I again used fast hardener).
A few hours later I pulled the peel ply and cleaned up the carbon fiber layup and edges.
I then took the air induction tube outside and very aggressively sanded the entire carbon fiber surface of the entire tube.
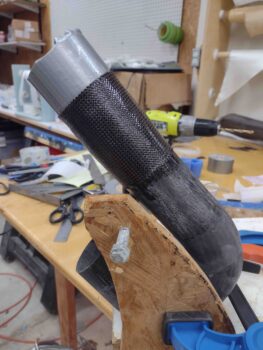
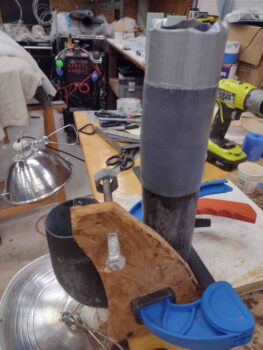
Once back inside I mounted it to my elevated work plate to allow me to layup the final ply of carbon fiber onto the actual tube portion of this air induction conduit (obviously I still need to attach the mounting plate).
To ensure that air induction tube wins out with any possible clearance fight with the lower cowling, I first added a small strip of Kevlar along the aft bottom center of the tube.
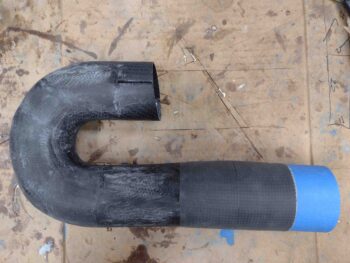
I then origami’d the single ply of carbon fiber to allow me to lay all of it up in one shot for the final securing of the air induction tube.

Yes, the layup is a little wet, for a few reasons. First, I wanted to ensure all the carbon fiber was wetted out well, which is a bit tougher to tell than when wetting out E-glass BID or UNI. Next, since I planned to peel ply the majority of this layup, less than half will stay as wet as it is showing here. Finally, I was using fast hardener so I was working at a fairly rapid pace.
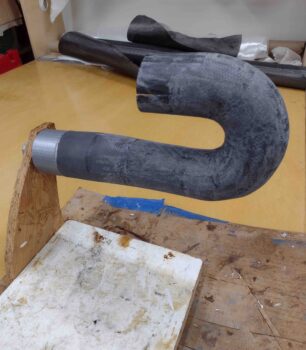
The bottom line is that I’m willing to accept a 2-3 gram weight penalty for getting this air induction tube’s final carbon fiber ply laid up and cured in expedited fashion.
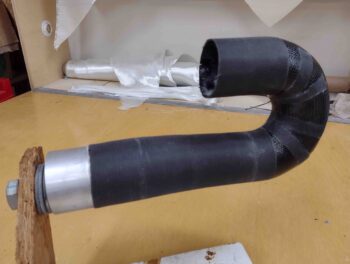
I then peel plied the ‘glassed’ air induction tube by wrapping all of the straighter parts while only peel plying the seams on the curve.

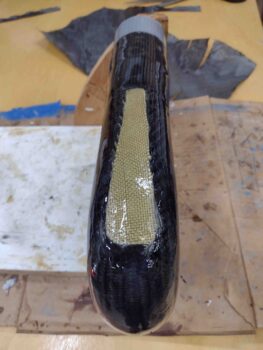
Once cured enough —over 3 hours later— to remove the peel ply, I removed it and cleaned up the edges.
Tomorrow I plan on attaching the square mounting plate to the top tube.
I’ll note that once the entire air induction tube assembly is completed, I’ll hit it with some type of epoxy clear coat to make the peel plied areas pop with that awesome carbon fiber weave on display.
And with a rather successful day under my belt, I called it a night!