
Before I started in on hooking up the throttle and mixture cables to the pilot throttle quadrant, I wanted to knock out a fairly quick task on the RAM air can.
Well, actually a couple. The first was simply taking it apart and cleaning out some of the dust that had accrued during the build.
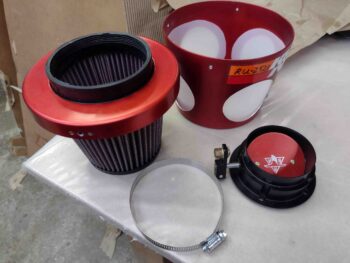
I then targeted 3 of the 5 holes to widen out to 3/16″ diameter to mount the can to the firewall using bolts (or screws) vs the machine screws that had been originally used to mount the entrance piece to the RAM can. It makes sense really since nearly everything I do on this Long-EZ is backwards [Side note: I remember a really cool Long-EZ build website title “Flying Backwards” when I first started building… ] and this RAM air can is no exception. The part that I am mounting to the firewall is normally that part that simply gets mounted to the cowl opening, or an air duct (another side note: Thus why I have a 2′ length of 3″ diameter SCEET tubing since Rod Bower said I would need it… Uh, wrong side Rod!)
Anyway . . . Why 3 screw holes drilled out vs all 5? Because the front housing isn’t meant for long screws so they press into the scalloped screw divots. I went with the minimum that I felt comfortable with to really secure this thing to the firewall. And I’m confident the other 2 screw positions will hold their own in securing this thing as well.
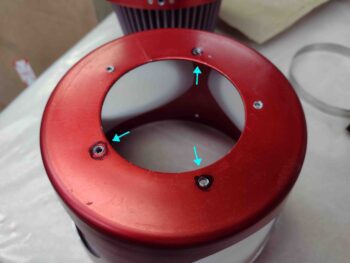
Here I’m simply testing the drilled hole diameters to ensure an AN3 sized piece of hardware will fit.
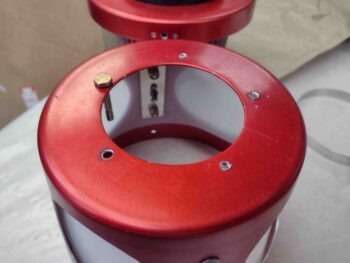
And then I test fit it with some button head screws in place. Yep, pressing just these 3 screws in to a tighter diameter pattern made me glad I didn’t do all 5!
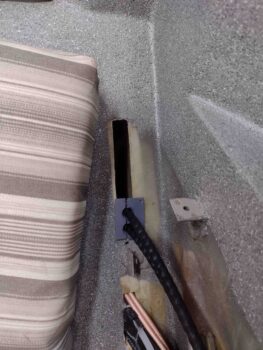
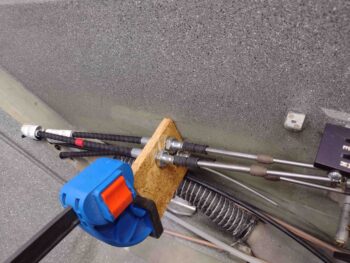
I then started working on routing and connecting the throttle and mixture cable coming from the engine-mounted fuel injection servo to the pilot’s throttle quadrant. Not wanting the cables to ride on the near-knife-edges-of-death that make up the sides of the slot in the GIB seatback, I planned on installing my 3D printed bulkhead pass-thru/cable protector.
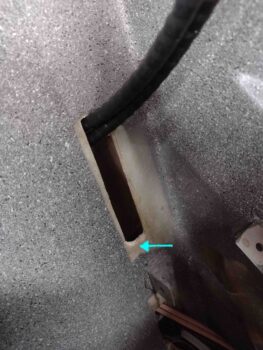
Well, the issue with installing the bulkhead cable protector is that it pushes the cables up and I have literally just enough length on the cables to reach the pilot quadrant levers… with the rod-ends installed! Pushing them up was not going to work. But neither was letting the cables ride commando through the GIB seatback slot.
I decided that I needed to trim the bottom of the GIB seatback slot to get the cables very close to the same position that they would be in if there was no bulkhead cable protector installed. So I got the cables out of the way, marked the bottom of the slot and then used my trusty Fein saw to extend the slot downwards.
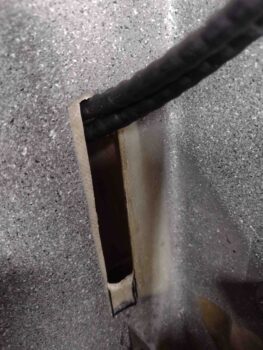
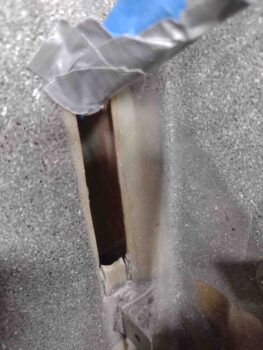
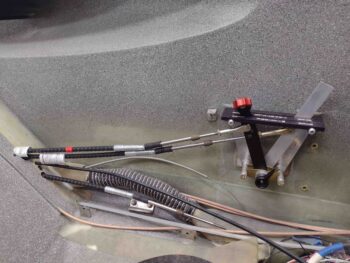
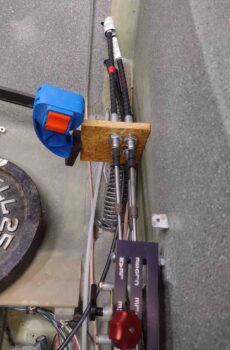
Here’s the finished product.
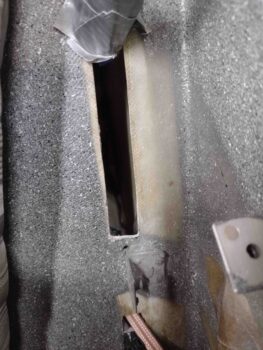
Ahh, now all fits as it should. Note the small gap at the split between the 2 bulkhead cable protector halves. I’ll re-3D print the inboard piece to add about 0.03″ to the width.
I then spent the next few hours connecting up and testing the throttle and mixture cables at the quadrant with the aft cable ends connected up to the fuel servo levers.
A quick tale: My measurements on my Silver Hawk EX fuel injection servo was a 2.45″ rotation on the throttle lever and 2.075″ rotation on the mixture lever. I measured the fore-aft rotation on the throttle quadrant levers at 2.532″. Now, another couple data points:
#1: Nearly every RV-building/owning bubba out there —a lot of them using these for-Van’s aircraft quadrants— order 2.25″ travel cables. #2: Marco has the same fuel injection servo and quadrant (modified to reverse configuration).
In talking to Frank at California Push-Pull Cables, I noted that he was very familiar with the RV crowd, even to the point that as I was giving him the cable nomenclatures that I planned to order he chimed in with “2.25” for the travel. I told him that my buddy was 3″ on his Long-EZ with same equipment (essentially) that I have, but I thought my numbers pointed to 2.75″ travel vs 3″… after a bit more discussion we agreed that a little more is better than too little (I’ll note that the instructions in the manual say to round up to the next whole inch).
Well, after having my rod ends threaded in as far as they would go, and still having about an 1/8″ on each end of my throttle and mixture lever rotations before they hit the stops, it told me I had about a quarter inch too much travel on the cables! My only option is to create a longer rotational throw on the quadrant throttle and mixture levers by moving the rod end attach holes up a little.
Yep, I should have trusted my measurements and my gut. Now I have some silliness to engage in to dial these things in… and not really that much extra work since I have to remake the throttle handle lever anyway. Moreover, tonight I finally realized that since my throttle quadrant is, in fact, made for a tractor engined VAN’s the rod end hole is on the wrong (front) side of the lever, with no space to merely drill it evenly across on the aft edge of the lever. IF I were keeping the throttle lever, I could simply turn it around. Not an option however on the mixture lever as it is bent inwards to provide a lower profile to clear the throttle handle.
In short, both levers have to be remade.
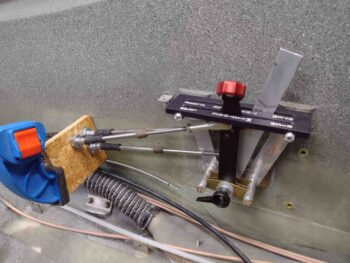
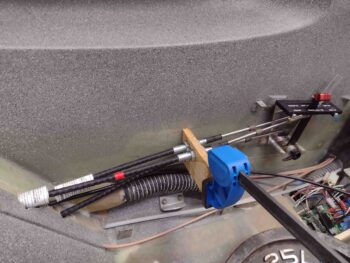
I then drilled my cable mounting holes in a scrap piece of OSB and tested out the general configuration of my cables. Having just dialed them in closely to working well on both sides (note the scrap aluminum piece with the rod end hole drilled higher up than stock for this quadrant… and on the correct (aft) side!).
More discoveries to be had… Lo and behold, securing the cables in the temp mockup wood mounting bracket let me know that I can’t dial in squat until the cables are mounted into the actual no-kidding bracket. Then the real fun and games can commence.
What we learn on these builds that if we only knew from the beginning!
I’ll reiterate that my cables are just about the exact length that they need to be. Again, that’s not bragging… there truly is a fine line between bravery and stupidity, and I’m just sincerely thankful that I dodged the bullet here and that these things fit.
Now . . . big sigh. This blog post is delayed a couple of days since I was waiting for the last 3D print to finish before grabbing a pic and adding it in with the others. When I went to upload the pic, as I have literally thousands of them, it wouldn’t load. Then I discovered no pics would load. Logging off and on, laptop reboots . . . nothing was working.
So I called GoDaddy the next day (yesterday). Having had literally hundreds of IT people working for me over my lifetime, and having stood at attention before various multi-starred generals getting my ass chewed for my IT bubbas’ shenanigans, I am 98% positive that a geek at GoDaddy changed a setting on the servo to not allow my (what we discovered) edited photos to be uploaded. Only the raw ones that have not been blemished by Mac’s photo editor are now allowed through the GoDaddy ironclad gates of purity.
I was on the phone for well over 2 hours troubleshooting this BS, and by the time they got through with me they had made Swiss cheese of my Word Press portal, causing me to have to reload and reconfigure it back to good. So whether the geeks are lying or just incompetent, I still have no ability to upload reformatted or edited photos. No more light blue arrows for a while folks… sorry. Talk to the geeks.
Back to the plane.
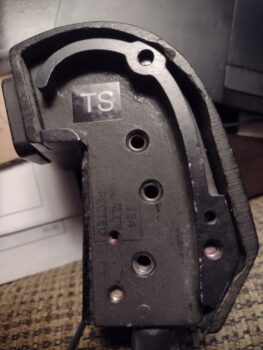
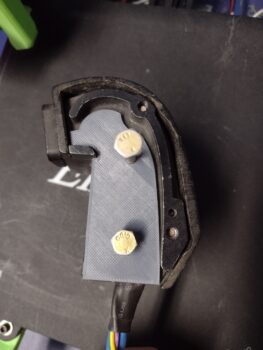
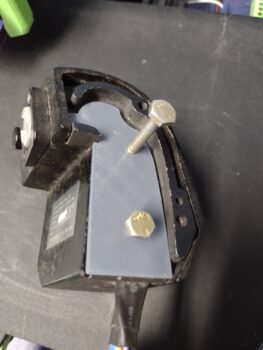
Here is the outboard side of my F-15 throttle handle. It has 3 threaded 3/16″ bolt holes, and I intend to use 2 of them for no-kidding mounting, and the bottom one to help secure the cable routing adapter that I also intend on making (3D printed in PETG).
I took the photo above, loaded it into Fusion 360 and was able to create an initial hack outline of the throttle handle mounting interface.
I then 3D printed my modeling effort (I call my work of art: “The Serious Pig: A Profile” (ha!).
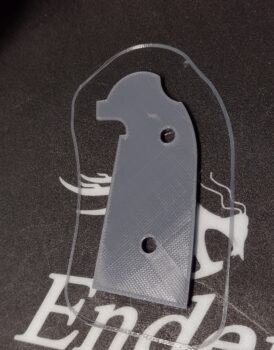
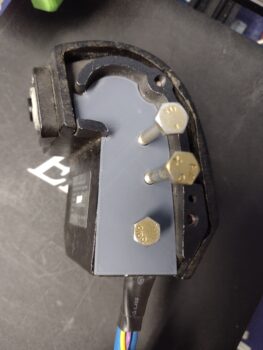
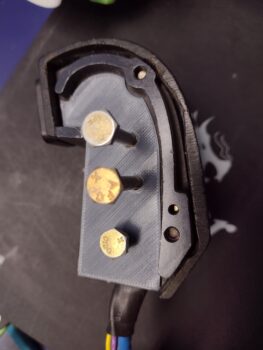
Here’s Version 1 of the Serious Pig mounted to the throttle handle. Note at this point I only drew up 2 of 3 bolt holes.
Below are Serious Pig Version 2 (left) and my final Version 3 (right).
Perhaps later after the plane is built, I’ll create: “Serious Pig, In Repose” (yes, it’s late… 2 nights later!).
I’ll try to get back on track with my blogs… much more exciting (I think!) info to report.
Pushing Forward!