
Today was the day I FINALLY kicked off my long-overdue exhaust pipe welding plan with James.
But first I pulled the heat lamp off the CF layup on the right side cold air induction pipe bump, and then pulled the peel ply. I then cleaned up all the peel ply boogers. As you can see, there is still a very slight bump from the original bump in my added foam fairing, but I will mitigate that with both some aggressive sanding and added micro when finishing. Overall, not bad and definitely does the job in both adding needed clearance for the aft right cold air induction pipe, and not creating a heinous goiter on the side of the bottom cowling.

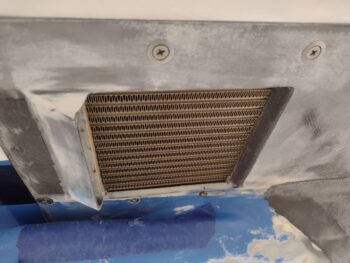
While the bottom cowling was on, I remembered to grab a shot of the newly angled aft oil cooler exit. Not crazy distinct in nature here, but definitely a significant angle created.
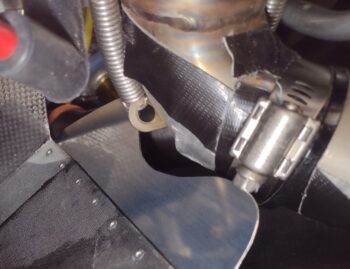
I then did a very final assessment on the left outboard (cylinder #3) exhaust pipe position before pulling a good bit of the duct tape off the pipe that was securing the cut exhaust pipe to the engine-side elbow. I then marked the position as best possible across the hose clamp.
I then removed the bottom cowing and both left exhaust pipes from the engine.
Now, with that duct tape on there for a LOT of months, it required about 30 minutes more than I was planning on to get it off there and cleaned up. Cleaning all the tape gunk off the exhaust pipe made me a bit later getting to James’ home shop than I had planned on, but all was good (I’ll note the drive from my place to his is right at about an hour).
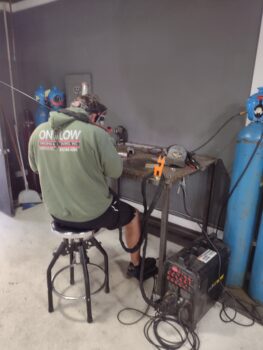
After we bantered about a bit on the exhaust pipe welding plan, airplane homebuilding and military war stories, James dove right in on welding up the first weld on the cylinder #3 exhaust pipe. Again, this is James’ home shop and I noted right off the bat that this guy —who welds up race car exhaust headers for a living— has the exact same TIG welder in his home shop that I do! That made me feel like I’ve made at least one right decision along the way… ha!
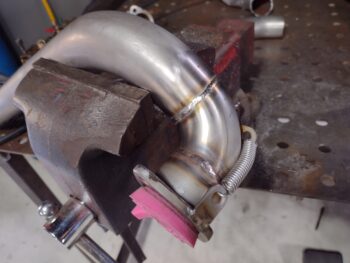
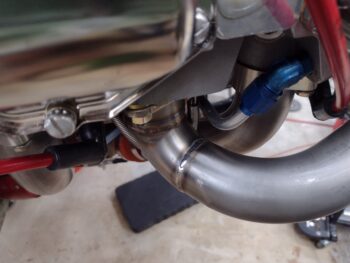
Here’s James’ beautiful TIG weld on the cylinder #3 exhaust pipe. Note the pink cap… the other end of the pipe is capped as well and is flooded with inert gas on the inside as the pipe gets welded. This creates a strong, clean, porous-free weld. Again, even if I was inclined to tackle this welding, I would need a setup like this to do it (we’re talking a decent bunch of $$$ for essentially a one-time task).
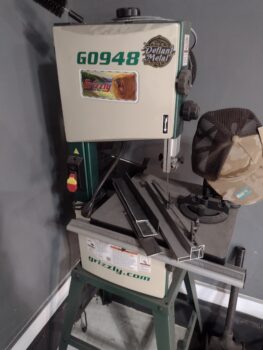
As James was welding up the pipe I of course was not directly watching what he was doing with no welding helmet on, so I wandered around his shop a bit. James has a huge Grizzly bandsaw in a central location along the wall of his shop, but over in the corner he had this smaller Grizzly bandsaw. Since my small Skill bandsaw has never been a top performer, I noted this G0948 model in the corner and thought that it looked like a perfect size for what I need, since I honestly don’t do a ton of bandsaw work.
As we were talking after James finished welding up the exhaust pipe, I asked him how he liked this smaller bandsaw in the corner. He said a friend of his bought it new, never used it, gave it to him and it’s sat in the corner unused for 2 years now. He offered it to me for a steal, practically giving it to me, and I of course couldn’t refuse (remember, I’m cheap!)… so into my vehicle it went. Hopefully my bandsaw woes are behind me now! <grin>
From James shop I drove into town and spent some time there, grabbed a bite to eat and then finally got home later in the evening.
I mounted the freshly welded #3 cylinder exhaust pipe onto the engine, and it looks great.
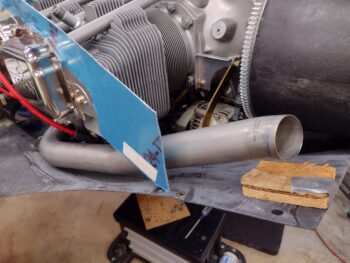
I then mounted the bottom cowling into place. Here we have the clearance between the armpit intake aft ramp/vane with the #3 cylinder exhaust pipe without the tape and hose clamp in place. I plan on trimming about another 1/8″ off the outboard edge of the vane, and then we’ll be good on clearance.
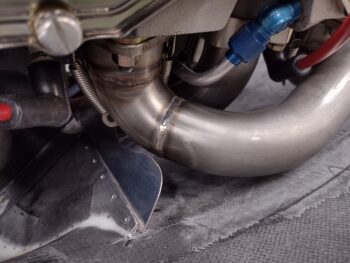
This shot here shows the area I was most concerned about on this round of welding up the #3 cylinder exhaust pipe. I wanted to get the pipe as high off the bottom cowling in this area as possible. My measurement on the aft side of the pipe (right side of pic) was 0.7″ from the exhaust pipe to the 3rd fin in on the aft bottom corner of the #1 cylinder. When I measured it here that gap was 0.65″… perfect!
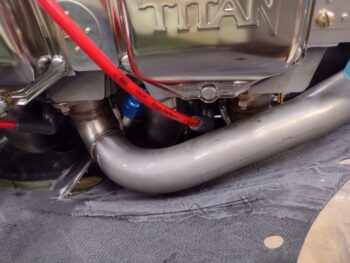
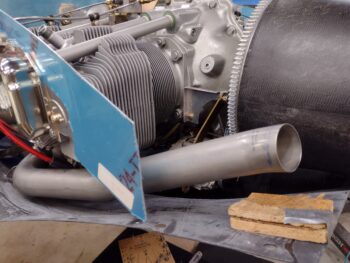
I’ll work the left inboard pipe next, and get it welded to its bare elbow sticking out of cylinder #1. After a round or two of welding on the inboard left exhaust pipe, then I’ll come back to the outboard pipe again and get it situated. Note the approximate distance from bottom cowl to where the bottom pipe end opening edge should be… about at the top of the wood spacers.
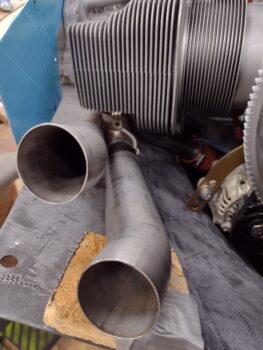
Here’s a better look (sorry for the fuzzy pic)… you can see right about where the outboard pipe meets the starting elbow of the inboard pipe is where it will need to get turned downward and slightly inward.
This pic shows that even a bit more… I set the inboard pipe loosely in place, close to its final exit elevation. See how the outboard pipe will need to get angled down and inboard a bit?
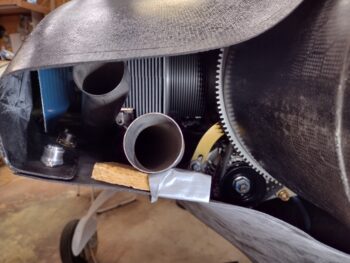
And a shot of this with the top cowl in place, which really shows you what machinations need to take place to get these left side exhaust pipes wrangled into place.
But how do we eat an elephant? One bite at a time! And that is exactly how these left side exhaust pipes will get configured into the final positions they need to be.
Pressing forward!