
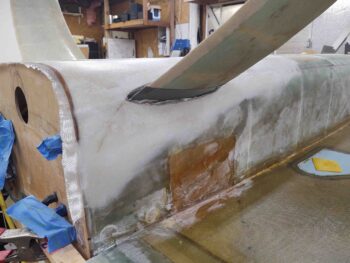
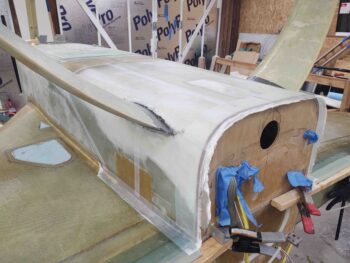
I started off this morning spending a couple of hours slogging through the sanding and final shaping of the hardshelled aft lower fuselage and hell hole cover.
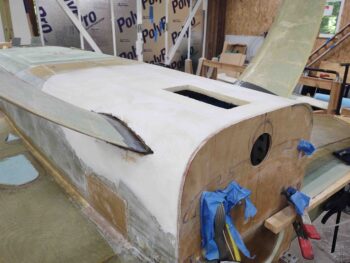

I then spent about another 45 minutes prepping the remaining glass surfaces of the fuselage for glass. I also installed red plastic NPT plugs into the fuel drain points to protect the threads from any errant epoxy.
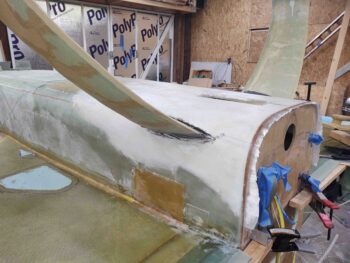
I then spent a couple more hours figuring out the glass configuration and cutting the glass. My layup schedule is 2 plies of UNI that meet –but don’t overlap– at the centerline, covered by 2 plies of BID. The BID plies overlap 8″ in the center to create a stronger 2″ edge along the 4″ wide center opening which is where the RAM air scoop will get mounted.
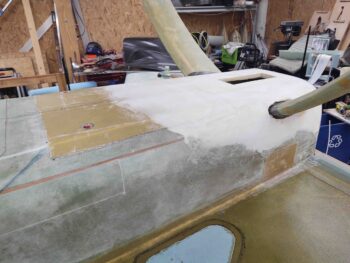
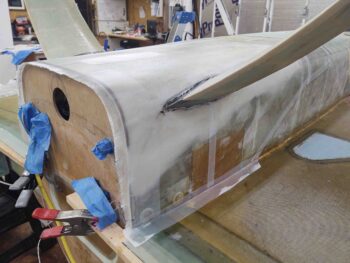
I then laid up the first ply to go on which was the UNI. The original edge of the UNI cloth is situated along the fuselage sidewall and angles up (as situated… technically down) the further forward it goes. I point this out to show that there is a slight angled bias to the UNI fibers just for a little extra strength (vs just straight front-to-back). And again, it’s 2 halves of UNI that intersect along the centerline.
This single ply of UNI goes from just aft of the landing brake to the firewall, covering both the exposed Kevlar and all the added foam making up the added aft lower fuselage structure and the hell hole cover.
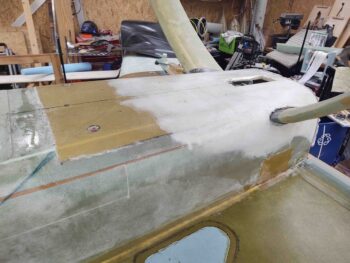
Here’s a closer shot of the first ply down, the UNI.
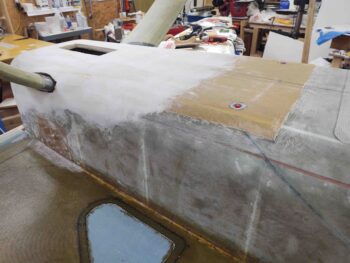
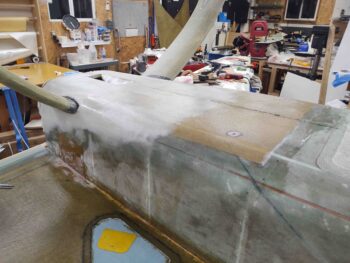
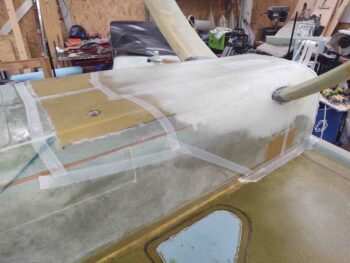
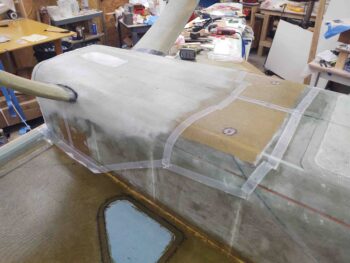
I then laid up the 2 overlapping plies of BID. I laid up the left side (as situated, technically right side) first and have to say it laid down without as much of a fuss as the right side… which just required a bit more machinations to get the gear seam overlap in line.
After the actual layups were complete, I then spent a decent bit of time peel plying all the edges and the seams. All told from start to finish this layup took over 4 hours.
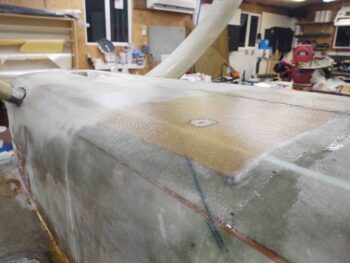
With the peel ply in place you can see that the plies of BID just covers the added pour foam on the bottom of the fuselage (not the Kevlar), but then covers more of the fuselage sidewall —actually overlapping almost an inch onto the bottom strake at the corner. Thus, these layups cover the exposed Kevlar, which gets a bit fuzzy when you sand it… not something you want when you go to micro finish the surface for paint.
Tomorrow I’ll pull the peel ply and clean up this layup. Then I’ll start back work on both the bottom cowling install and the cowling-to-firewall interface.