
I started off today doing a fair amount of updates to my electrical connector pinout diagrams for a bunch of the work I did on the panel last night.
I then got down into the shop to figure out the fuel valve skirt, pedestal, base . . . whatever it is that you’d call one of things! Since the fuel valve sits higher than the thigh support cover, then I clearly need something to keep things from falling down under the thigh support, but also I want it all to look finished as well. Another important function of this piece is that it will keep the seat cushion in place and from sliding forward.
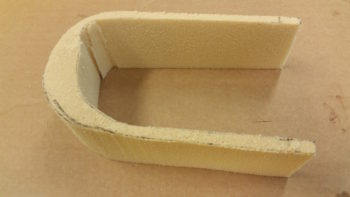
I started by assessing and brainstorming what I needed and what I wanted. I had a general idea –obviously– but the particulars have been germinating in my mind since the day I decided to place the fuel selector valve in the location I did. After taking some measurements and playing around with the top few ideas on my list, I decided to keep the top level all the way around, so it’s basically a giant “U”, just flipped forward away from you.
I measured the depth at the back at about 1.7″, although it ended up being a bit taller on the very back part. The front was about 1.3″ high. The bottom line is that I knew that I could use some of my 2″ thick urethane foam for this task. I then made a quick thin cardboard template to figure out the lengths and slope on the bottom of the pedestal. I then used the actual thigh support cover turned upside down to get the interior shape and dimensions transferred to the foam. I then measured 0.25″ from the inside edge to give my sides, with a bit thicker area on the aft end for room to shape it around the actual fuel valve. I then used my jig saw and on VERY slow speed cut this out in a very cautious manner.
Once I got the pedestal rough top view cut out, I then marked the sides using my template. I then cut the lines to give me a straight top and angled bottomed pedestal piece.
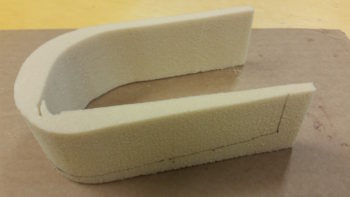
I then tried it out on the thigh support by wrapping it around the fuel selector valve. Of course it took about 15 minutes of the trial and error fitting-sanding-fitting cycle to do this, but I fairly quickly dialed it in. A bit ironically (or stupidly!) I had the sides reaching forward where I needed them on the rough cutout and then ended up lopping them off too short! I then had to make a little extension piece for each side and use needles to keep them in place.
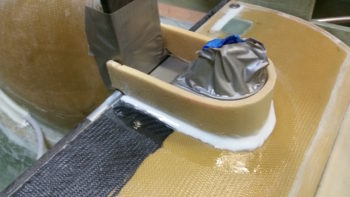
You may be wondering, looking at the pic below, why I’m extending the sides all the way forward . . . well, I want an area that is a little sort of a tray, or bin, if you will, to hold small bits either in flight or especially on the ground.
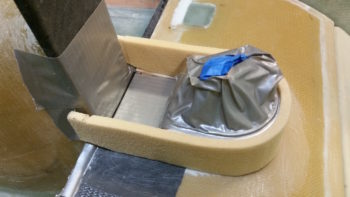
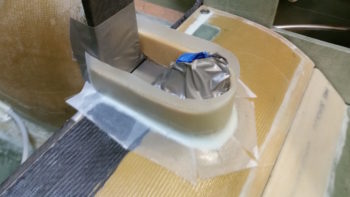
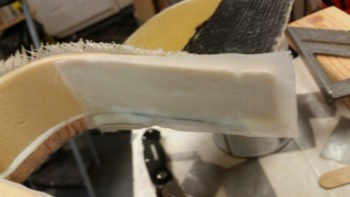
I then mixed up some epoxy with fast hardener and whipped up some micro. When I set the fuel valve pedestal foam piece in place I did cheat a little and used a spot of 5 minute glue about mid-point on each side. After about 5 minutes of ensuring it wasn’t moving anywhere then I finished adding the micro fillets all the way around as you see below.
I then laid up 1 ply of BID all the way up the pedestal walls overlapping down onto the seat thigh support about an inch. After ensuring the layup was all good I peel plied it since I’m going to add another ply of BID over top of it tomorrow.

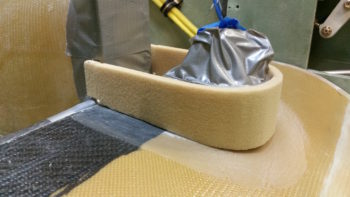
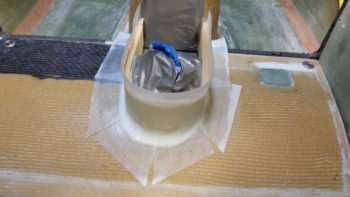 I then went for pizza & beer with a buddy of mine and we decided to go see a movie. After I returned I decided to glass the straight sections on the inside of the fuel selector pedestal so that I would have glass curing overnight. Since I used urethane foam on this, the walls are a bit flimsy and I wanted to beefen them up a bit. So I laid up 1 ply of BID on each inside straight wall of the fuel selector pedestal, peel plied them and called it a night. For now I stayed clear of the aft curved wall.
As you can see I also added some micro on the inside aft curved foam edge… actually with a little bit of cheater alcohol in it to make it much easier to sand (I learned this trick from Randi of Cozy Girrrls fame).
Here’s a shot of the interior right side glassed with 1 ply of BID (and the alcohol micro).
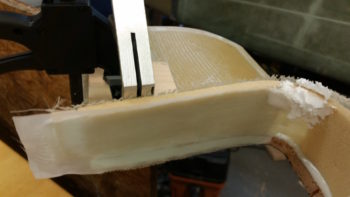
And shot of the right side as well.
Tomorrow I plan on getting the fuel selector valve pedestal base completed and move on to figuring out and building the pilot left side arm support & console. If I get a chance, because I didn’t today, I’ll try to work on wiring up the intercom on the instrument panel mockup as well.