
I started off today by cutting and applying Gorilla duct tape into the seam between the bottom right strake and the bottom right wing. I secured it upright in places with some masking tape on the strake side.
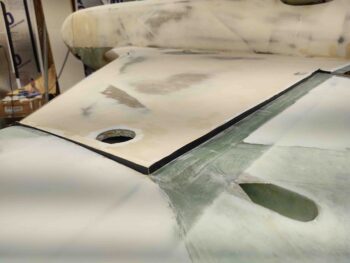
Once the duct tape seam separator was installed, I then mixed up some flocro to create a flocro edge on the wing side to help minimize chipping or dings when installing or removing the wing.
Normally I would use the fast West 205 hardener here, but since I was heading out for a few hours to run some errands I went ahead and used the slow West 206 hardener for the flocro.

I returned a few hours later and began the nearly 5-hour task of applying West 410 filler/micro to the bottom of the right wing. I have to say this completed task felt especially good to clean up and make amends (ha!) for the grotesqueness of this bottom right wing! All is right (for the next 12 hours . . . ) with the build once again!
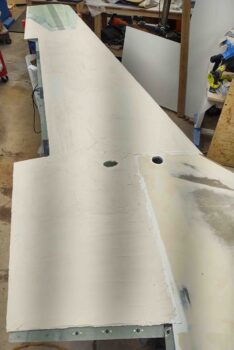
After I “micro’d” up the bottom right wing, I then spent about half an hour sanding the straight West 410 refill spots on the bottom left wing (looks the same as the original refill pic). The refill looked good so the bottom left wing is ready for raw epoxy wipes.
Tomorrow I’ll work on some ancillary stuff until about the 24-hour mark, at which point I’ll start sanding the “micro” fill on the bottom of the right wing.