
I took a bit of break from my normal build actions to do a quick tool building project. Starting yesterday & finishing today I’ve been working on constructing a bridge sander as Nick Ugolini spells out how to do on his blog. Once again, I was notified of this brilliant contraption by the watchdog of the canard world, my friend Dave Berenholtz who is blazing through his Long-EZ build down in OZ (check out his blog here). Coincidentally, Mike Beasley also built one of these as he was finishing up the major sanding of his Long-EZ as well.
For the base, Nick calls for using 1/16″ thick x 1-1/2″ wide aluminum that you can easily buy from Lowe’s, Home Depot, etc. I did pick up some of that aluminum for the micro spreader, but for the sander it just wasn’t wide enough for me so I picked up a cheap automotive rigid sander at Harbor Freight after assessing that the aluminum base looked as if it would be amenable to getting pressed into service as a flexible sanding board. As for parts, one other point of note: Nick calls out for 1″ square tubing to be turned into 6 U-channel pieces and then a separate piece of 7/8″ U-channel to be used inside the 1″ share tubing/U-channel above. Well, I found the 1″ square tubing, but not the 7/8″ U-channel so I ended up using some 1″ wide U-channel I had on hand with 1/8″ walls, then buying 3/4″ U-channel to go inside that. Just a slight variation that worked out really well.
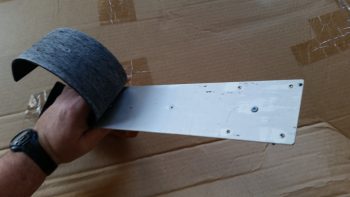
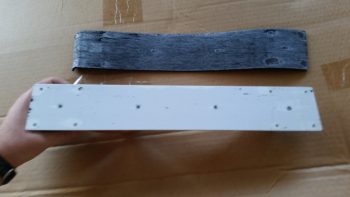
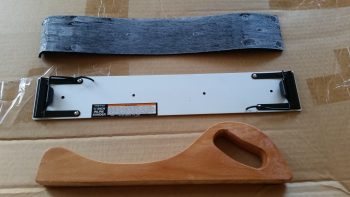
I started off by ensuring that I could dismantle the Harbor Freight sander to ensure I wouldn’t destroy it in the process. I peeled the rubber pad off the bottom of the base to gain access to its 4 handle mounting screws.
I simply used my fingers to pry off the bottom rubber pad, with an occasionally use of my utility knife to round up any errant pieces of rubber that decided to stay on the aluminum rather than come with the rubber pad.
With the sander broken down into an acceptable number of pieces, I then did a final assessment on whether the aluminum base would be flexible enough to be used in this type of sander.
Since the base off the HF sander is only 0.01″ thicker than the 0.063″ (1/16″) called out for by Nick, it looked as if my eevil plan was going to work!

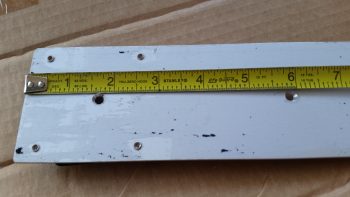
An added bonus in using the HF sander was that the screw holes in the base for holding on the wood handle are at the perfect dimensions that Nick calls for on his blog: approx. 1-1/2″ and 6″, respectively, from each end. Pretty cool.
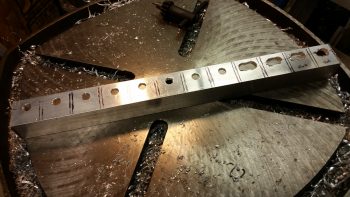
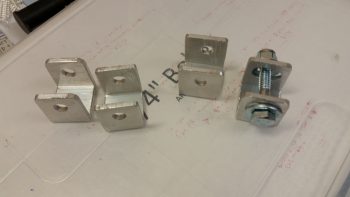
I cut enough of the brackets and aluminum pieces for two of these things since I’ll also be building the micro spreader, but I wanted to get the sander under my belt first. I marked up the U-channel for 12 each 0.9″ wide brackets, 6 for the sander and 6 for the micro spreader. Of the 6 brackets for each, 4 will get normal holes drilled through them while 2 will require slots. Since I’m using cheaper Zinc bolts, 1/4″ is the smallest diameter I could get (versus the 3/16″ AN3 hardware Nick used).

For easier drilling of the holes and the slots, I drilled them all before I cut the U-channel into the respective brackets. Yes, since I don’t have a mill my slots are pretty sloppy, but for this purpose I’m sure they’ll work fine.
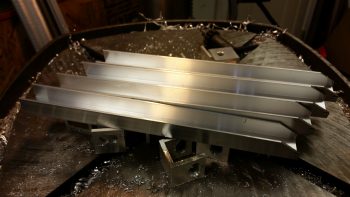
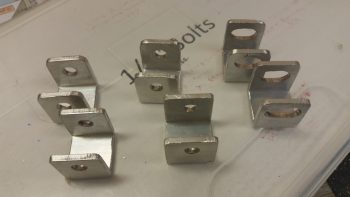
I then cut 12 brackets from the U-channel

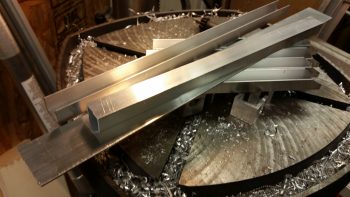
And then cut the 3/4″ U-channel into the approximate lengths for the first layer of cross supports.
Finally, I cut the 1/16″ x 1-1/2″ aluminum for the micro spreader to 16-1/2″ long. I also cut 2 longer lengths of the 3/4″ U-channel stock for the top cross supports/handle bases.
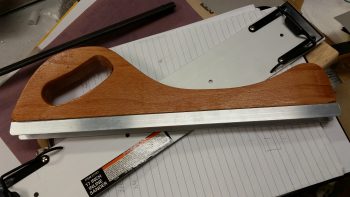
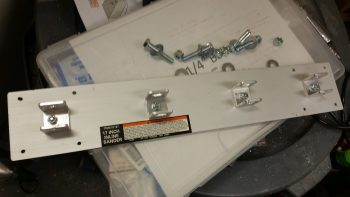
I drilled the 4 holes through the U-channel for my bridge sander and mounted the handle base.
And then started the arduous process of cleaning up each bracket.
I cleaned up 4 straight-holed brackets and 2 slot brackets for the bridge sander, and left the 6 brackets for the micro spreader for later.
I then mocked it all up to see how it would look. Not bad!
I then drilled a hole in each of the bottom brackets that attach to the base for mounting. I drilled them just a bit off-center to allow for mounting one countersunk rivet through the base into each bracket to keep the alignment straight. This was the last action of the evening since I wanted to ponder on the handle a bit.
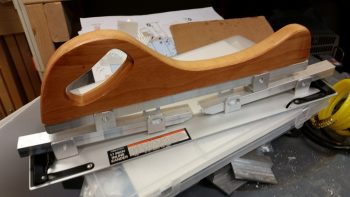
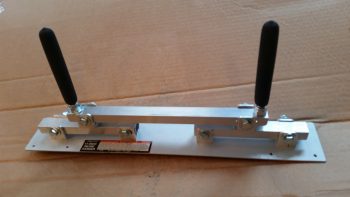
I called it a night, but I couldn’t help but get the feeling that I needed to go with the “traditional” 2-handled setup vs. using the HF sander’s wooden handle. So this morning I used the handle base/cross support 3/4″ U-channel stock that I had cut for the micro spreader and drilled the final holes into it to allow it to be bolted to the two sander cross supports, and also add two 3/8″ bolts for handles. I cut about an inch off the top of each handle bolt to allow me to use rubber slip-on grips from McMaster-Carr.
It looked good, but my quick testing of it proved to me that it’s the downward force against the surface being sanded that determines the conformal action of the sanding base, not the actual configuration of the handles. So my initial hunch was right, and thus I’ll drill up the the base with the wooden handle to see how that works.
I have out-of-town company so the build will be a bit slow over the next few days, but I am happy that I got this reportedly invaluable finishing tool constructed.